Welcome to RevenueCat's Android SDK Codelab!
In this codelab, you will:
- Integrate the RevenueCat SDK into your project
- Implement in-app purchases in your Android application
- Learn how to distinguish between paying and non-paying users
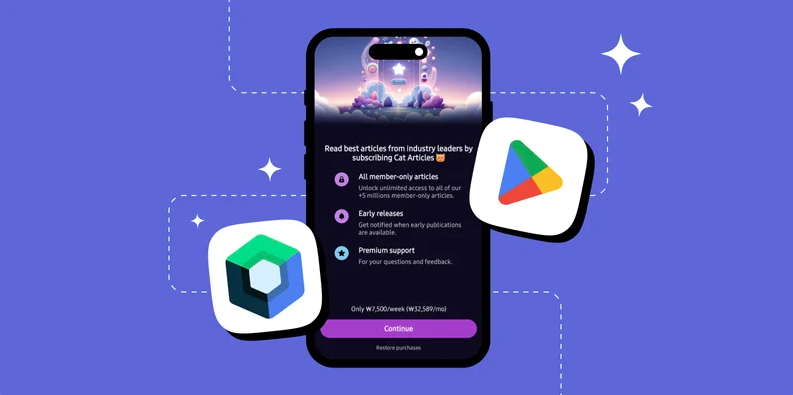
- Build a paywall screen, which is based on server-driven UI approach
By the end of this codelab, you'll be able to successfully implement in-app purchases in your Android app and display dynamic paywalls using RevenueCat's Android SDK.
First things first, before implementing in-app purchases, you'll need to import the RevenueCat SDK into your existing or new project. To get started, add the following dependency to your build.gradle.kts file:
You can check out the latest release version on GitHub.
implementation("com.revenuecat.purchases:purchases:8.20.0")
If you're also planning to implement Paywalls, you can simply include the following dependency instead:
implementation("com.revenuecat.purchases:purchases-ui:8.20.0")
Next, initialize the Purchases SDK in your Application class using the code below:
/**
 * Initialize the RevenueCat Purchases SDK.
 *
 * `appUserID` is nil, so an anonymous ID will be generated automatically by the Purchases SDK.
 * Read more about Identifying Users here: https://docs.revenuecat.com/docs/user-ids
 *
 * `purchasesAreCompletedBy` is set to REVENUECAT, so Purchases will automatically handle finishing transactions.
 * Read more about finishing transactions here: https://www.revenuecat.com/docs/migrating-to-revenuecat/sdk-or-not/finishing-transactions
 */
val builder = PurchasesConfiguration.Builder(this, "REVENUECAT_API_KEY")
Purchases.configure(
  builder
    .purchasesAreCompletedBy(PurchasesAreCompletedBy.REVENUECAT)
    .appUserID(null)
    .diagnosticsEnabled(true)
    .build(),
)
Yes! You've now completed 50% of the implementation.
Now let's move on to validating user entitlements.
As mentioned earlier, an entitlement represents the level of access or features a user unlocks after making a purchase. This makes it useful for determining things like whether to display an ad banner or grant premium access.
You can easily check if a user has an active entitlement using the code snippet below:
val ENTITLEMENT_IDENTIFIER = ".." // get specific entitlement identifier from your RevenueCat dashboard
val customerInfo = Purchases.sharedInstance.awaitCustomerInfo()
val isEntitled = customerInfo?.entitlements[ENTITLEMENT_IDENTIFIER]?.isActive == true
Once you've checked whether the user has a specific entitlement, you can decide how to proceed based on your app's business model.
For example, if your app is ad-supported, you might choose to show or hide an AdMob banner. Alternatively, you could choose to display a paywall or purchase dialog, allowing users to unlock advanced features or content.
Here's an example of how you might implement that logic:
@Composable
fun ContentScreen(isEntitled: Boolean) {
    if (isEntitled) {
      // if the user is granted access to this entitlement. don't need to display a banner.
    } else {
      // display a banner UI here or display a paywall
      ..
    }
}
Now, let's implement in-app purchases to offer an ad-free experience. To get started, you'll first need to fetch the relevant product information from your RevenueCat dashboard. This product data will be used to present purchase options to your users.
You can retrieve the available products by calling Purchases.sharedInstance.awaitGetProducts(), as shown in the example below:
// fetches the product information from the RevenueCat server
val products = Purchases.sharedInstance.awaitGetProducts(
  productIds = listOf("paywall_tester.subs"),
)

// proceed in-app purchases
val purchaseResult = Purchases.sharedInstance.awaitPurchase(
  purchaseParams = PurchaseParams.Builder(
    activity = context as Activity,
    storeProduct = products.first(),
  ).build()
)
If you offer multiple product variations, such as paywall_tester.subs:weekly, paywall_tester.subs:monthly, and paywall_tester.subs:yearly, you can simplify product retrieval by using the base product identifier, paywall_tester.subs, as the value for the productIds field. This tells RevenueCat to fetch all related product variations as a list, so you can dynamically present them in your paywall UI.
Once you've retrieved the product data, you can initiate the in-app purchase flow by calling Purchases.sharedInstance.awaitPurchase(product). This will automatically trigger the Google Play purchase dialog, enabling the user to complete the transaction within your app.
Just like that, you've integrated a fully functional in-app purchase flow with just a few lines of code—no need to deal with the complexity of handling receipts, store APIs, or purchase validation manually.
Now, it's time to impement Paywalls in your Android project using Jetpack Compose.
Business Logic
To begin, you'll need to fetch the current offering from the RevenueCat dashboard. An offering defines the available purchase options presented to the user, such as monthly, yearly, or lifetime plans. This can be done effortlessly using the Purchases.sharedInstance.awaitOfferings() method, as demonstrated in the example below.
internal class DetailsRepositoryImpl @Inject constructor(
  @Dispatcher(CatArticlesDispatchers.IO) private val ioDispatcher: CoroutineDispatcher,
) : DetailsRepository {

  override fun fetchOffering(): Flow<ApiResponse<Offering>> = flow {
    try {
      val offerings = Purchases.sharedInstance.awaitOfferings()
      offerings.current?.let { currentOffering ->
        val response = ApiResponse.of { currentOffering }
        emit(response)
      }
    } catch (e: PurchasesException) {
      ApiResponse.exception(e)
    }
  }.flowOn(ioDispatcher)
}
The RevenueCat Android SDK has native support for Kotlin coroutines, making it a seamless fit for projects using a coroutine-based architecture. The current offering is also exposed as a Flow, allowing you to observe changes reactively and update your UI accordingly.
Paywalls UI With Jetpack Compose
At this point, everything should be ready to go. If you've already added the com.revenuecat.purchases:purchases-ui SDK, you can easily build paywall UIs using Jetpack Compose.
RevenueCat's UI library provides built-in components, such as PaywallDialog that allow you to quickly display a paywall screen or dialog. These components are fully customizable, offering a variety of configuration options to tailor the look and behavior to match your app's design.
Here's an example showing how simple it is to implement and customize a paywall using Jetpack Compose:
val offering by viewModel.offering.collectAsState()

PaywallDialog(
   PaywallDialogOptions.Builder()
       .setDismissRequest {  }
       .setOffering(offering)
       .setFontProvider(..)
       .setCustomPurchaseLogic(..)
       .setListener(object : PaywallListener {
           override fun onPurchaseStarted(rcPackage: Package) {
               super.onPurchaseStarted(rcPackage)
           }

           override fun onPurchaseCompleted(customerInfo: CustomerInfo, storeTransaction: StoreTransaction) {
               super.onPurchaseCompleted(customerInfo, storeTransaction)

               customer = customerInfo
           }

           override fun onPurchaseError(error: PurchasesError) {
               super.onPurchaseError(error)
           }

           override fun onPurchaseCancelled() {
               super.onPurchaseCancelled()
           }
       })
       .build()
)
Configuration! 🥳 Now, you'll be able to display paywalls whenever a user doesn't have the required entitlement, using the exact same design you configured in the Paywall Editor.
As you've already seen in the Codelab: RevenueCat Google Play Integration (Create Paywalls), the paywall system is built on a server-driven UI. This means you can dynamically update the paywall's content and design directly from the dashboard without needing to push app updates or go through the review process.
In this codelab, you've learned how to integrate RevenueCat's Android SDK, implement in-app purchases, and build paywalls in Jetpack Compose. Now it's time to ship your app and make more money! 💰
You can also learn more about using the RevenueCat SDK in your Android project with Jetpack Compose through the resources below: