RevenueCat Google Play 連携の概要
0:03:00RevenueCatのGoogle Play連携コードラボへようこそ!
このコードラボでは、以下のことを学びます:
Google Playで商品を適切に設定する方法 RevenueCatダッシュボードのセットアップとGoogle Play商品との連携 Product、Offering、Package、Entitlementの理解 ペイウォールエディターを使用したペイウォールの作成
このコードラボを終える頃には、Androidアプリにアプリ内課金とペイウォールをシームレスに実装するために必要なGoogle PlayとRevenueCatダッシュボードの設定がすべて完了します。
なぜRevenueCat?
世界をリードするアプリがRevenueCatを使用して、アプリ内課金、サブスクリプション、ペイウォールを実装し、顧客データを管理し、iOS、Android、Webで収益を拡大しています。年間80億ドル以上のアプリ内課金を処理し、OpenAI(ChatGPT)、Notion、Buffer、Goodnotesなどのトップ企業から信頼されています。
なぜ多くの開発者がRevenueCatを選ぶのか?
RevenueCatは、分析のための統一された情報源を提供しながら、クロスプラットフォームのアプリ内課金を簡素化します。ライフタイムバリュー(LTV)、収益トレンド、ユーザー行動をより深く理解し、よりスマートな収益化と迅速な成長を可能にします。主なメリットは以下の通りです:
統一されたユーザーID:購入をあなた独自のユーザーIDに確実にリンクし、アプリレベルとストアレベルのアカウント間の断絶を解決します。 効率的なサブスクリプション管理:プラットフォーム固有の制限を抽象化し、直接制御が制限されている場合(例:iOS)でも一貫したサブスクリプション動作を提供します。 クロスプラットフォーム分析:AppleやGoogleコンソールからの遅延データよりも明確で実用的な、標準化されたリアルタイムインサイトを取得できます。 正確な価格インサイト:ネイティブフレームワークでは不十分な場合でも、すべてのロケールとストアでユーザーが支払った金額を正確に把握できます。
RevenueCatを使用すれば、アプリの収益化がよりシンプルで、スマートで、スケーラブルになります。
Google Play商品の設定
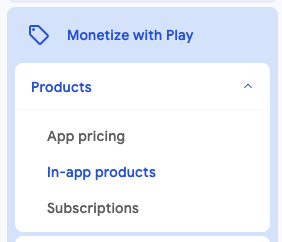
0:05:00まず、Google Play Consoleにログインし、アプリケーションを選択してから、サイドバーの収益化 > 商品に移動し、下の画像のようにアプリ内アイテムまたは定期購入をクリックします。
基本的に、Google Playで作成できる商品にはアプリ内アイテムと定期購入の2種類があります。
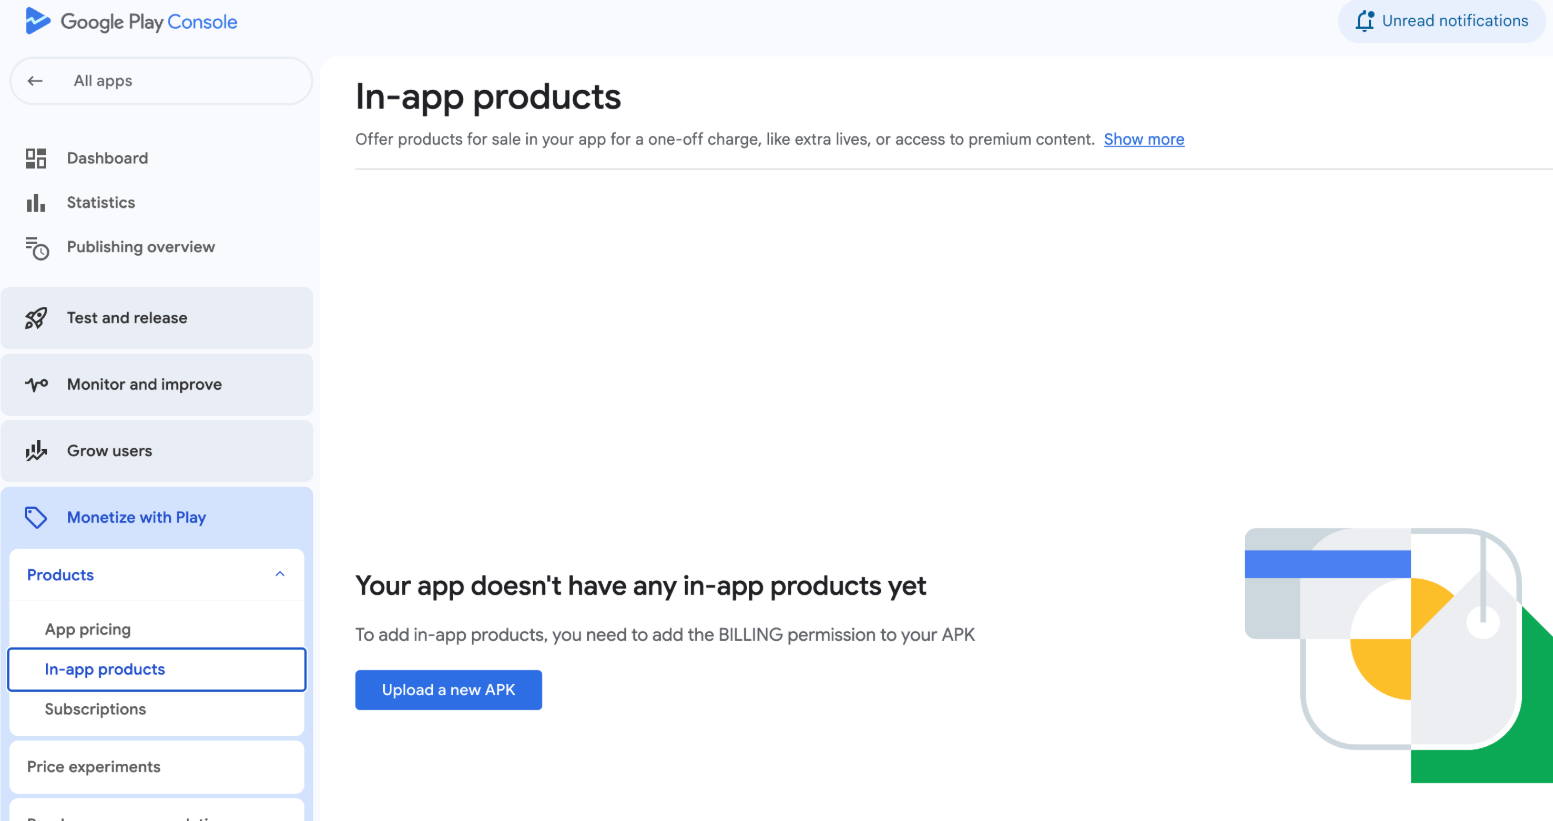
下の画像のように、まだAPKをアップロードしていない場合は、商品を設定する前にAPKをアップロードする必要があります。サイドバーのリリースセクションに移動してAPKをアップロードできます。
アプリ内アイテム
これらは、機能やコンテンツを永続的にロック解除する1回限りの購入です。例として、広告の削除、プレミアム機能のロック解除、ゲーム内通貨の購入などがあります。
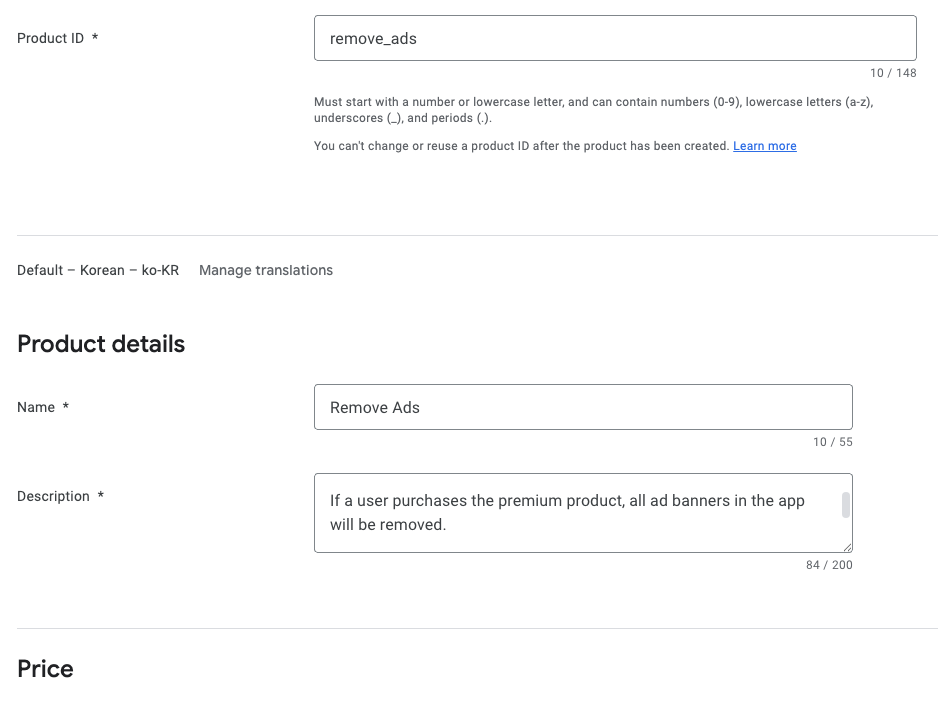
サイドバーのアプリ内アイテムをクリックすると、上記の画面が表示され、ユーザーが購入できる新しいアプリ内アイテムを作成できます。
定期購入
これらは、月額、年額、またはカスタム期間で繰り返し料金を支払うことで、コンテンツや機能へのアクセスを提供します。ストリーミングコンテンツ、プレミアムアプリアクセス、定期的に更新される機能などのサービスに最適です。
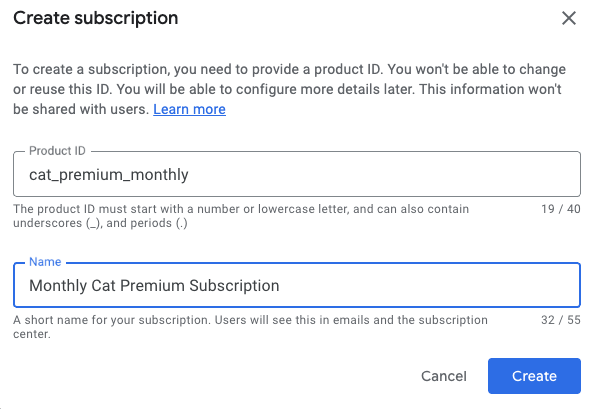
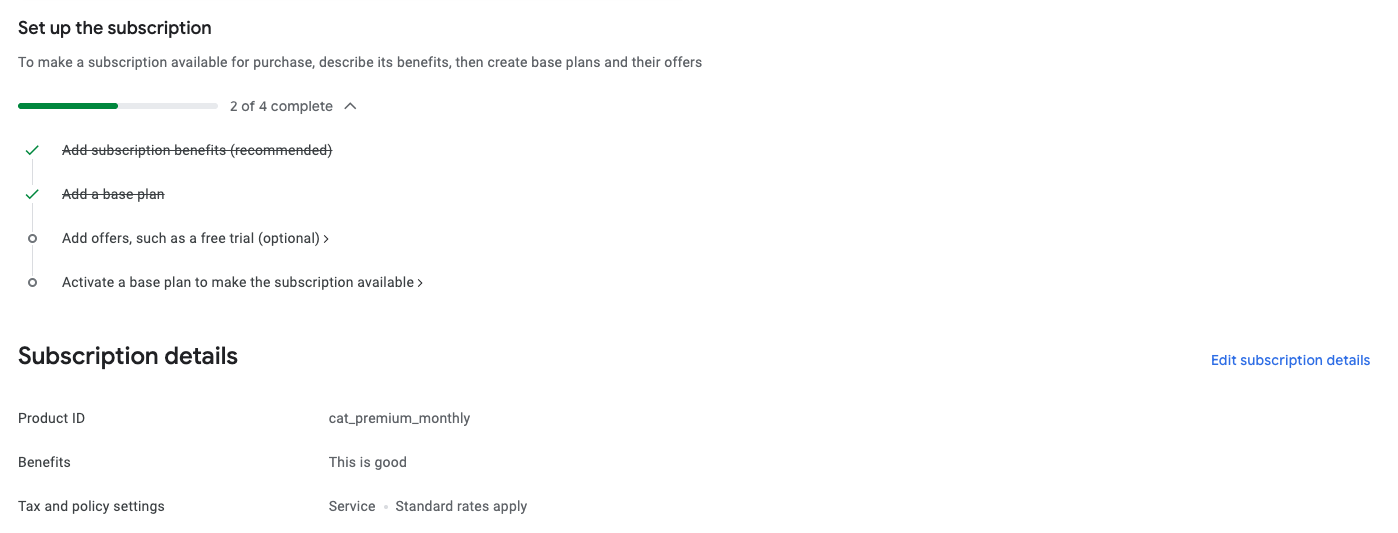
定期購入商品を作成する際、サブスクリプション特典の追加、基本プランの設定、オファー(無料トライアルや導入価格など)の設定、そして最終的に商品の有効化によってさらにカスタマイズできます。
Google Playでの商品設定が完了したら、準備完了です!アプリ内アイテムや定期購入の作成、信頼性の高い商品IDの作成、基本プランとオファーの設定、非消費型アイテムの追加についてさらに詳しく知りたい場合は、Google Play商品セットアップガイドで詳細な手順とベストプラクティスを確認してください。
Google PlayをRevenueCatに接続
0:15:00次に、商品、収益化、統計などを管理するためのRevenueCatアカウントを設定する必要があります。必要なのはメールアドレスだけです。
RevenueCatでアカウントを作成した後、Google Play Storeサービス認証情報ガイドで提供されている手順に従って、Google Play Storeサービス認証情報を設定します。
この設定により、RevenueCatがGoogle Play商品と連携し、ストア商品をRevenueCatダッシュボードにシームレスにインポートし、購入アクティビティを追跡し、LTVレポートを分析し、ユーザー購入通知を取得し、リアルタイムのデータインサイトを使用して成長戦略を開発できるようになります。
開始するには、以下の手順に従ってください:
1. Google DeveloperおよびReporting APIの有効化
Google CloudプロジェクトでGoogle Play Developer APIとDeveloper Reporting APIの両方を有効にするには、以下の手順に従います:
- Google Cloud Consoleを開きます。
- ドロップダウンから既存のプロジェクトを選択するか、新しいプロジェクトを開始します。
- Google Play Android Developer APIとGoogle Play Developer Reporting APIのページにアクセスします。
- 各ページで有効にするボタンをクリックします(既に有効な場合は管理と表示されます)。
APIが有効になると、プロジェクトのAPIダッシュボードに移動します。認証情報がまだ設定されていない場合は、作成を求められます。認証情報がGoogle Play Android Developer APIで使用するためのものであることを必ず指定してください。このステップは、プロジェクトオーナーまたはGoogle Play Consoleから適切なAPIアクセス権を付与されたチームメンバーが完了する必要があります。
2. サービスアカウントの作成
Google Cloud Consoleのサービスアカウントセクションに移動し、正しいプロジェクト内で作業していることを確認してください。
そこから、RevenueCatがGoogleサービスと連携するために使用できるサービスアカウントを生成する必要があります。サービスアカウントを作成をクリックし、意味のある名前を付けて、作成して続行を選択して進みます。
ロールを割り当てるよう求められたら、以下を含めてください:
Pub/Sub 管理者 – Googleのリアルタイムサーバー通知を処理するために必要です。 Monitoring 閲覧者 – キューのメトリクスとパフォーマンスを可視化します。
> 注意: 検索バーでロールが見つからない場合は、リストのPub/SubとMonitoringカテゴリで手動で見つけることができます。
次は、秘密鍵ファイルを生成します。
Google Cloud Consoleのサービスアカウントパネルで、作成したサービスアカウントを見つけます。「アクション」列の下にある3点アイコンをクリックし、鍵を管理を選択します。
そこから、鍵を追加をクリックし、新しい鍵を作成を選択します。ダイアログが表示されたら、進む前に必ずJSON形式を選択してください。ファイルをダウンロードします—このJSON鍵はセットアッププロセスの後半で必要になります。
3. RevenueCatに財務アクセスを付与
Google Play Consoleのユーザーと権限セクションに移動します。そこで、ユーザーを招待をクリックして、先ほど作成したサービスアカウントのメールアドレス(ステップ2)を追加します。
次に、アプリの権限で、RevenueCatにアクセスさせたい特定のアプリを選択していることを確認してください。その後、アカウントの権限エリアにスクロールダウンします—ここですべてがスムーズに動作するために必要なアクセスを付与します。
以下の権限がチェックされていることを確認してください:
アプリの詳細を読み取り、一括レポートのダウンロードにアクセス 財務データ、注文履歴、およびキャンセルフィードバックにアクセス- サブスクリプションと顧客の注文を管理
すべてが正しく見えたら、一番下までスクロールして招待を送信をクリックします。送信後、ユーザーと権限の概要に戻り、受け入れられるとサービスアカウントがアクティブステータスでリストに表示されます。
4. 認証情報JSONをRevenueCatに登録
最後に、RevenueCatダッシュボードに移動してプロジェクト設定を開きます。先ほど保存したJSON認証情報ファイル(ステップ2から)を見つけ、セットアップエリアにドラッグアンドドロップするか、ファイルピッカーを使用して手動で参照します。
アップロードしたら、保存をクリックして変更を適用することを忘れないでください。RevenueCatが認証情報の検証を開始し、約36時間以内に、連携を通じてGoogle Play購入の処理を開始する準備が整います。
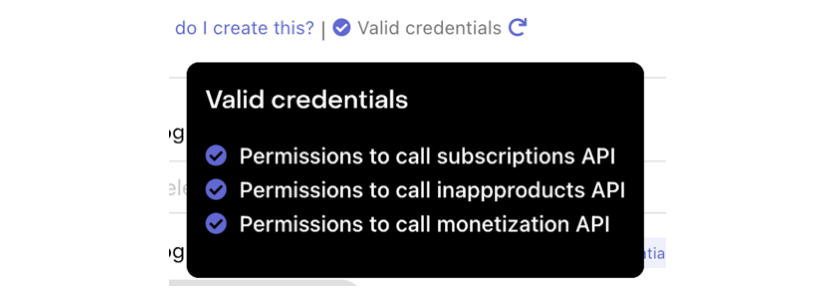
以下のように「認証情報を検証」ボタンをクリックして認証情報を確認できます:

検証結果を表示し、Google認証情報の現在のステータスについてのインサイトを提供するサマリーが表示されます。すべてが正しく設定されている場合、アップロードしたJSONファイルの下に「有効な認証情報」メッセージとすべての必要な権限のチェックリストが表示されます。
5. 署名済みAPKまたはAndroid App Bundleをアップロード
前の手順を完了したら、すべてが正しく接続されていることを確認するための最終チェックがいくつかあります:
- 署名済みAPKまたはApp BundleがGoogle Play Consoleに正常にアップロードされていることを確認します。
- リリースがすべての必要なレビューと承認ステップを通過していることを確認します。
- アプリがクローズドまたはオープンテストトラックで利用可能であり、少なくとも1つのテスターアカウントを追加していることを確認します。
- 定期購入商品がPlay Consoleで有効としてマークされていることを再確認します。
- 最後に、RevenueCatで使用しているパッケージ名がGoogle Playに登録されているものと完全に一致することを確認します。
これらの最終検証は、セットアップの問題を回避し、RevenueCatがGoogle Playデータとシームレスに同期できるようにするために不可欠です。
お疲れ様でした!難しい部分を乗り越えましたね 🎉
Product、Offering、Package、Entitlement
0:6:00この時点で、複雑なセットアップのほとんどは完了しています。次は、収益化戦略を設定する前に理解する必要があるRevenueCatの4つの重要な概念に慣れる時間です:Product、Offering、Package、Entitlement。
それぞれがプラットフォーム間でアプリ内課金を定義、提示、管理する方法において独自の役割を果たします。
🧩 Product(商品)
Productは、Google Play、Apple App Store、またはWebなどのストアプラットフォームで直接作成・管理される個別のアプリ内課金アイテムです。これは収益化の基本単位です—月額サブスクリプション、生涯アクセス、または1回限りの購入を考えてください。各商品には、ストアによって定義された独自の識別子、価格、および期間設定があります。
> 例:Google Playで設定されたcom.app.pro_monthlyのような月額サブスクリプション商品。
🎯 Offering(オファリング)
Offeringは、アプリでペイウォール体験として提示するためにグループ化された商品のコレクションです。OfferingはRevenueCatダッシュボードで設定され、A/Bテスト、価格実験、地域やユーザーセグメント別のペイウォールを柔軟に管理でき、すべてアプリの更新なしで実現できます。
> 例:defaultという名前のOfferingには、ユーザーに表示される月額、年額、生涯オプションなどの複数のパッケージが含まれる場合があります。
📦 Package(パッケージ)
Packageは、異なるプラットフォーム(例:iOS、Android、Web)間で同等の商品のラッパーとして機能します。これにより、各ストアの特定の商品IDにリンクしながら、1つの価格オプション(月額サブスクリプションなど)を一貫してプラットフォーム間で提示できます。
各パッケージにはOffering内で一意の識別子(例:monthly、annual)があり、RevenueCatがユーザーのプラットフォームに基づいて正しい商品を解決するのに役立ちます。
> 例:monthlyパッケージはiOSではcom.app.pro_monthly_iosに、Androidではcom.app.pro_monthly_androidにマッピングされる場合があります。
🏷️ Entitlement(権限)
Entitlementは、購入が成功した後にユーザーがアクセスできるものを定義します。これはロック解除される機能やコンテンツを表し、基礎となる商品やパッケージの識別子を抽象化します。Entitlementを使用すると、商品IDをアプリにハードコーディングせずにユーザーアクセスロジック(例:「プレミアムアクセスを持っている」)を管理できます。
また、RevenueCatがデバイスやプラットフォーム間で購入を追跡および復元する方法の中心でもあります。
> 例:premiumというEntitlementは、そのアクセスレベルに関連付けられた任意の商品(月額または年額サブスクリプションなど)を購入したユーザーに付与される場合があります。
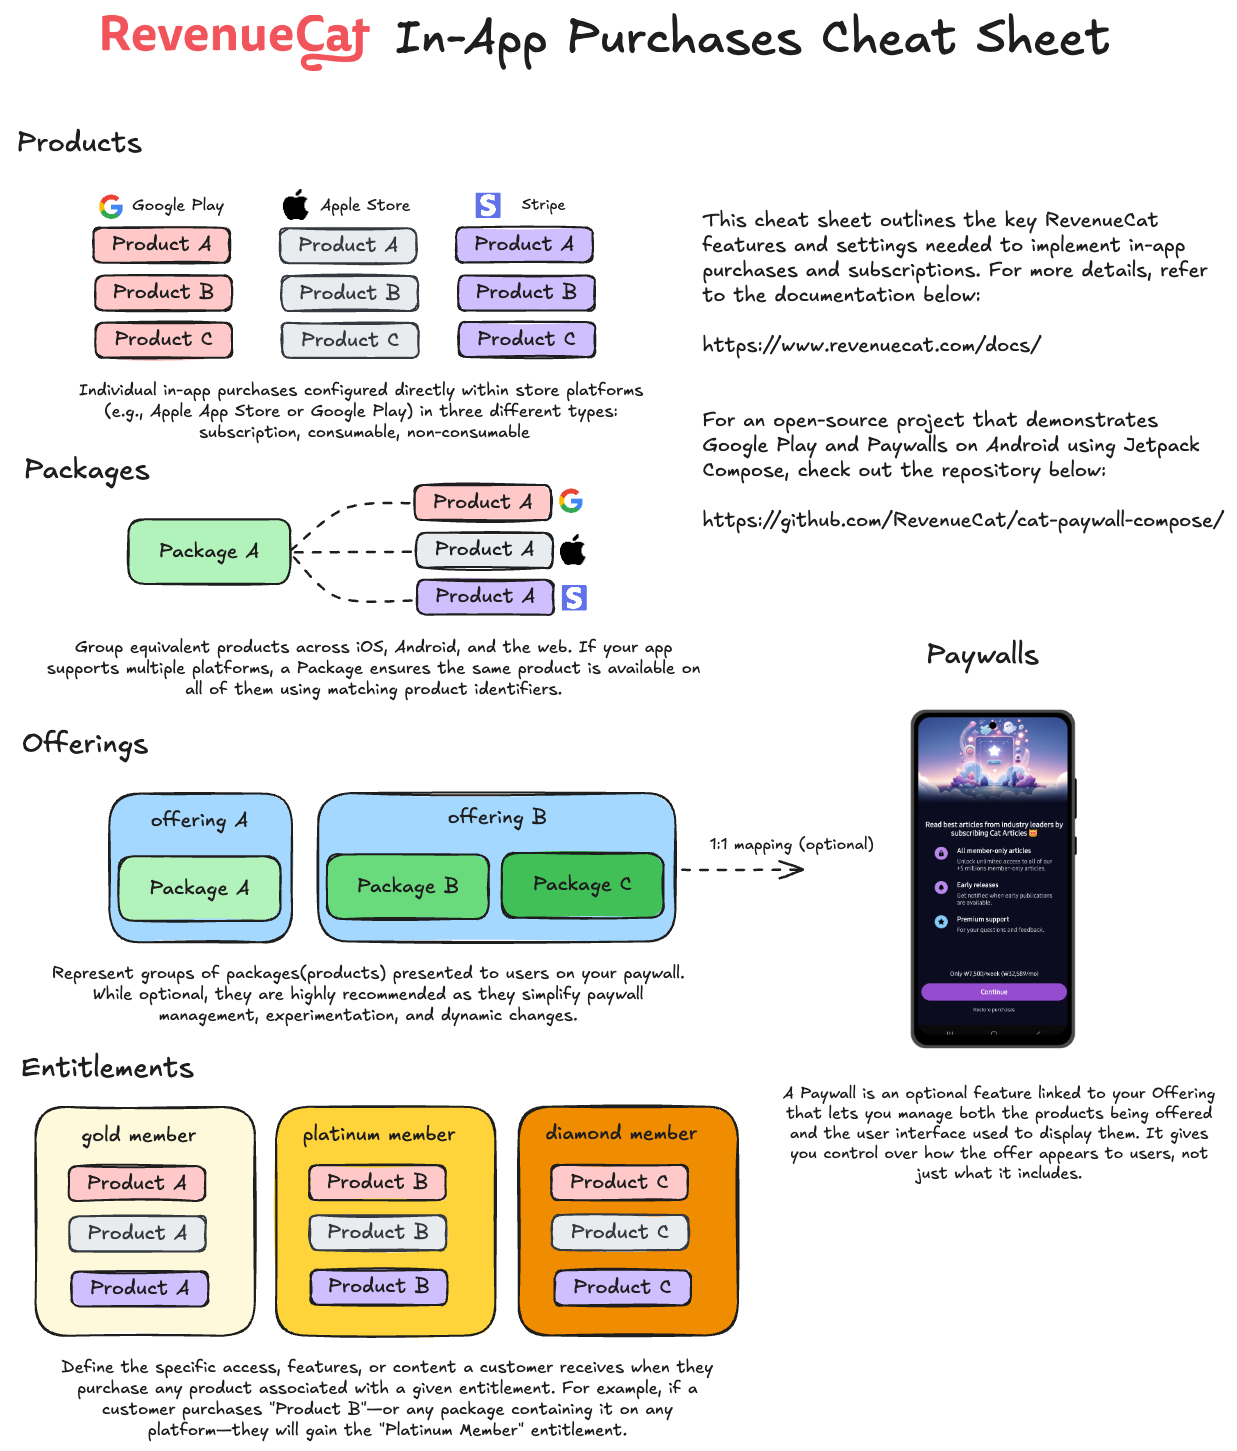
チートシート
これら4つの要素がどのように連携するかを理解することで、クロスプラットフォームサブスクリプションの管理、価格戦略の実験、シームレスなアプリ内課金体験の提供が容易になります。
理解を深めるために、以下のRevenueCatアプリ内課金チートシートの視覚的な図を参照できます:
ストア商品のインポート
0:3:00Why Import Products?
In the previous step, you created products directly in Google Play Console. However, RevenueCat needs to know about those products so it can manage purchases, validate receipts, and track subscriptions on your behalf. Importing products into RevenueCat bridges the gap between your store configuration and RevenueCat's platform.
Once imported, RevenueCat can:
- Validate purchases: Verify that transactions are legitimate by communicating with Google Play.
- Track subscription status: Monitor renewals, expirations, and cancellations automatically.
- Provide unified analytics: Give you a single dashboard view of revenue, subscribers, and product performance.
- Power Entitlements and Offerings: Link products to entitlements and group them into offerings for your paywalls.
How to Import
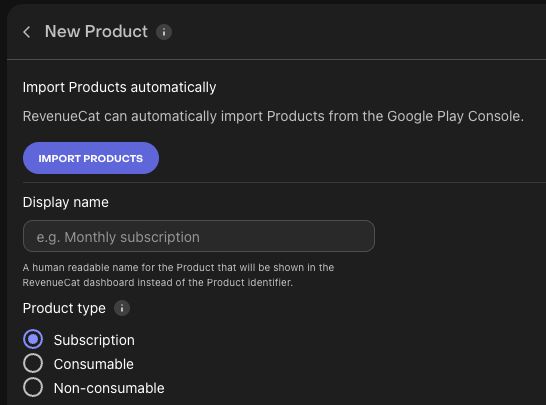
Go to the RevenueCat dashboard, navigate to your project, and open the Products tab under Product Catalog.
Click the + New button in the top right corner, then select Import Products from the dropdown menu. RevenueCat will automatically fetch and display a list of available in-app products from your connected Google Play store account.
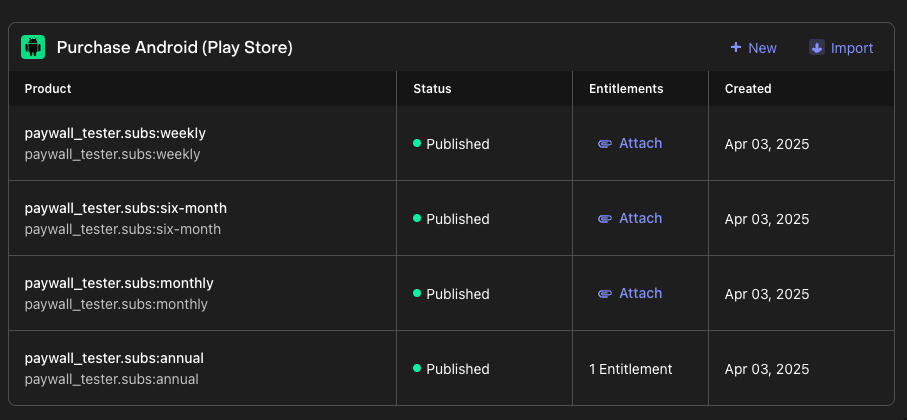
Once your products have been imported, you'll see that the in-app purchase items have been successfully added to your RevenueCat project. These imported products are now ready to be attached to Entitlements and grouped into Offerings in the next steps.
Entitlementの作成
0:5:00商品をインポートまたは作成したので、次はEntitlementを設定します。 学んだように、Entitlementは購入が成功した後にユーザーがアクセスできるものを定義します。「購入」とは、ユーザーがサービスにアクセスするために行う任意のタイプのアプリ内トランザクション(1回限りの購入やサブスクリプションなど)を指すことがあります。
通常、機能アクセス階層(例:"has_premium_access")に基づいて1つ以上のEntitlementを作成したいでしょう。これらのEntitlementを使用すると、アプリ内のゲート付き機能やコンテンツへのアクセスを制御できます。
新しいEntitlementを作成するには:
- プロジェクトダッシュボードの左メニューで商品カタログに移動します。
- Entitlementsタブをクリックします。
- ➕ 新規Entitlementを選択します。
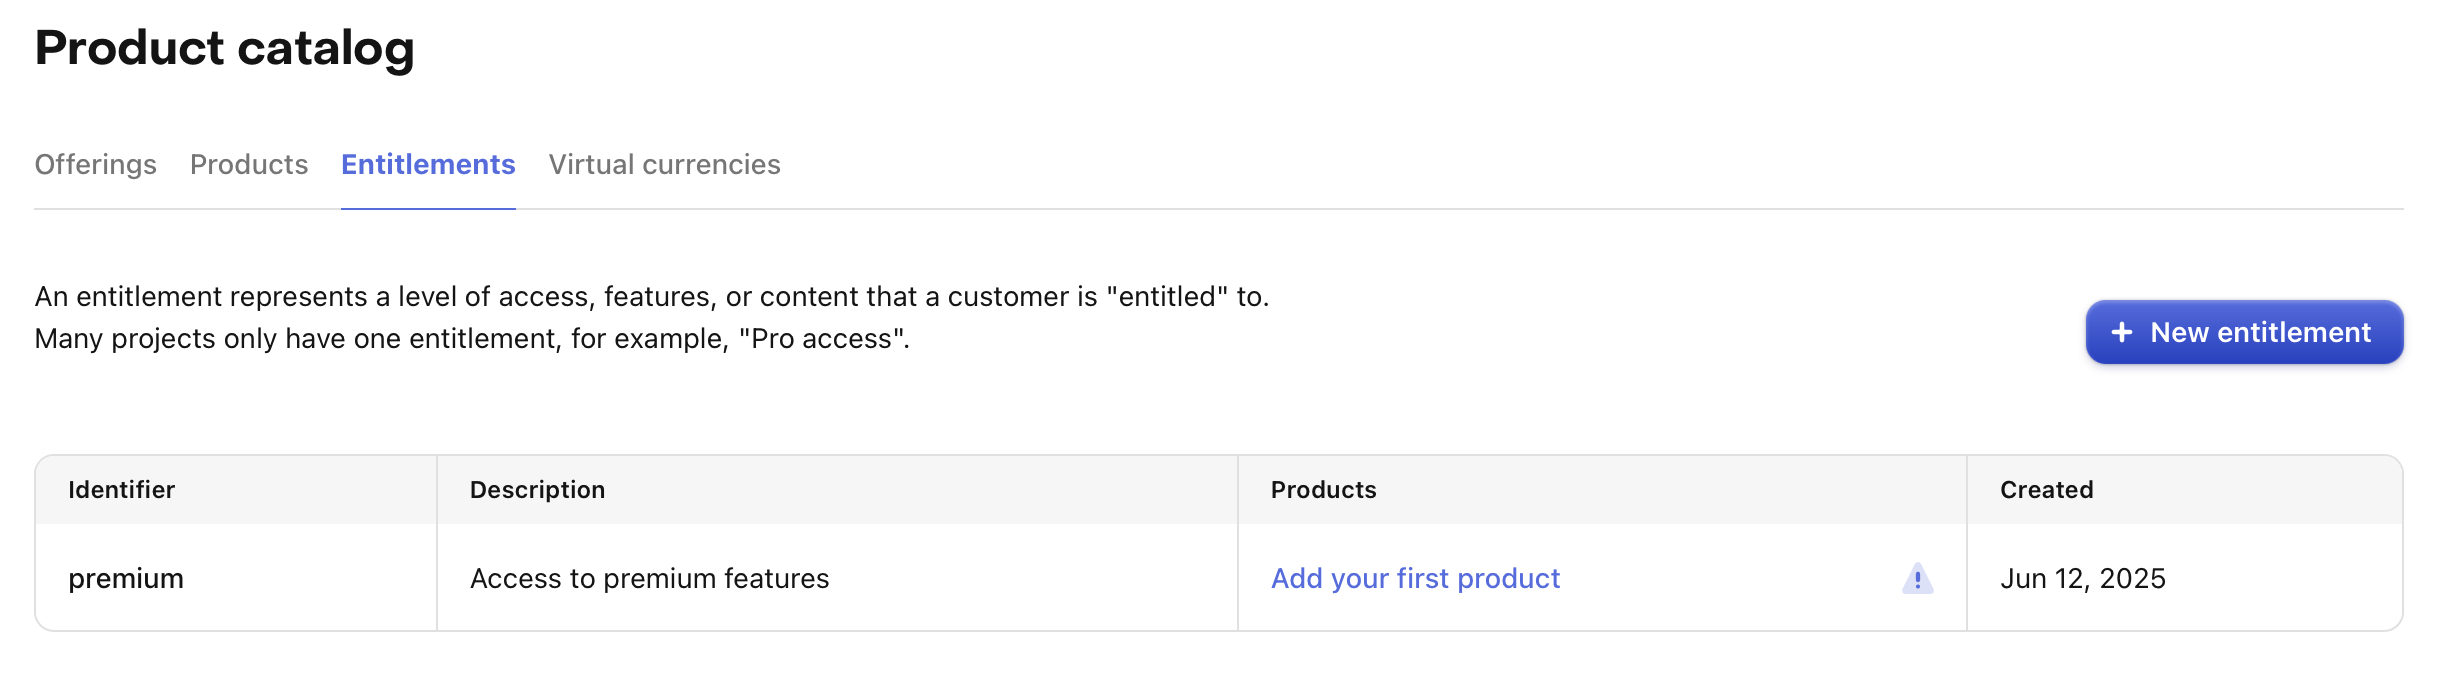
Entitlementの一意の識別子(例:"pro")を入力するよう求められます。これは後でアプリでユーザーのアクセスレベルを確認するために参照します。
ほとんどのアプリは単一のEntitlementを使用しますが、必要に応じて複数作成できます。 例えば、ナビゲーションアプリは完全アクセス用のサブスクリプション("pro")を提供し、特定のマップ地域をロック解除する1回限りの購入も販売する場合があります。その場合、1つの"pro" Entitlementと、各地域用の追加のEntitlement(例:"map_north_america"、"map_europe")を持つことになるでしょう。
商品をEntitlementにアタッチ
次は商品をEntitlementにアタッチする時です。これにより、アプリ内課金とそれがロック解除するアクセスがリンクされます。この設定により、ユーザーが商品を購入すると、対応するEntitlementが付与され、アプリ内の特定の機能やコンテンツへのアクセスが可能になります。
例えば、ユーザーが特定のEntitlementを持っているかどうかを確認する単純なif文を使用して、ゲート付き機能を簡単に実装できます。
商品をEntitlementにアタッチするには:
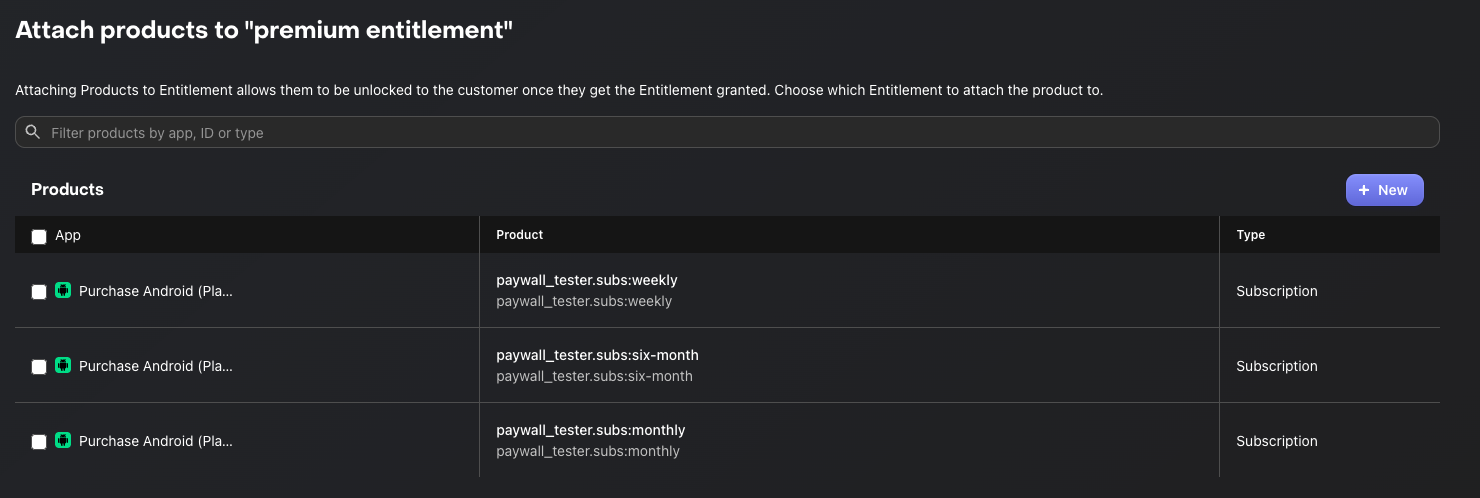
- RevenueCatダッシュボードでEntitlementsタブを開きます。
- 設定したいEntitlementをクリックします。
- アタッチボタンをクリックします。
- 商品を既に追加している場合は、リストに表示されます—リンクしたいものを選択するだけです。
Entitlementにアタッチされた商品が購入されると、Entitlementはその商品の期間中アクティブになります。
サブスクリプション商品の場合、Entitlementはサブスクリプション期間の長さだけアクティブのままです。 非消費型または消費型購入(Entitlementにアタッチされている場合)の場合、Entitlementは通常永続的にコンテンツをロック解除します。
このメカニズムにより、アプリで複雑なロジックを処理することなく、購入タイプに基づいて機能アクセスを管理できます。
アプリにペイウォールを実装する予定がない場合は、まとめセクションにスキップできます。それ以外の場合は、次のステップに進んでOfferingの作成方法を学びましょう。
Offeringの作成
0:7:00If you want to introduce Paywalls in your app, the first step is to create Offerings. An Offering represents a set of products that are presented to users on your paywall.
Creating an Offering
To create a new Offering, navigate to Product Catalog → Offerings in your RevenueCat dashboard, then click the + New button.
You'll be prompted to fill in the following fields:
- Identifier: A unique key used to reference this offering in your code (e.g.,
default). This cannot be changed later, so choose a meaningful name. - Display Name: A human-readable name for this offering that helps you identify it in the dashboard (e.g., "Default Offering").

Once you've filled in the details, click Create to save the new Offering. Your newly created Offering will now appear in the Offerings list.
Note that RevenueCat automatically creates a "Default" Offering for your project. You can use this default offering or create additional ones to support different paywall configurations, A/B tests, or regional pricing strategies.
Adding Packages
A Package serves as a wrapper for equivalent products across different platforms (e.g., iOS, Android, Web). This provides a single source of truth for your products across platforms.
For example, if a user purchases a product on Android, they can still access the same entitlement on their iOS device, as long as they're logged into the same account.
To create a package, navigate to your newly created Offering, then click the Edit button to configure the details, and then you can add packages by clicking the + New Package in the Packages section.
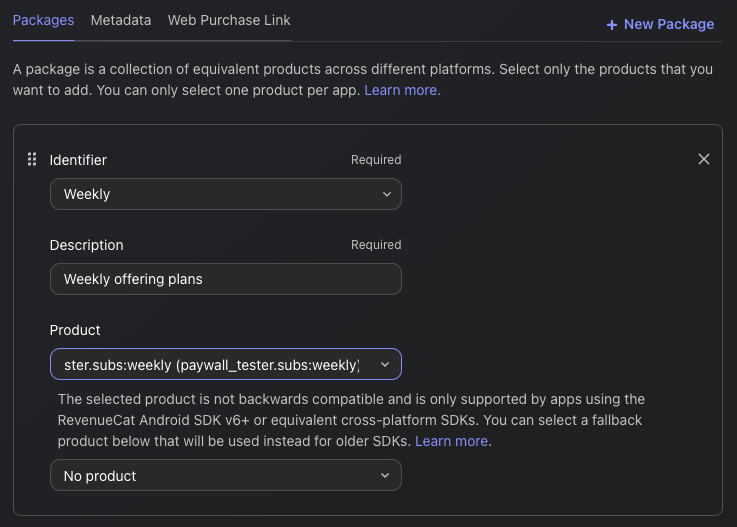
From there:
- Choose an Identifier from the dropdown that best represents the package duration (e.g., monthly, annual).
- If none of the predefined durations fit—such as in the case of consumable purchases—you can select a custom identifier instead.
- Add a description to help clarify the purpose or contents of the package.
- Attach the relevant products that match the chosen duration (e.g., monthly products across iOS and Android).
- Click Save to create the package.
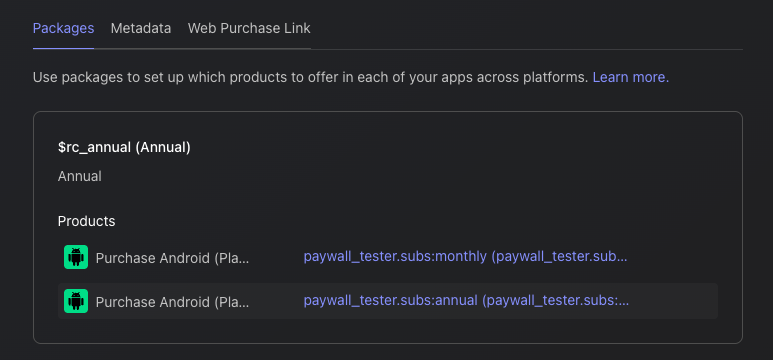
Once you've added all the Packages to your Offering, you'll see the results displayed as shown below:
The relationships between Offerings and Packages
So, an Offering can contain multiple Packages, allowing you to "offer" different options to users. This means you can present various choices—such as monthly, annual, or lifetime plans—all within a single Offering, as illustrated in the diagram below:
Offering(例:「proプラン」)
                    |
       --------------------------------
       |              |              |
   Package A      Package B      Package C
   ("monthly")    ("annual")    ("lifetime")
       |              |              |
 Product A1      Product B1      Product C1
 (iOS/Android)   (iOS/Android)   (iOS/Android)
さあ、素晴らしいペイウォールを作成しましょう!
ペイウォールの作成
0:7:00A paywall is a screen that encourages users to purchase your products. RevenueCat's paywall system is built on a server-driven UI, allowing you to update layouts instantly using the Paywall Editor without needing to release a new app version.

This allows your team to focus on A/B testing, refining offerings, and optimizing messaging to boost subscriptions, all without the delays of app updates. If you want to deep dive into the server-driven UI approach, you can read Server-driven UI SDK on Android: how RevenueCat enables remote paywalls without app updates.
Prerequisites: Offering Setup
Before creating a paywall, you must have at least one Offering configured with packages. The paywall will be linked to an Offering, and the packages within that Offering determine which products are displayed to users.
How Paywalls Connect to Offerings
Understanding the relationship between Paywalls and Offerings is crucial:
- Offering = The container that holds your packages (products)
- Paywall = The visual presentation layer that displays those packages
- One Offering can have one active Paywall at a time
- When you select an Offering for your paywall, it automatically has access to all packages within that Offering
Creating a New Paywall
To start building, go to the Paywalls page for your project and click + New Paywall.

Choose a Starting Point
You have three options to begin:
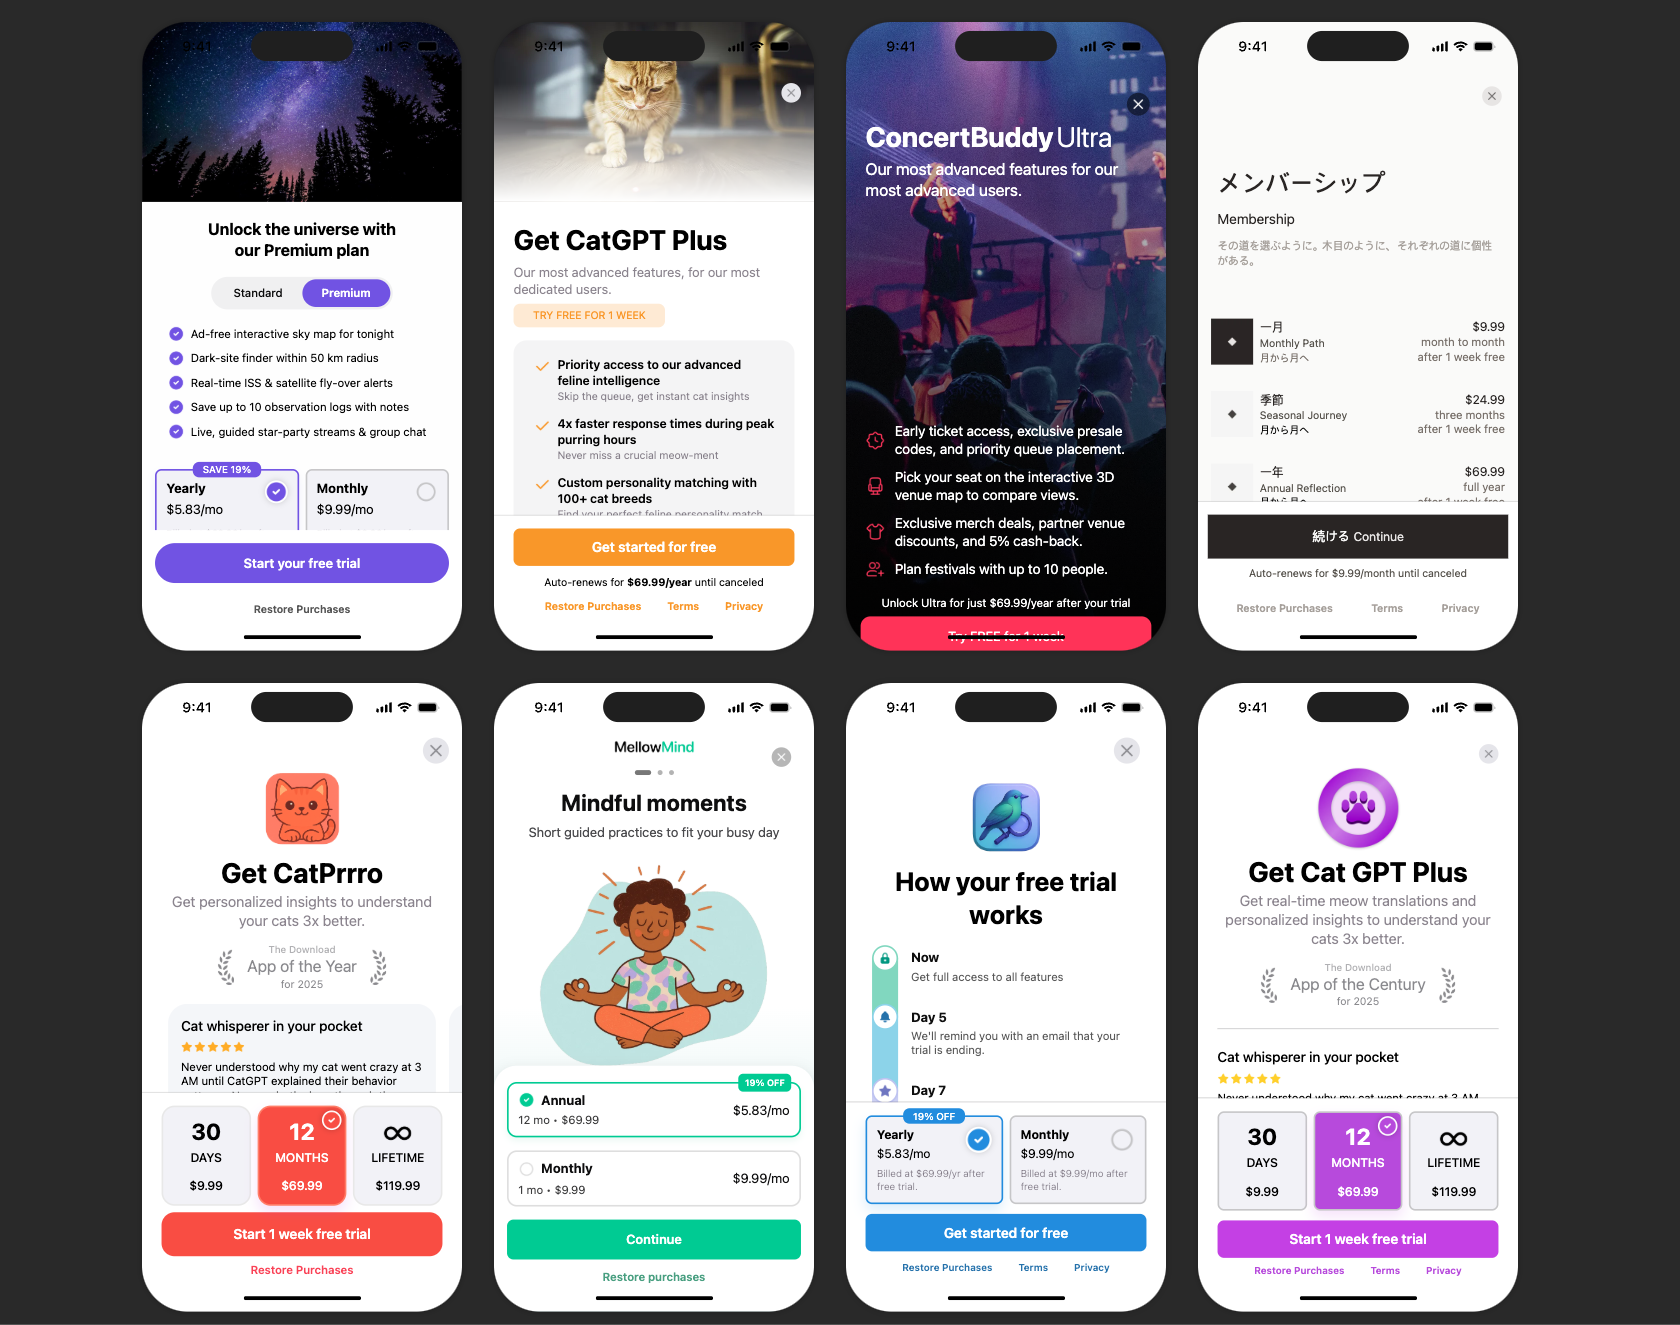
- Pre-built Templates (Recommended): Start with professionally designed templates and customize them.
- Start from Scratch: Build your paywall from a blank canvas.
- Import from Figma: Import designs directly from Figma.
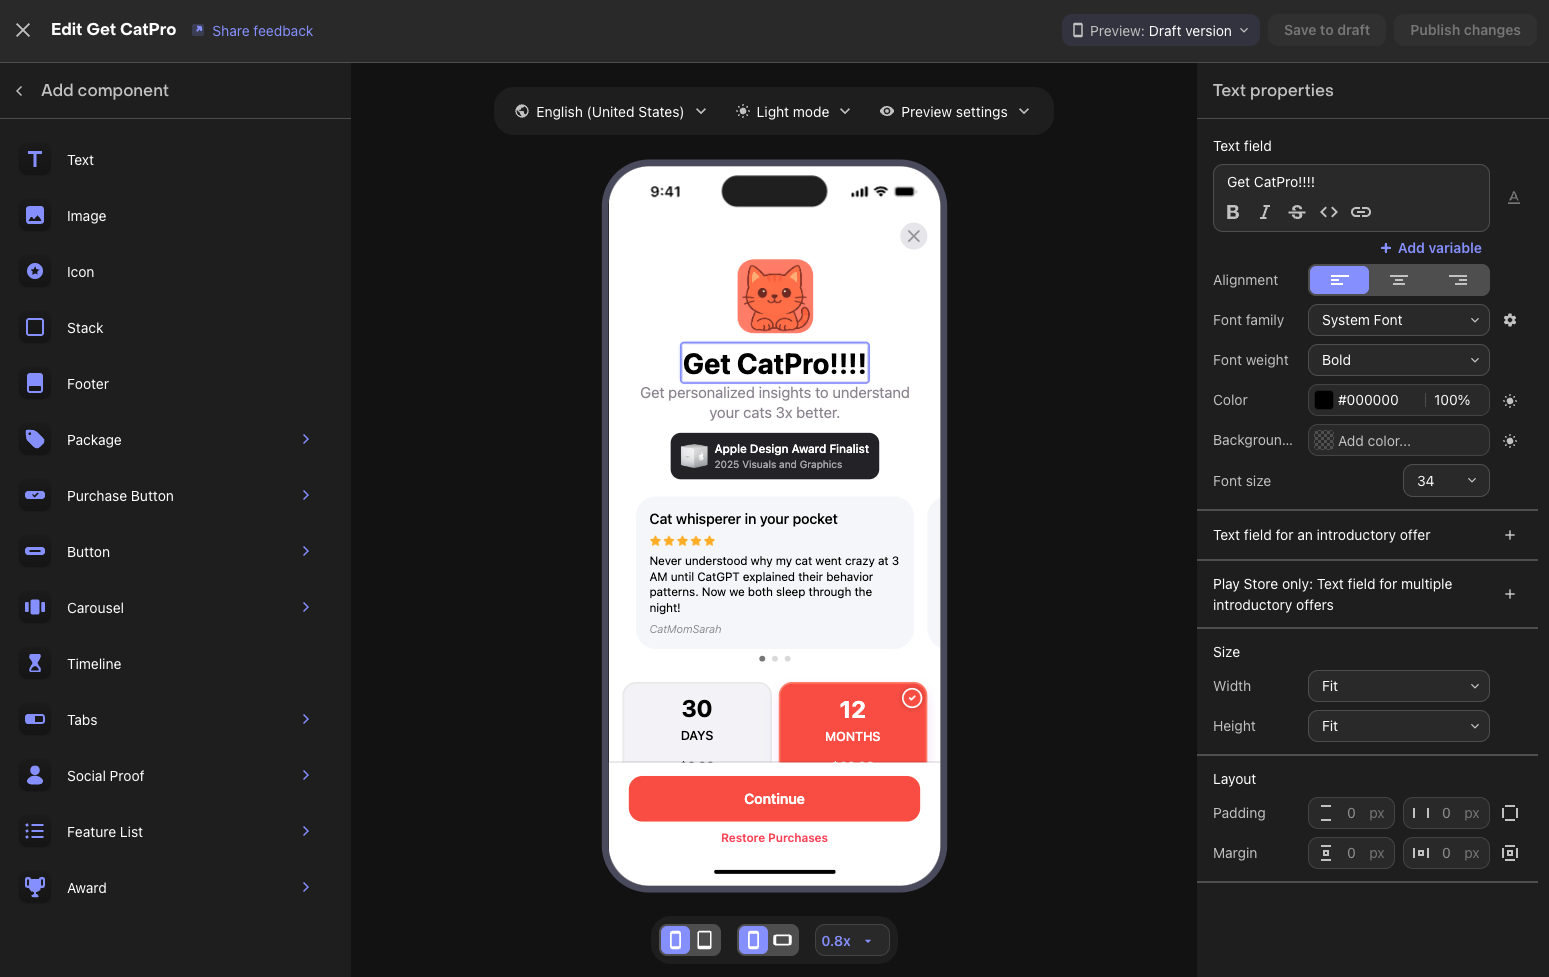
Using the Paywall Editor
The Paywall Editor consists of three main areas:
- Left Sidebar: Add components, view the layer hierarchy, manage branding and media assets.
- Center Preview: Real-time visualization of your paywall.
- Right Panel: Configure properties for the selected component (sizing, styling, behavior).
Key Configuration Steps
- Set the Paywall Name: Give your paywall a descriptive name (e.g., "Main Subscription Paywall").
- Select an Offering: Choose which Offering this paywall will display. The identifier links the paywall to your Offering.
- Configure Components: Add and arrange text, images, icons, package selectors, and purchase buttons.
- Style Your Design: Customize colors, fonts, spacing, and images to match your app's branding.
- Set Up Purchase Button: Ensure the purchase button is connected to trigger checkout for the selected package.
Available Components
RevenueCat provides various building blocks for your paywall:
- Text & Images: Headlines, descriptions, feature lists, and visual assets.
- Package Selector: Displays your subscription options from the linked Offering.
- Purchase Button: Triggers the purchase flow for the selected package.
- Footer: Terms of service, privacy policy, and restore purchases links.
- Stacks & Containers: Layout components to organize other elements.
- Carousels: Swipeable content sections.
Preview Options
Use the editor's preview controls to test your paywall:
- Toggle between Light and Dark mode
- Switch between different device sizes
- Preview different locales if you have localized content
Draft vs Published
Paywalls have two states:
| State | Description | Visible to Users |
|---|---|---|
| Draft | Work in progress, saved but not active | No |
| Published | Live and served to users via SDK | Yes |
Workflow:
- Make changes and click "Save to draft" to save your work without affecting live users
- When ready, click "Publish changes" to make your paywall live
- You can toggle a published paywall back to inactive status anytime
You've completed all the configuration steps for setting up Google Play products and the RevenueCat dashboard! Next, let's look at how to test your in-app purchases.
Testing in-app purchases (Optional)
0:05:00Before shipping your app to production, you'll want to test the complete purchase flow. There are two approaches to testing in-app purchases: RevenueCat Test Store for fast, deterministic testing without any special account setup, and Google Play License Testing for end-to-end testing with Google's infrastructure.
RevenueCat Test Store
Test Store is RevenueCat's built-in testing environment that allows you to test in-app purchase flows without connecting to Google Play. It's automatically provisioned with every RevenueCat project and gives you complete control over purchase outcomes.
Key benefits of using Test Store:
- Deterministic outcomes: Control whether purchases succeed, fail, or get cancelled — no more flaky sandbox behavior.
- No special accounts needed: Skip the hassle of creating and managing license tester accounts.
- Fast feedback: Test purchase flows in seconds rather than minutes.
- Works in CI/CD: Write automated tests for your purchase logic that run reliably in any environment.
To get started with Test Store, navigate to your RevenueCat dashboard, go to Apps & providers, and enable Test Store. You'll receive a Test Store API key prefixed with test_ that you can use in place of your production API key during development and testing.
Google Play License Testing
Google provides license testing that allows you to simulate purchases using Google Play's infrastructure without being charged real money.
To set up license testing:
- Go to the Google Play Console.
- Navigate to Settings → License testing.
- Add the Google account email addresses of your testers.
- Set the license response to RESPOND_NORMALLY for standard testing.
When testing on a real device with a Google account added as a license tester, purchases will show as "Test order" and no real charges will be made. This gives you end-to-end testing with Google's actual billing infrastructure.
With your testing approach configured, you're ready to ship with confidence! Let's wrap up in the conclusion.
まとめ
このコードラボでは、Google Play商品の設定方法、Google PlayアカウントをRevenueCatダッシュボードに接続する方法、そして商品、オファリング、Entitlement、ペイウォールの設定方法を学びました。すべての設定が完了したので、RevenueCat SDKをプロジェクトに統合する準備ができました!
次のステップ:
- RevenueCat Android SDKのアプリ内課金とペイウォール統合 — 完全に機能する収益化フローへの次のステップ。
- RevenueCat Kotlin Multiplatform SDKのアプリ内課金とペイウォール統合 — KMP/CMPプロジェクト向けの完全に機能する収益化フローへの次のステップ。
- RevenueCat Flutter SDKのアプリ内課金とペイウォール統合 — Flutterプロジェクト向けの完全に機能する収益化フローへの次のステップ。
- 製品チュートリアル: RevenueCatを始めて最大限に活用するためのビデオチュートリアル。