RevenueCat Google Play 연동 개요
0:03:00RevenueCat의 Google Play 연동 Codelab에 오신 것을 환영합니다!
이 Codelab에서는 다음을 배우게 됩니다:
Google Play에서 상품을 올바르게 구성하는 방법. RevenueCat 대시보드를 설정하고 Google Play 상품에 연결하는 방법. Product, Offering, Package, Entitlement 이해하기. Paywall Editor를 사용하여 페이월(Paywall)을 생성하는 방법.
이 Codelab을 마치면 Android 앱에서 인앱 결제와 페이월을 원활하게 구현하기 전에 필요한 모든 Google Play 및 RevenueCat 대시보드 설정을 완료할 수 있습니다.
왜 RevenueCat인가요?
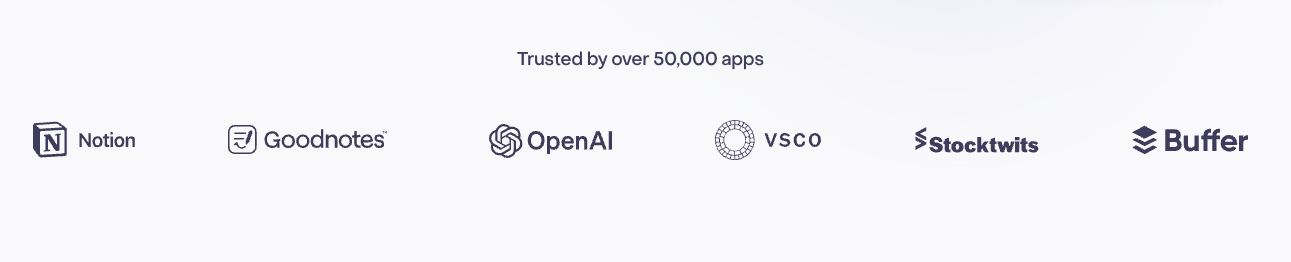
세계 최고의 앱들은 RevenueCat을 사용하여 iOS, Android 및 웹에서 인앱 결제, 구독 및 페이월을 관리하고 고객 데이터를 관리하며 수익을 늘립니다. 연간 80억 달러 이상의 인앱 결제를 처리하는 RevenueCat은 OpenAI(ChatGPT), Notion, Buffer, Goodnotes와 같은 최고의 기업들로부터 신뢰받고 있습니다.
왜 많은 개발자들이 RevenueCat을 선택할까요?
RevenueCat은 크로스 플랫폼 인앱 결제를 단순화하면서 분석을 위한 통합된 정보 소스를 제공합니다. 이를 통해 생애가치(LTV), 수익 추세 및 사용자 행동을 더 잘 이해할 수 있으며, 더 스마트한 수익화와 더 빠른 성장을 가능하게 합니다. 주요 이점은 다음과 같습니다:
통합된 사용자 식별: 구매를 사용자 ID에 안정적으로 연결하여 앱 수준과 스토어 수준 계정 간의 단절을 해결합니다. 간소화된 구독 관리: 플랫폼별 제한 사항을 추상화하여 직접 제어가 제한적인 경우(예: iOS)에도 일관된 구독 동작을 제공합니다. 크로스 플랫폼 분석: Apple 및 Google 콘솔의 지연된 데이터보다 더 명확하고 실행 가능한 표준화된 실시간 인사이트를 얻을 수 있습니다. 정확한 가격 인사이트: 네이티브 프레임워크가 부족한 경우에도 모든 지역 및 스토어에서 사용자가 지불한 정확한 금액을 이해할 수 있습니다.
RevenueCat을 사용하면 앱 수익화가 더 간단하고 스마트하며 확장 가능해집니다.
Google Play 상품 설정하기
0:05:00먼저, Google Play Console에 로그인하고, 애플리케이션을 선택한 다음, 사이드바에서 Monetize with Play > Products로 이동하여 아래 이미지에 표시된 대로 In-app products 또는 Subscriptions를 클릭하세요.
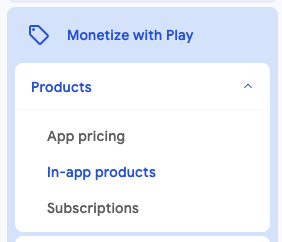
기본적으로 Google Play에서 만들 수 있는 상품 유형은 두 가지입니다: In-app products와 Subscriptions입니다.
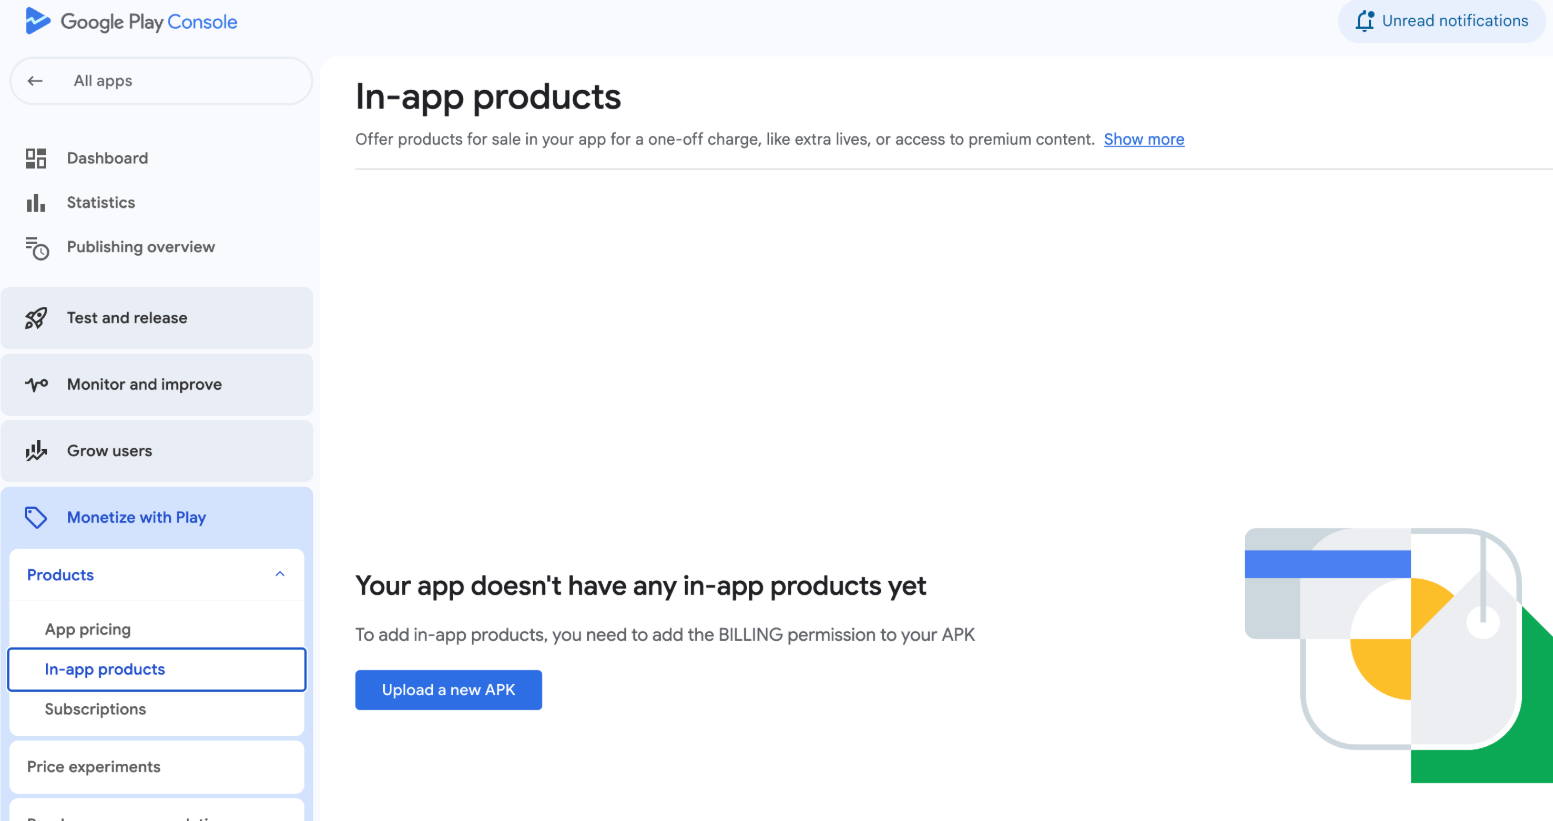
아래 이미지처럼 아직 APK를 업로드하지 않았다면 상품을 설정하기 전에 먼저 APK를 업로드해야 합니다. 사이드바의 Release 섹션으로 이동하여 APK를 업로드할 수 있습니다.
인앱 상품
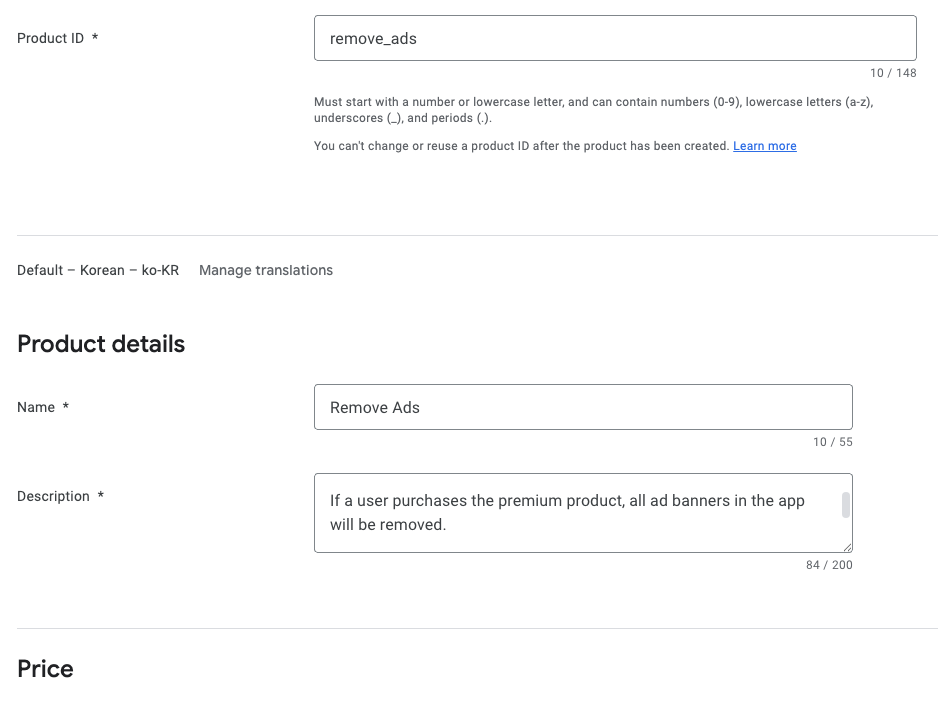
일회성 구매로 기능이나 콘텐츠를 영구적으로 잠금 해제합니다. 예를 들어 광고 제거, 프리미엄 기능 잠금 해제 또는 게임 내 화폐 구매 등이 있습니다.
사이드바에서 In-app products를 클릭하면 위의 화면이 표시되며, 사용자가 구매할 수 있는 새로운 인앱 상품을 만들 수 있습니다.
구독
월별, 연간 또는 맞춤 기간 동안 정기적인 요금으로 콘텐츠나 기능에 대한 액세스를 제공합니다. 스트리밍 콘텐츠, 프리미엄 앱 액세스 또는 정기적으로 업데이트되는 기능과 같은 서비스에 이상적입니다.
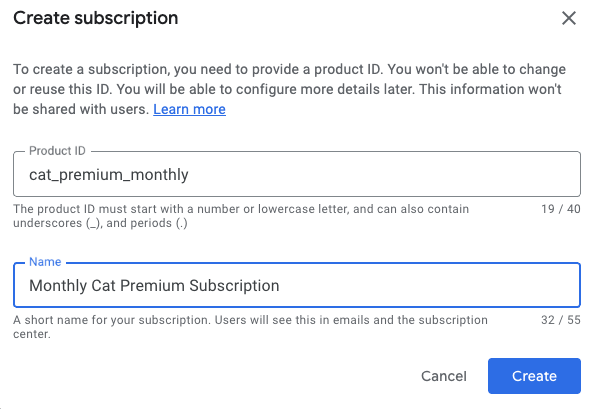
구독 상품을 생성할 때 구독 혜택을 추가하고, 기본 플랜을 구성하고, 오퍼(무료 체험 또는 프로모션 가격 등)를 설정한 다음 최종적으로 상품을 활성화하여 추가로 사용자 지정할 수 있습니다.
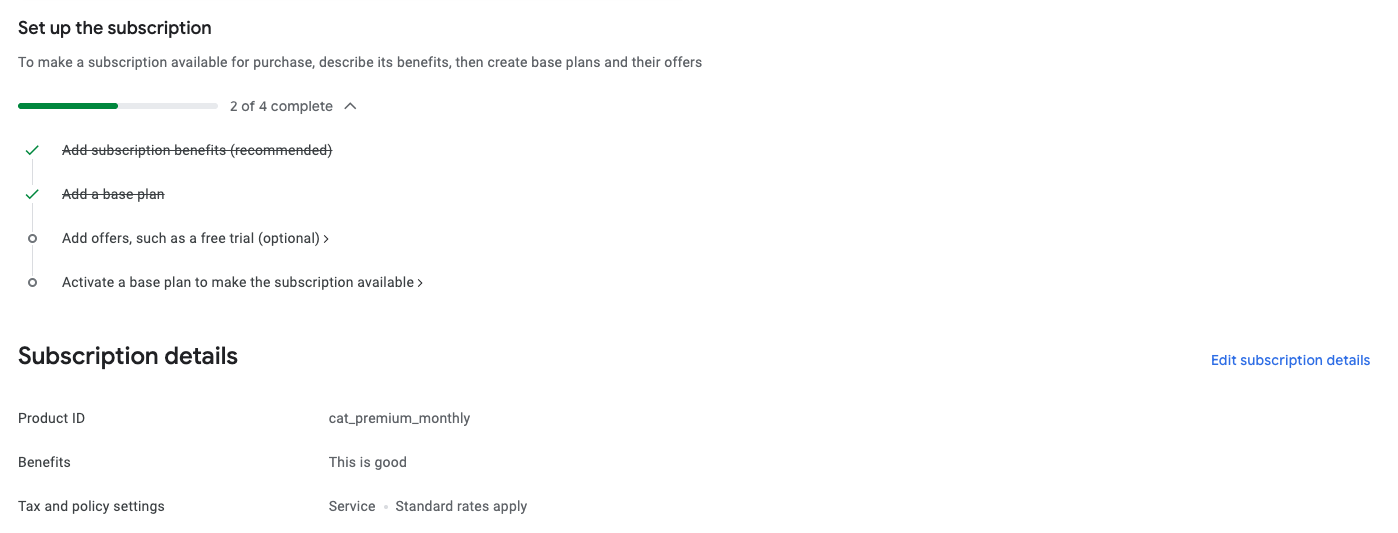
Google Play에서 상품 설정을 완료하면 모든 준비가 완료됩니다! 인앱 상품이나 구독 생성, 신뢰할 수 있는 상품 ID 작성, 기본 플랜 및 오퍼 설정, 또는 비소모성 항목 추가에 대해 더 자세히 알아보려면 자세한 지침과 모범 사례를 확인하기 위해 Google Play 상품 설정 가이드를 확인하세요.
Google Play를 RevenueCat에 연결하기
0:15:00다음으로, 상품, 수익화, 통계 등을 관리하기 위해 RevenueCat 계정을 설정해야 합니다. 필요한 것은 이메일 주소뿐입니다.
RevenueCat에서 계정을 만든 후, Google Play Store 서비스 자격 증명 가이드에 제공된 지침에 따라 Google Play Store 서비스 자격 증명 세트를 구성하세요.
이 설정을 통해 RevenueCat이 Google Play 상품과 통합되어 스토어 상품을 RevenueCat 대시보드로 원활하게 가져오고, 구매 활동을 추적하고, LTV 보고서를 분석하고, 사용자 구매 알림을 받고, 실시간 데이터 인사이트를 사용하여 성장 전략을 개발할 수 있습니다.
시작하려면 아래 단계를 따르세요:
1. Google Developer 및 Reporting API 활성화
Google Cloud 프로젝트에서 Google Play Developer API와 Developer Reporting API를 모두 활성화하려면 다음 단계를 따르세요:
- Google Cloud Console을 엽니다.
- 드롭다운에서 기존 프로젝트를 선택하거나 새 프로젝트를 시작합니다.
- Google Play Android Developer API 및 Google Play Developer Reporting API 페이지를 방문합니다.
- 각 페이지에서 Enable 버튼을 클릭합니다(이미 활성화된 경우 Manage로 표시됩니다).
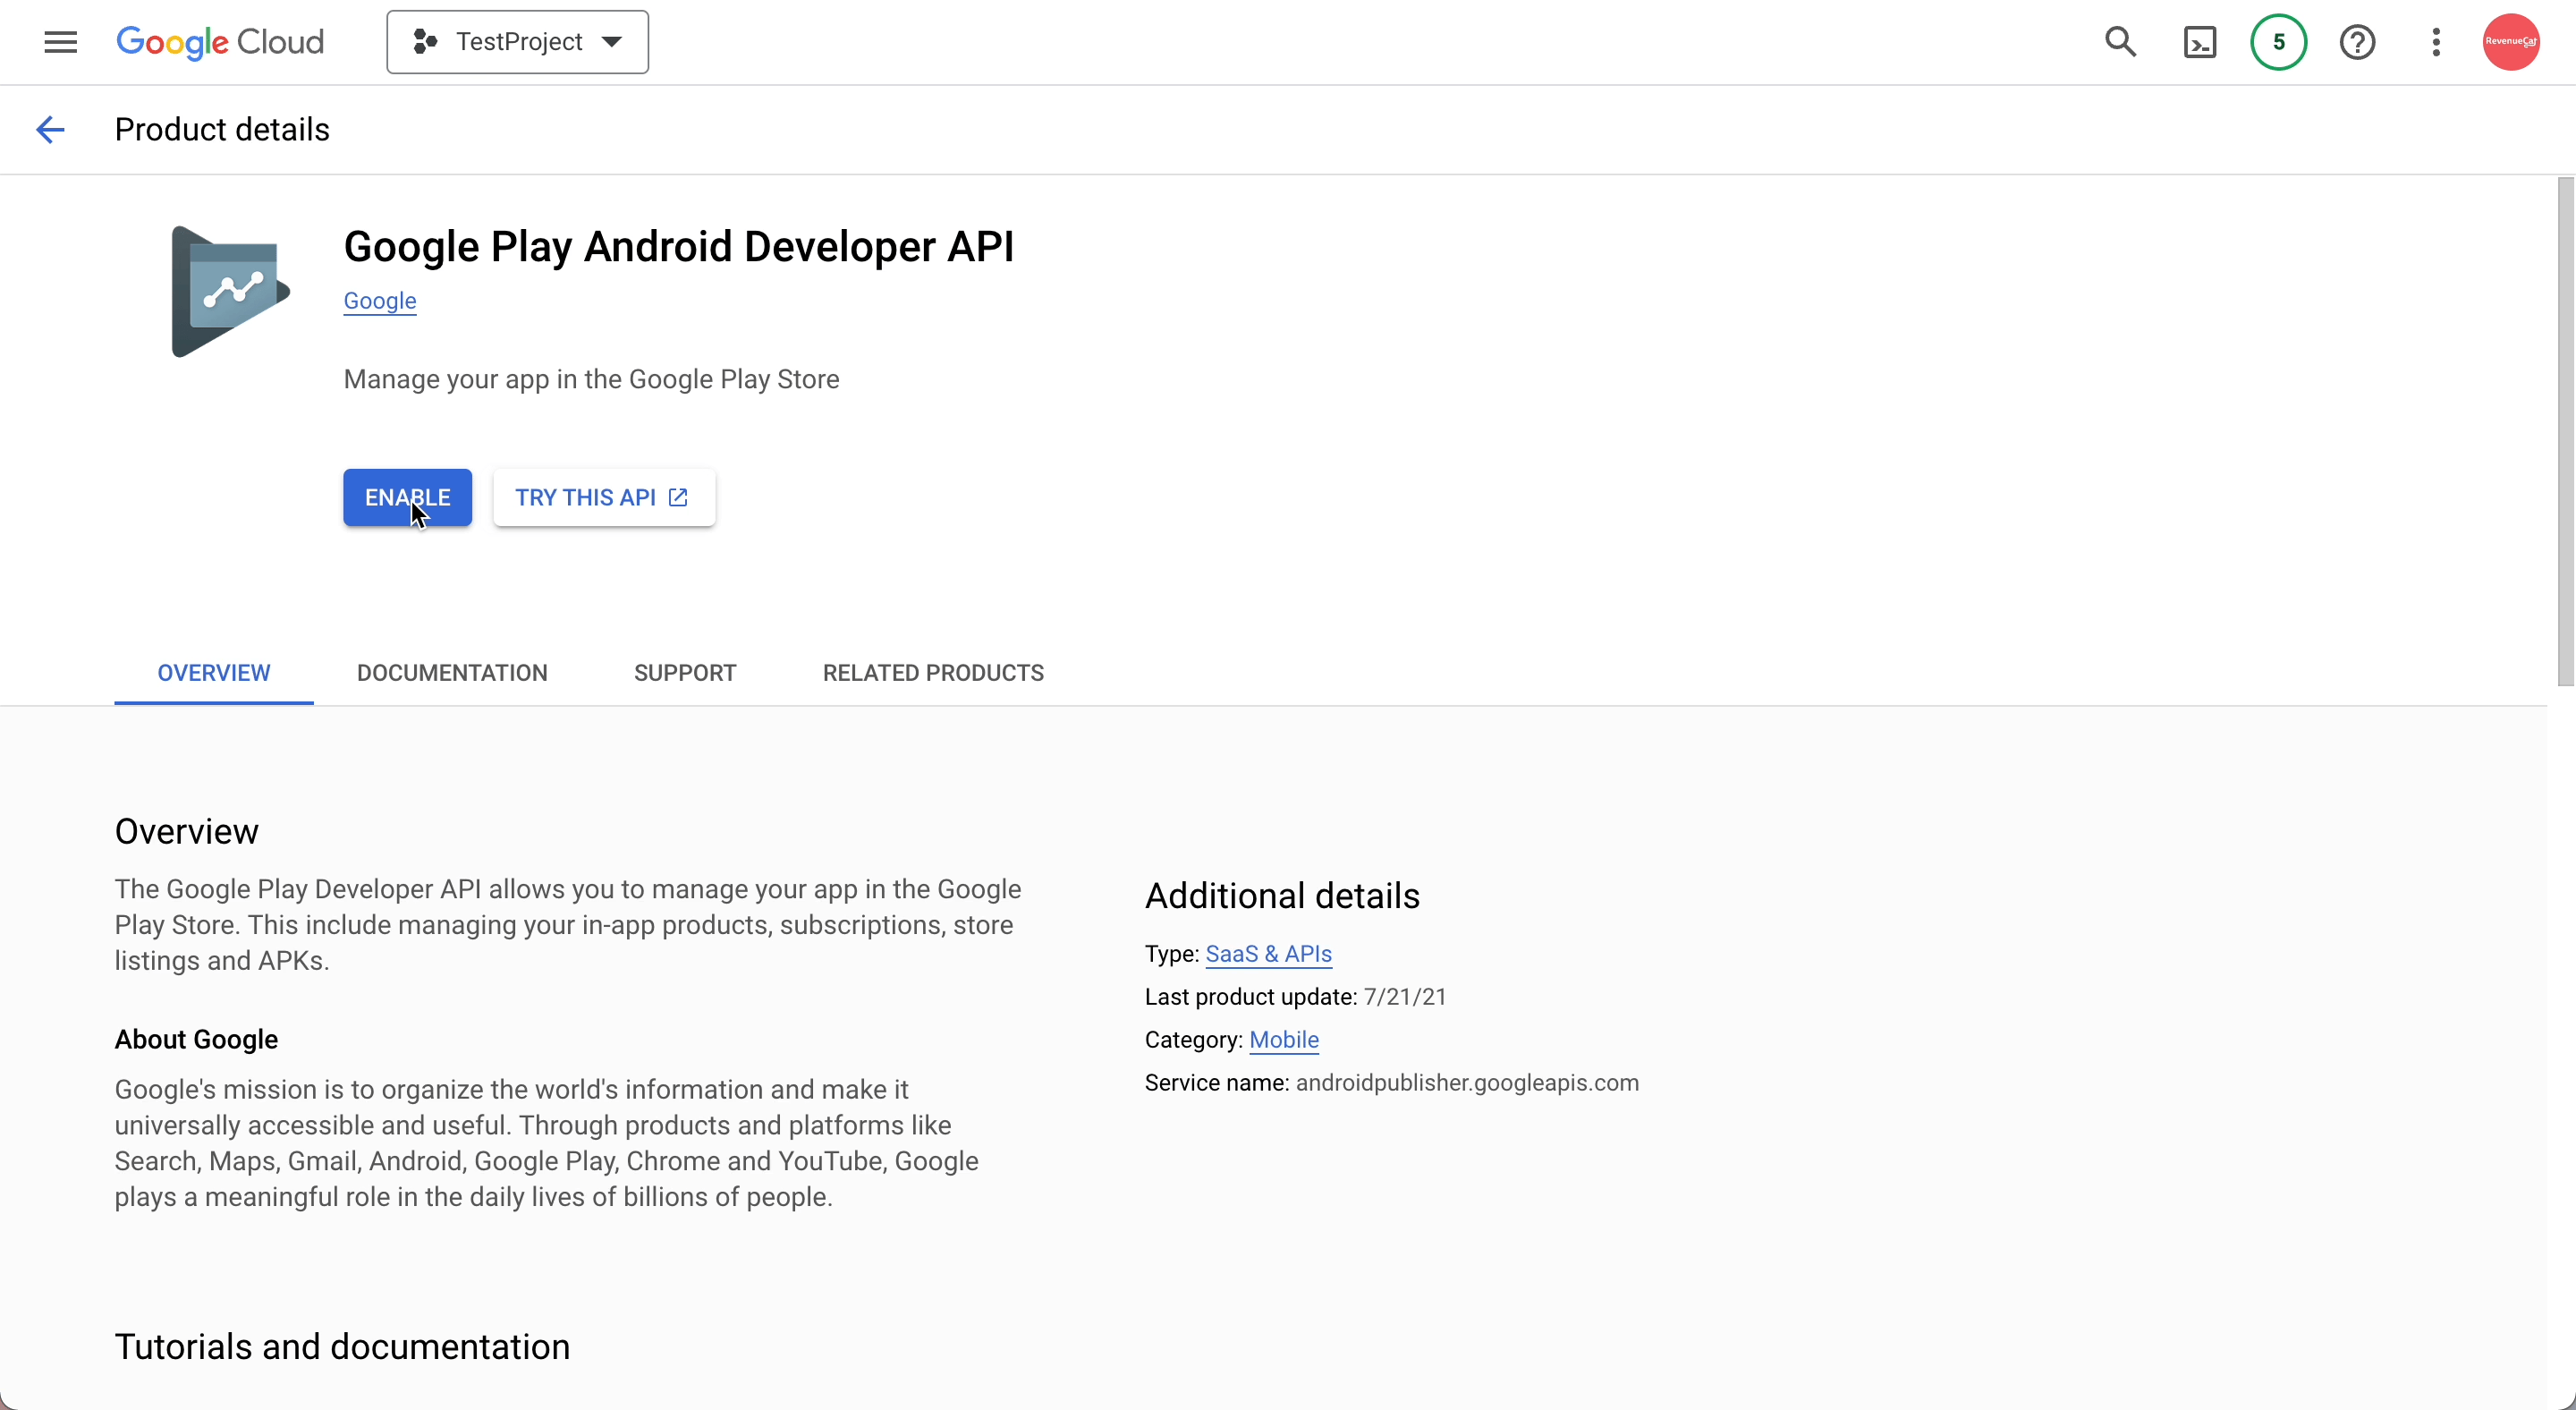
API가 활성화되면 프로젝트의 API 대시보드로 이동합니다. 아직 자격 증명이 구성되지 않은 경우 자격 증명을 만들라는 메시지가 표시됩니다. 자격 증명이 Google Play Android Developer API와 함께 사용하기 위한 것임을 지정해야 합니다. 이 단계는 프로젝트 소유자 또는 Google Play Console에서 적절한 API 액세스 권한을 부여받은 팀원이 완료해야 합니다.
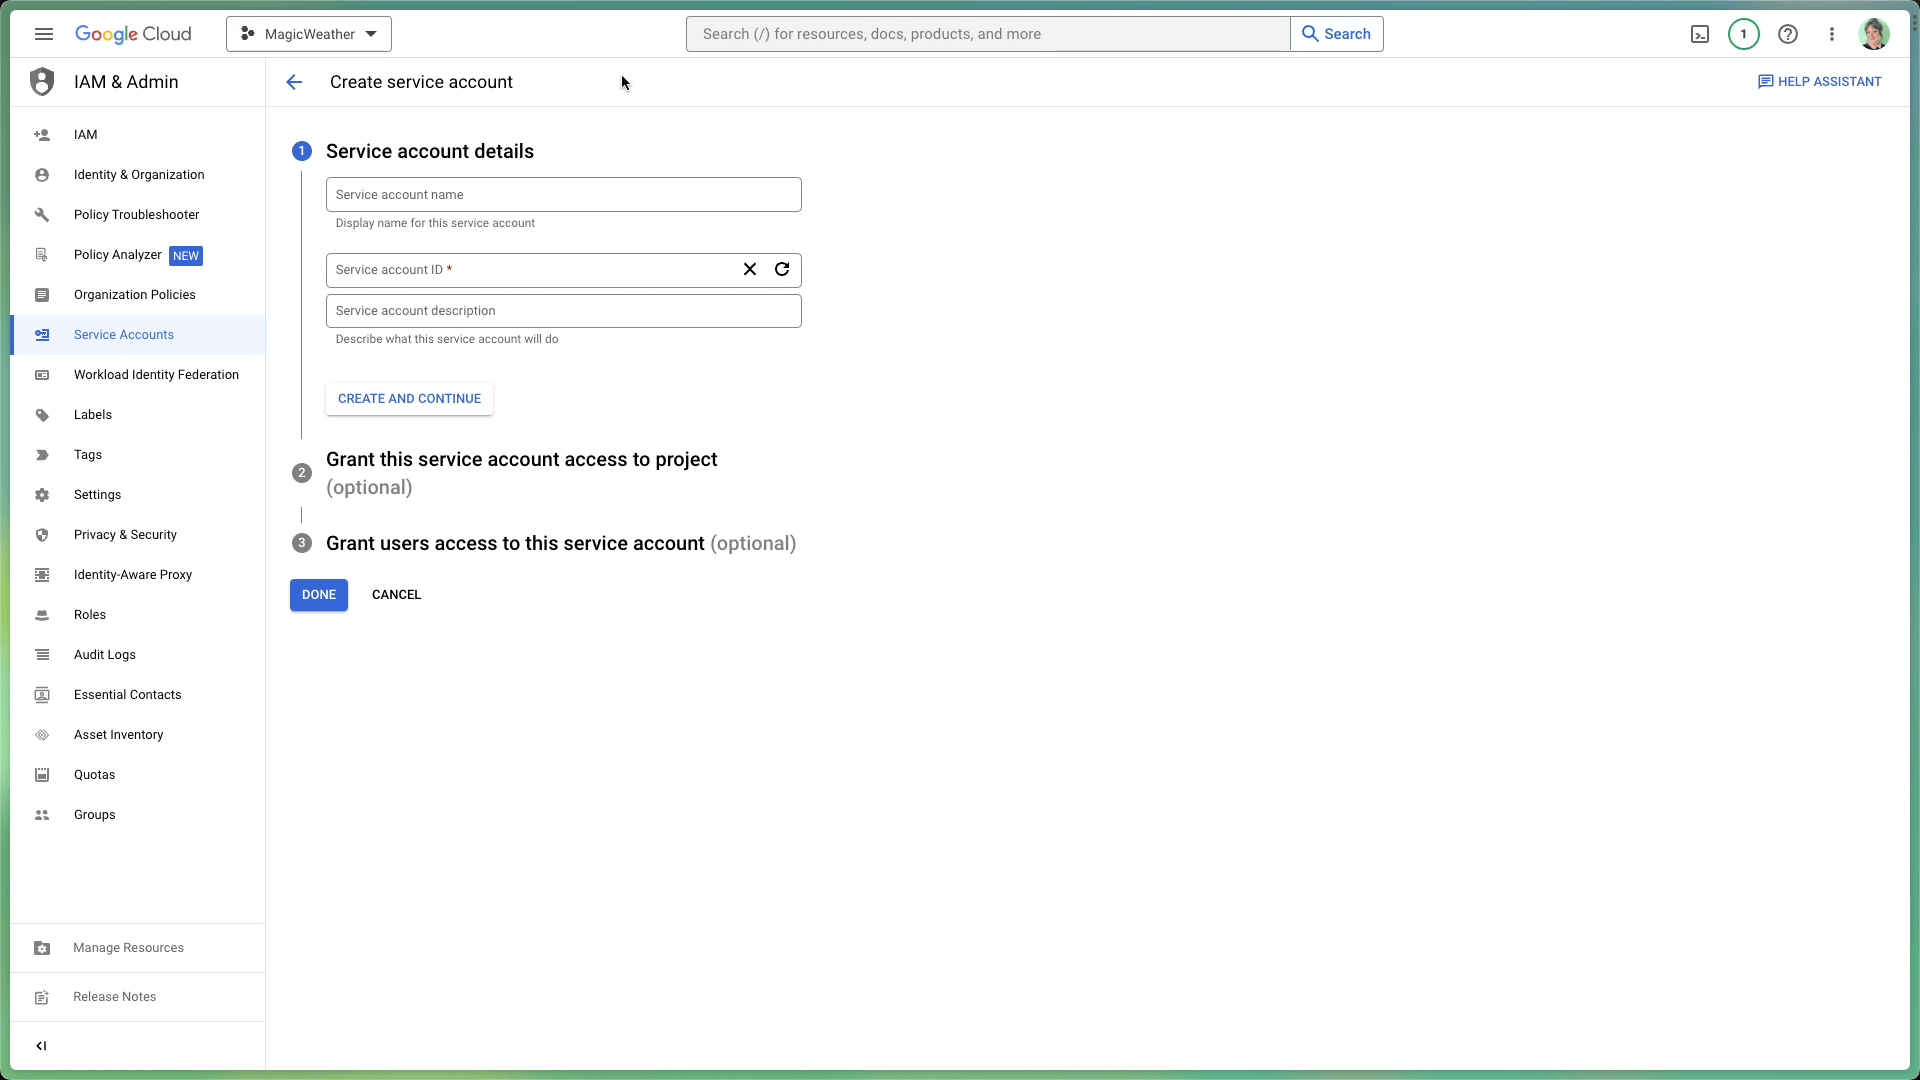
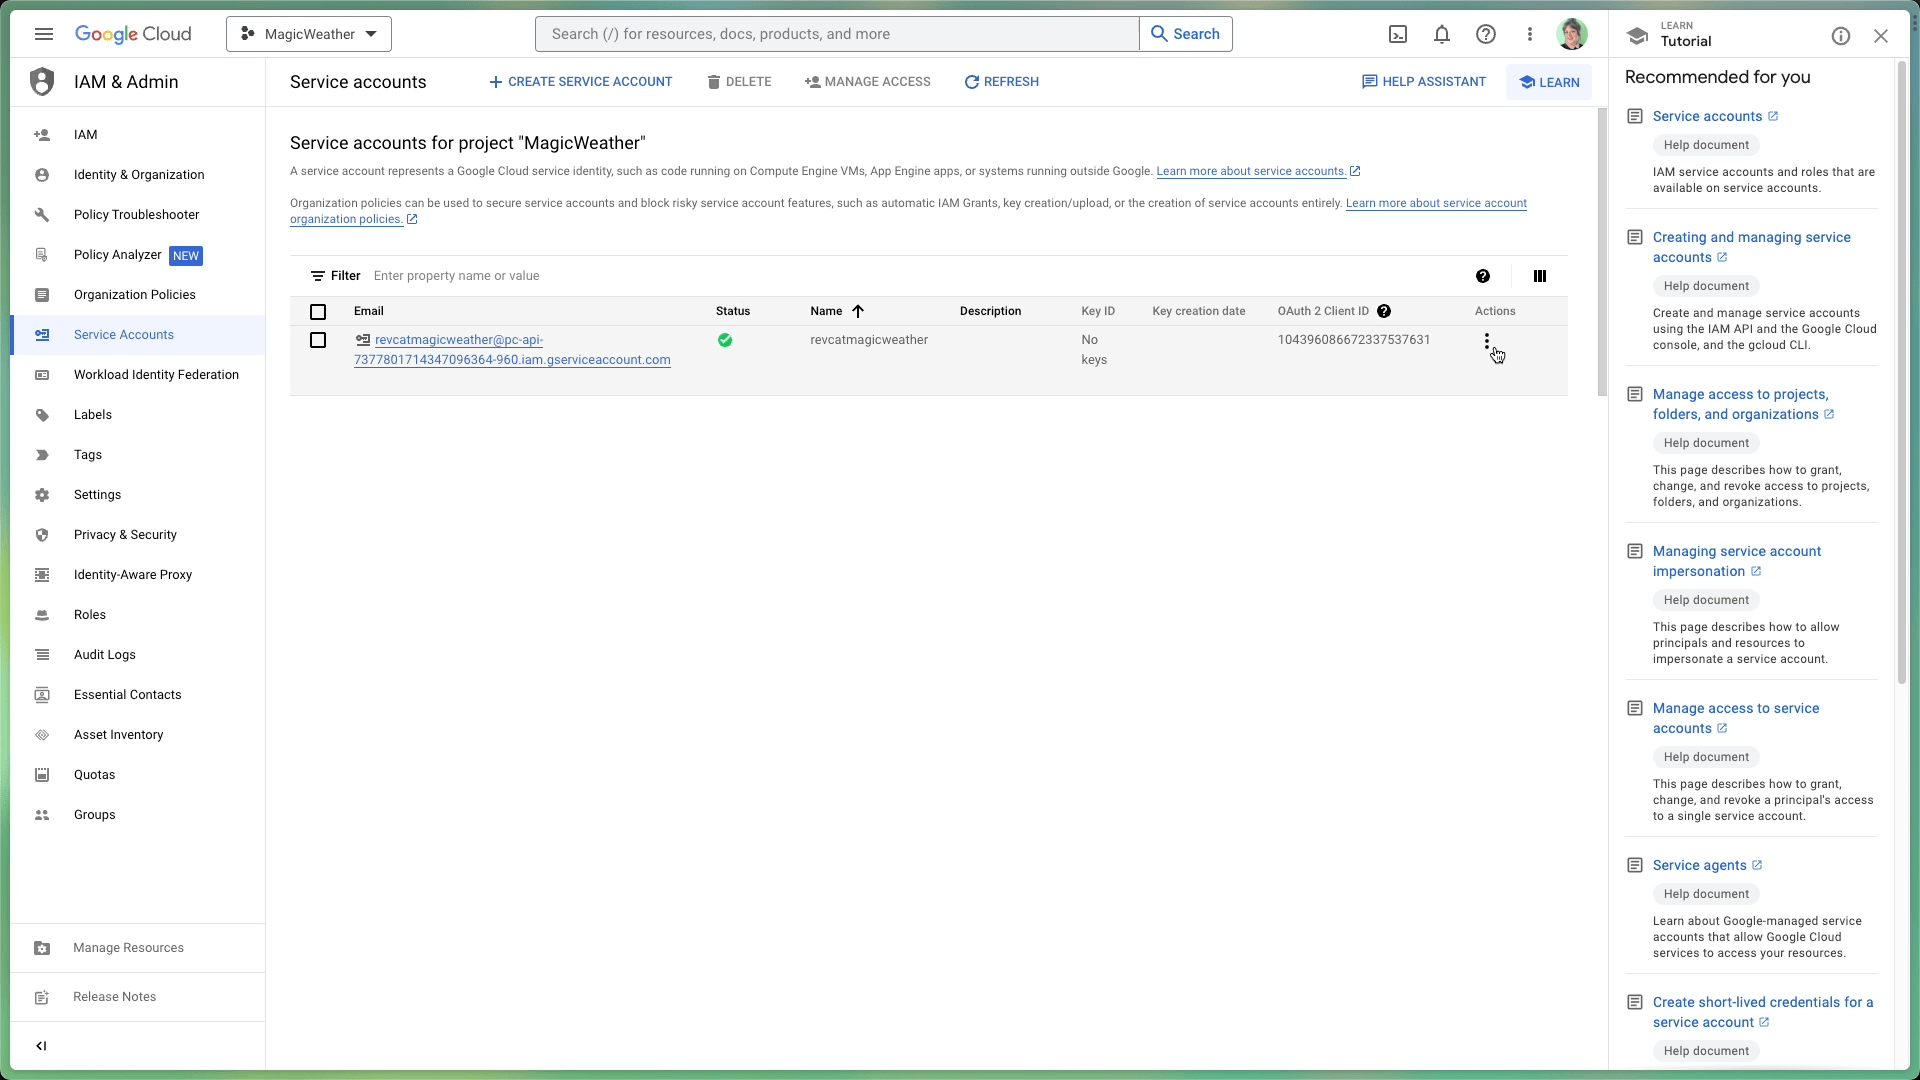
2. 서비스 계정 생성
Google Cloud Console의 Service Accounts 섹션으로 이동하여 올바른 프로젝트 내에서 작업하고 있는지 확인하세요.
여기에서 RevenueCat이 Google 서비스와 인터페이스하는 데 사용할 수 있는 서비스 계정을 생성해야 합니다. Create Service Account를 클릭하고 의미 있는 이름을 지정한 다음 Create and continue를 선택하여 진행하세요.
역할을 할당하라는 메시지가 표시되면 다음을 포함해야 합니다:
Pub/Sub Admin – Google의 실시간 서버 알림 처리에 필요합니다. Monitoring Viewer – 큐 메트릭 및 성능에 대한 가시성을 제공합니다.
> 참고: 검색창에서 역할이 반환되지 않으면 목록의 Pub/Sub 및 Monitoring 카테고리에서 수동으로 찾을 수 있습니다.
이제 개인 키 파일을 생성할 차례입니다.
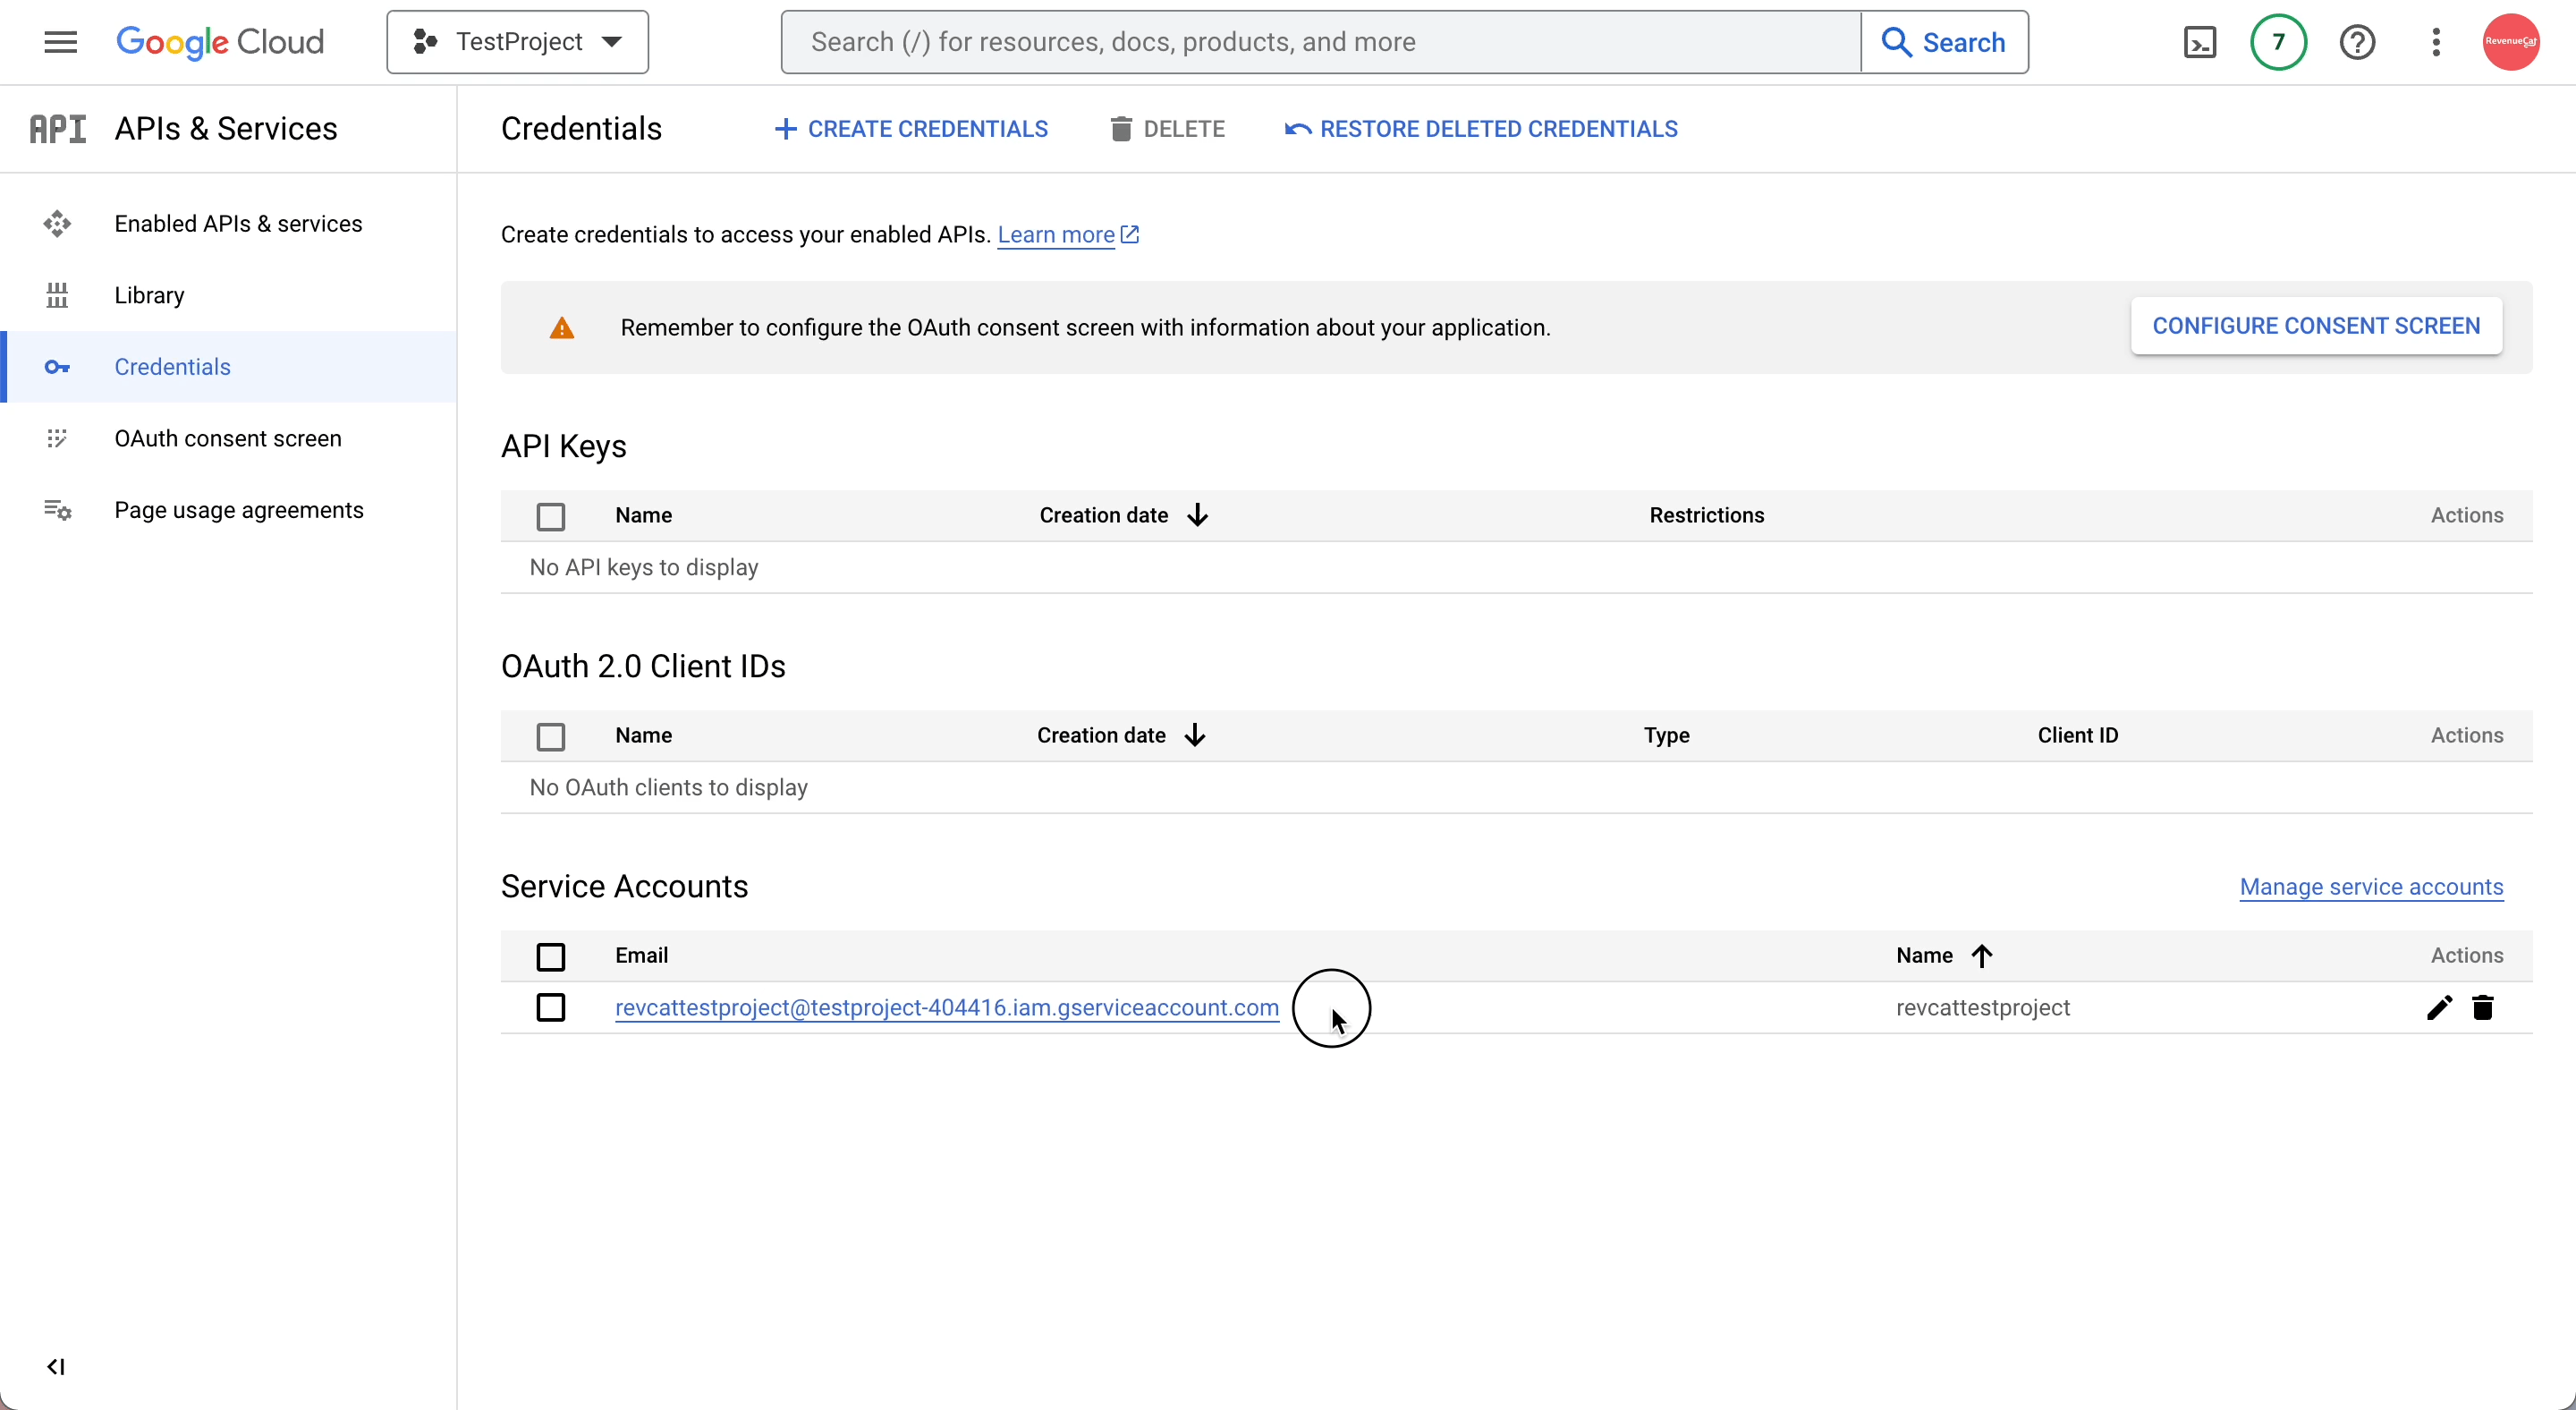
Google Cloud Console의 Service Accounts 패널에서 방금 생성한 서비스 계정을 찾으세요. "Actions" 열 아래의 세 점 아이콘을 클릭하고 Manage Keys를 선택합니다.
거기에서 Add Key를 누른 다음 Create new key를 선택합니다. 대화 상자가 나타나면 진행하기 전에 JSON 형식을 선택해야 합니다. 파일을 다운로드하세요. 이 JSON 키는 나중에 설정 프로세스에서 필요합니다.
3. RevenueCat에 재정 액세스 권한 부여
Google Play Console의 Users and Permissions 섹션으로 이동합니다. 거기에서 Invite user를 클릭하여 이전에 생성한 서비스 계정 이메일(2단계)을 추가하세요.
다음으로 App permissions에서 RevenueCat이 액세스할 특정 앱을 선택해야 합니다. 그런 다음 Account permissions 영역으로 스크롤하세요. 여기에서 모든 것이 원활하게 실행되는 데 필요한 액세스 권한을 부여합니다.
다음 권한이 선택되어 있는지 확인하세요:
앱 세부정보 읽기 및 대량 보고서 다운로드 액세스 재무 데이터, 주문 기록 및 취소 피드백에 액세스- 구독 및 고객 주문 관리
모든 것이 올바르게 보이면 하단으로 스크롤하여 Send invite를 클릭하세요. 보낸 후에는 Users and Permissions 개요로 돌아갑니다. 여기서 수락된 후 서비스 계정이 활성 상태로 나열되어야 합니다.
4. RevenueCat에 자격 증명 JSON 등록
마무리하려면 RevenueCat 대시보드로 이동하여 프로젝트 설정을 엽니다. 이전에 저장한 JSON 자격 증명 파일(2단계에서)을 찾아서 설정 영역으로 끌어다 놓거나 파일 선택기를 사용하여 수동으로 찾으세요.
업로드한 후에는 Save를 눌러 변경 사항을 적용하는 것을 잊지 마세요. RevenueCat은 자격 증명 확인을 시작하며, 약 36시간 이내에 Google Play 구매를 통합을 통해 처리할 수 있습니다.
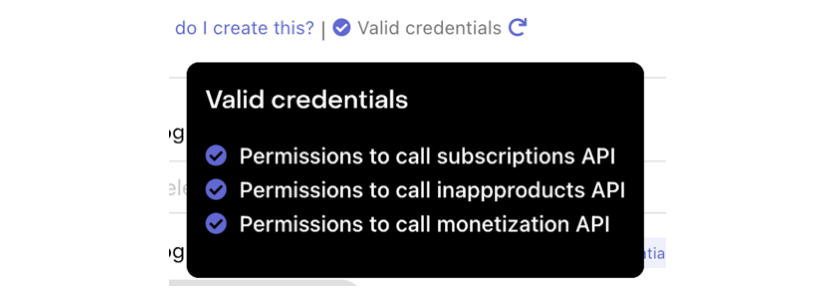
아래와 같이 "Validate Credentials" 버튼을 클릭하여 자격 증명을 확인할 수 있습니다:

요약이 표시되어 유효성 검사 결과를 보여주고 Google 자격 증명의 현재 상태에 대한 인사이트를 제공합니다. 모든 것이 올바르게 설정되면 업로드한 JSON 파일 아래에 "Valid credentials" 메시지와 함께 필요한 모든 권한의 체크리스트가 표시됩니다.
5. 서명된 APK 또는 Android App Bundle 업로드
이전 단계를 완료한 후에는 모든 것이 올바르게 연결되었는지 확인하기 위한 몇 가지 최종 확인 사항이 있습니다:
- 서명된 APK 또는 App Bundle이 Google Play Console에 성공적으로 업로드되었는지 확인합니다.
- 릴리스가 필요한 모든 검토 및 승인 단계를 거쳤는지 확인합니다.
- 앱이 Closed 또는 Open 테스트 트랙에서 사용 가능하고 적어도 하나의 테스터 계정을 추가했는지 확인합니다.
- 구독 상품이 Play Console에서 Active로 표시되어 있는지 다시 확인합니다.
- 마지막으로 RevenueCat에서 사용하는 package name이 Google Play에 등록된 것과 문자 하나하나 정확히 일치하는지 확인합니다.
이러한 최종 유효성 검사는 설정 문제를 방지하고 RevenueCat이 Google Play 데이터와 원활하게 동기화될 수 있도록 하는 데 필수적입니다.
휴, 축하합니다! 까다로운 부분을 통과하셨습니다!
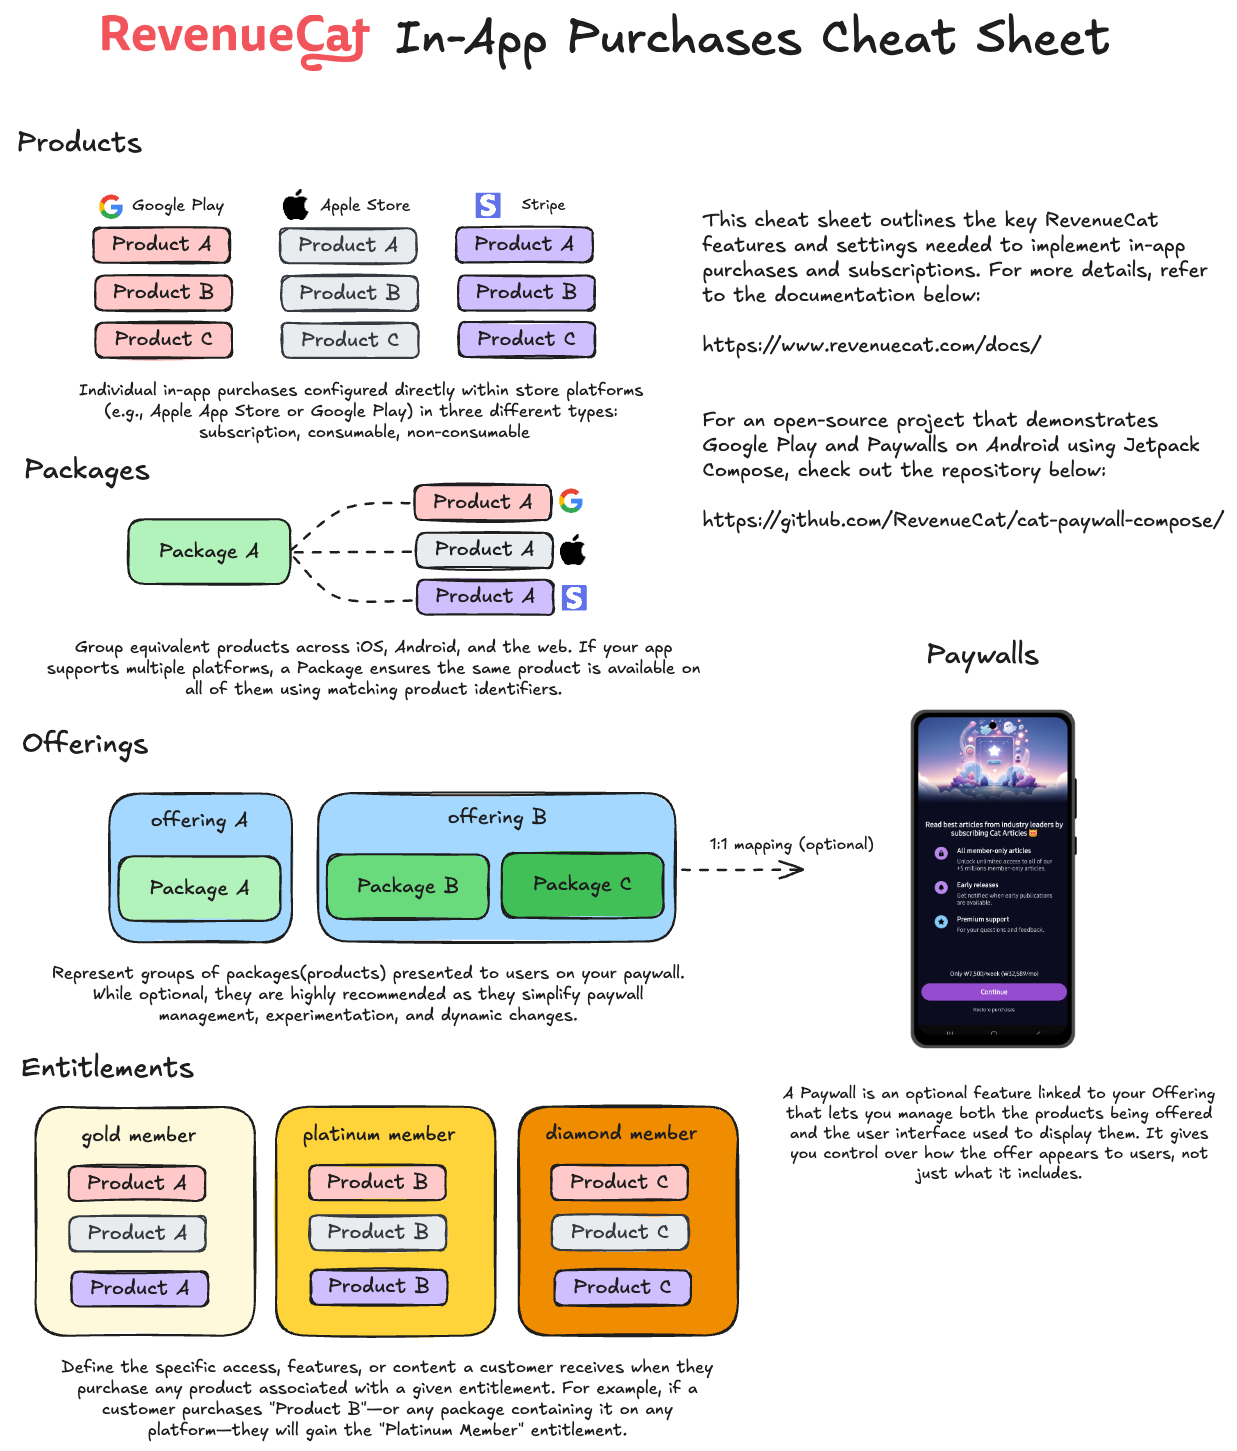
Product, Offering, Package, Entitlement
0:6:00이 시점에서 복잡한 설정의 대부분은 완료되었습니다. 이제 수익화 전략을 구성하기 전에 이해해야 하는 RevenueCat의 네 가지 필수 개념인 Product, Offering, Package, Entitlement에 익숙해질 시간입니다.
각각은 플랫폼 간에 인앱 결제를 정의하고, 표시하고, 관리하는 방법에서 고유한 역할을 합니다.
🧩 Product
Product는 Google Play, Apple App Store 또는 웹과 같은 스토어 플랫폼에서 직접 생성되고 관리되는 개별 인앱 결제 항목입니다. 이것이 수익화의 기본 단위입니다. 월간 구독, 평생 액세스 또는 일회성 구매를 생각해 보세요. 각 상품에는 스토어에서 정의한 고유한 식별자, 가격 및 기간 설정이 있습니다.
> 예: Google Play에서 구성된 com.app.pro_monthly와 같은 월간 구독 상품.
🎯 Offering
Offering은 앱에서 페이월(Paywall) 경험으로 제공되도록 함께 그룹화된 상품 모음입니다. Offering은 RevenueCat 대시보드에서 구성되며 앱 업데이트 없이도 A/B 테스트, 가격 실험 및 지역별 또는 사용자 세그먼트별 페이월을 관리할 수 있는 유연성을 제공합니다.
> 예: default라는 이름의 Offering에는 사용자에게 표시되는 월간, 연간 및 평생 옵션과 같은 여러 패키지가 포함될 수 있습니다.
📦 Package
Package는 다양한 플랫폼(예: iOS, Android, Web)에서 동등한 상품에 대한 래퍼 역할을 합니다. 이를 통해 하나의 가격 옵션(예: 월간 구독)을 플랫폼 간에 일관되게 제시하면서 각 스토어의 특정 상품 ID에 연결할 수 있습니다.
각 패키지에는 Offering 내에서 고유한 식별자(예: monthly, annual)가 있으며, RevenueCat이 사용자의 플랫폼에 따라 올바른 상품을 확인하는 데 도움이 됩니다.
> 예: monthly 패키지는 iOS의 com.app.pro_monthly_ios와 Android의 com.app.pro_monthly_android에 매핑될 수 있습니다.
🏷️ Entitlement
Entitlement는 성공적인 구매 후 사용자가 액세스할 수 있는 것을 정의합니다. 잠금 해제된 기능이나 콘텐츠를 나타내며, 기본 상품 또는 패키지 식별자를 추상화합니다. Entitlement를 사용하면 상품 ID를 앱에 하드코딩하지 않고도 사용자 액세스 로직(예: "프리미엄 액세스 권한")을 관리할 수 있습니다.
또한 RevenueCat이 장치 및 플랫폼 간에 구매를 추적하고 복원하는 방법의 중심입니다.
> 예: premium이라는 Entitlement는 월간 또는 연간 구독과 같은 해당 액세스 수준과 관련된 상품을 구매한 사용자에게 부여될 수 있습니다.
치트 시트
이 네 가지 요소가 함께 작동하는 방식을 이해하면 크로스 플랫폼 구독을 관리하고, 가격 전략을 실험하고, 원활한 인앱 결제 경험을 제공하는 것이 더 쉬워집니다.
더 쉽게 이해하려면 아래의 RevenueCat In-App Purchases Cheat Sheet에서 시각적 다이어그램을 참조하세요:
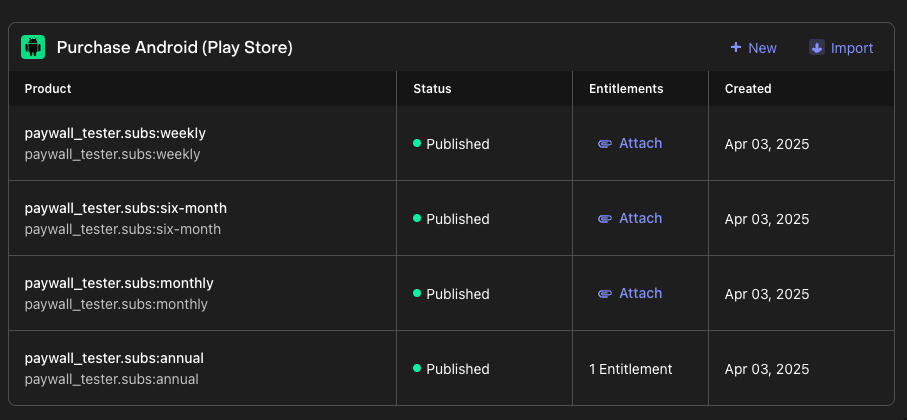
스토어 상품 가져오기
0:03:00Why Import Products?
In the previous step, you created products directly in Google Play Console. However, RevenueCat needs to know about those products so it can manage purchases, validate receipts, and track subscriptions on your behalf. Importing products into RevenueCat bridges the gap between your store configuration and RevenueCat's platform.
Once imported, RevenueCat can:
- Validate purchases: Verify that transactions are legitimate by communicating with Google Play.
- Track subscription status: Monitor renewals, expirations, and cancellations automatically.
- Provide unified analytics: Give you a single dashboard view of revenue, subscribers, and product performance.
- Power Entitlements and Offerings: Link products to entitlements and group them into offerings for your paywalls.
How to Import
Go to the RevenueCat dashboard, navigate to your project, and open the Products tab under Product Catalog.
Click the + New button in the top right corner, then select Import Products from the dropdown menu. RevenueCat will automatically fetch and display a list of available in-app products from your connected Google Play store account.
Once your products have been imported, you'll see that the in-app purchase items have been successfully added to your RevenueCat project. These imported products are now ready to be attached to Entitlements and grouped into Offerings in the next steps.
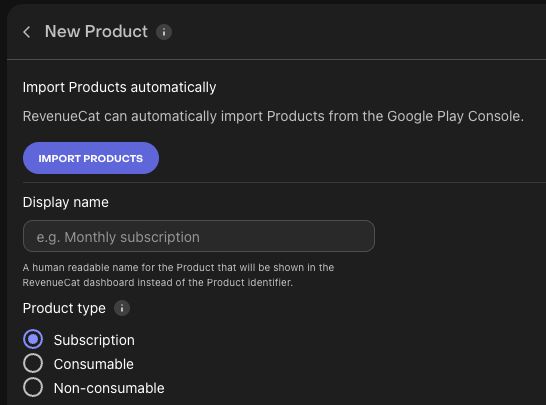
Entitlement 생성하기
0:05:00이제 상품을 가져오거나 생성했으므로 Entitlement를 설정할 차례입니다. 배운 것처럼 Entitlement는 성공적인 구매 후 사용자가 액세스할 수 있는 것을 정의합니다. "구매"는 사용자가 서비스에 액세스하기 위해 수행하는 일회성 구매 또는 구독과 같은 모든 유형의 인앱 거래를 나타낼 수 있습니다.
일반적으로 기능 액세스 계층을 기반으로 하나 이상의 Entitlement를 생성하려고 할 것입니다(예: "has_premium_access"). 이러한 Entitlement를 통해 앱 내에서 제한된 기능이나 콘텐츠에 대한 액세스를 제어할 수 있습니다.
새 Entitlement를 생성하려면:
- 프로젝트 대시보드의 왼쪽 메뉴에서 Product Catalog로 이동합니다.
- Entitlements 탭을 클릭합니다.
- ➕ New Entitlement를 선택합니다.
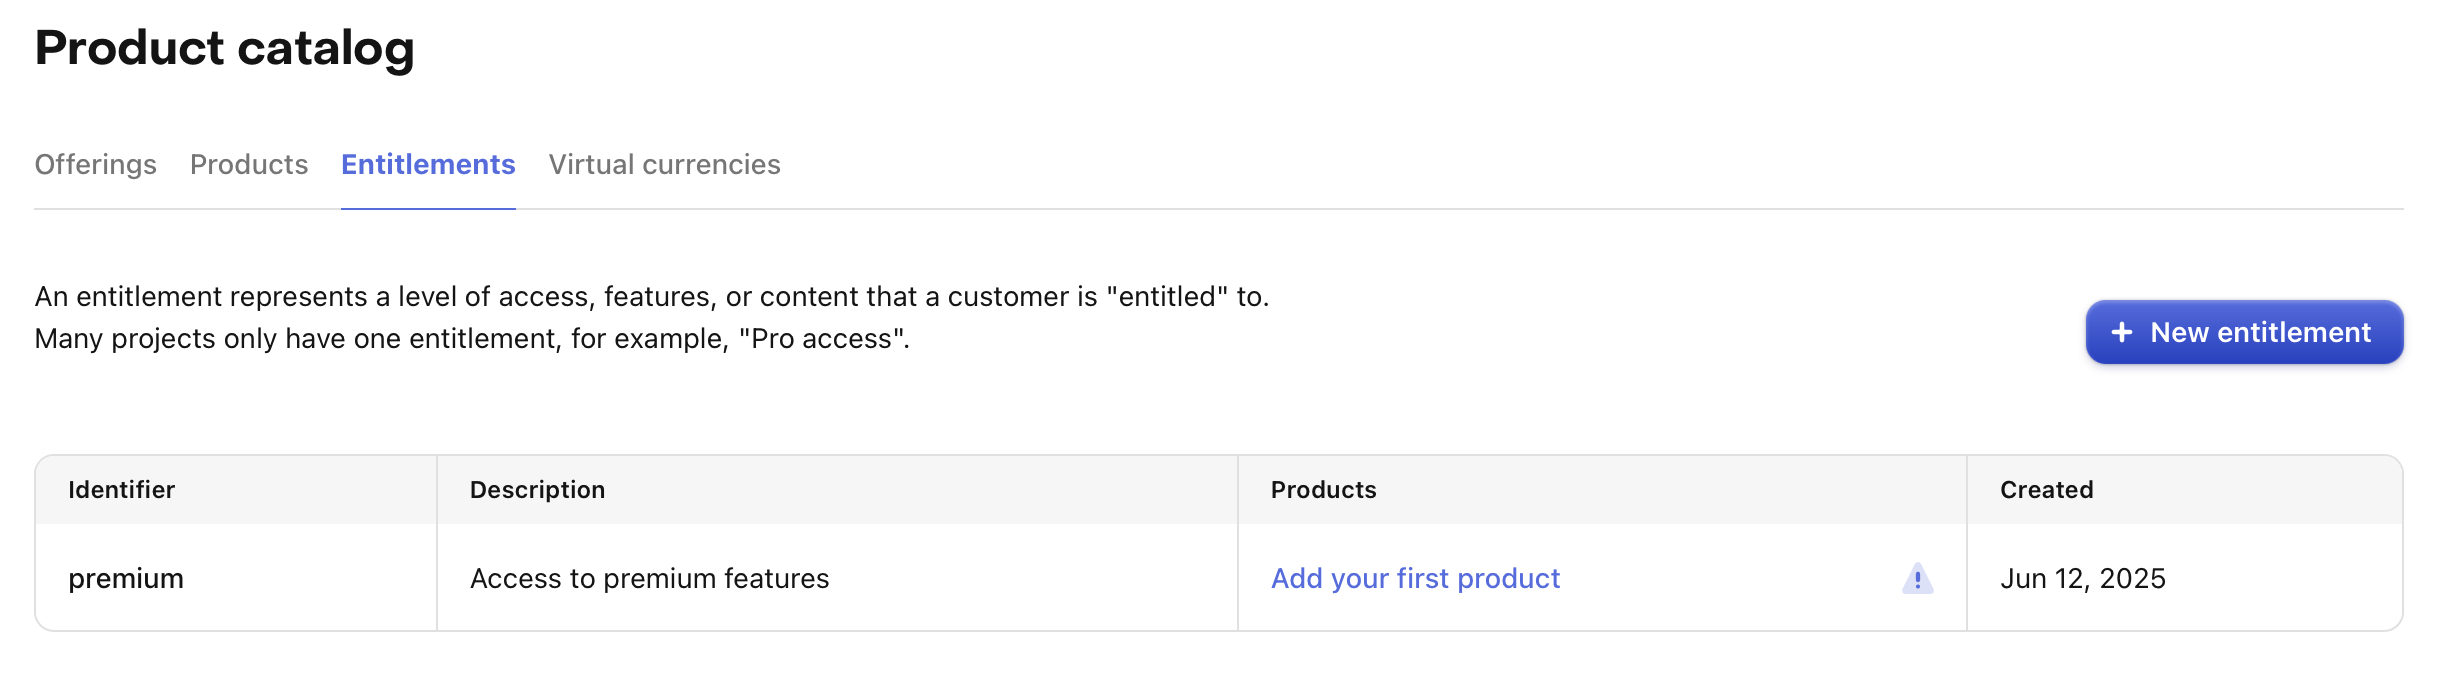
Entitlement에 대한 고유 식별자를 입력하라는 메시지가 표시됩니다(예: "pro"). 이 식별자는 나중에 앱에서 사용자의 액세스 수준을 확인하기 위해 참조하게 됩니다.
대부분의 앱은 단일 Entitlement를 사용하지만 필요한 경우 여러 개를 만들 수 있습니다. 예를 들어, 내비게이션 앱은 전체 액세스에 대한 구독("pro")을 제공하고 특정 지도 지역을 잠금 해제하기 위한 일회성 구매도 판매할 수 있습니다. 이 경우 하나의 "pro" Entitlement와 함께 각 지역에 대한 추가 Entitlement(예: "map_north_america", "map_europe")가 있을 것입니다.
Entitlement에 상품 연결하기
이제 Entitlement에 상품을 연결할 차례입니다. 이는 인앱 결제를 잠금 해제하는 액세스에 연결합니다. 이 설정을 통해 사용자가 상품을 구매하면 해당 Entitlement가 부여되어 앱의 특정 기능이나 콘텐츠에 액세스할 수 있습니다.
예를 들어, 사용자에게 주어진 Entitlement가 있는지 확인하는 간단한 if 문을 사용하여 제한된 기능을 쉽게 구현할 수 있습니다.
Entitlement에 상품을 연결하려면:
- RevenueCat 대시보드에서 Entitlements 탭을 엽니다.
- 구성하려는 Entitlement를 클릭합니다.
- Attach 버튼을 클릭합니다.
- 이미 상품을 추가한 경우 목록에 표시됩니다. 연결하려는 상품을 선택하기만 하면 됩니다.
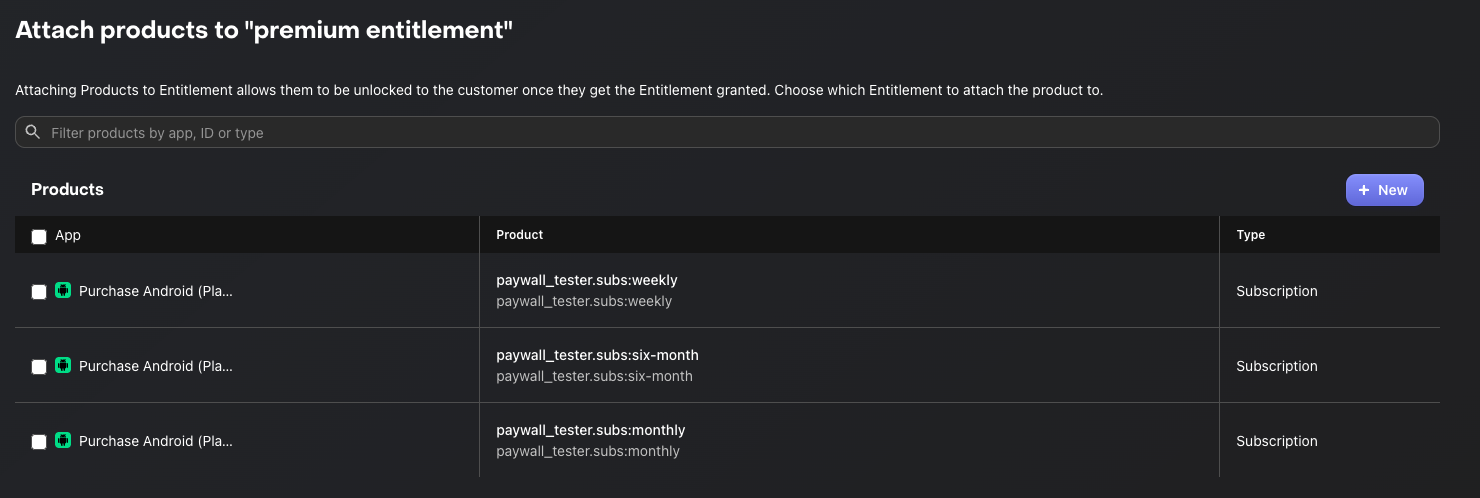
Entitlement에 연결된 상품을 구매하면 해당 상품의 기간 동안 Entitlement가 활성화됩니다.
구독 상품의 경우 Entitlement는 구독 기간 동안 활성 상태로 유지됩니다. 비소모성 또는 소모성 구매(Entitlement에 연결된 경우)의 경우, Entitlement는 일반적으로 콘텐츠를 영구적으로 잠금 해제합니다.
이 메커니즘을 사용하면 앱에서 복잡한 로직을 처리하지 않고도 구매 유형에 따라 기능 액세스를 관리할 수 있습니다.
앱에서 Paywall을 구현할 계획이 없다면 마무리 섹션으로 건너뛸 수 있습니다. 그렇지 않으면 Offering 생성 방법을 배우기 위해 다음 단계로 계속하세요.
Offering 생성하기
0:07:00If you want to introduce Paywalls in your app, the first step is to create Offerings. An Offering represents a set of products that are presented to users on your paywall.
Creating an Offering
To create a new Offering, navigate to Product Catalog → Offerings in your RevenueCat dashboard, then click the + New button.
You'll be prompted to fill in the following fields:
- Identifier: A unique key used to reference this offering in your code (e.g.,
default). This cannot be changed later, so choose a meaningful name. - Display Name: A human-readable name for this offering that helps you identify it in the dashboard (e.g., "Default Offering").

Once you've filled in the details, click Create to save the new Offering. Your newly created Offering will now appear in the Offerings list.
Note that RevenueCat automatically creates a "Default" Offering for your project. You can use this default offering or create additional ones to support different paywall configurations, A/B tests, or regional pricing strategies.
Adding Packages
A Package serves as a wrapper for equivalent products across different platforms (e.g., iOS, Android, Web). This provides a single source of truth for your products across platforms.
For example, if a user purchases a product on Android, they can still access the same entitlement on their iOS device, as long as they're logged into the same account.
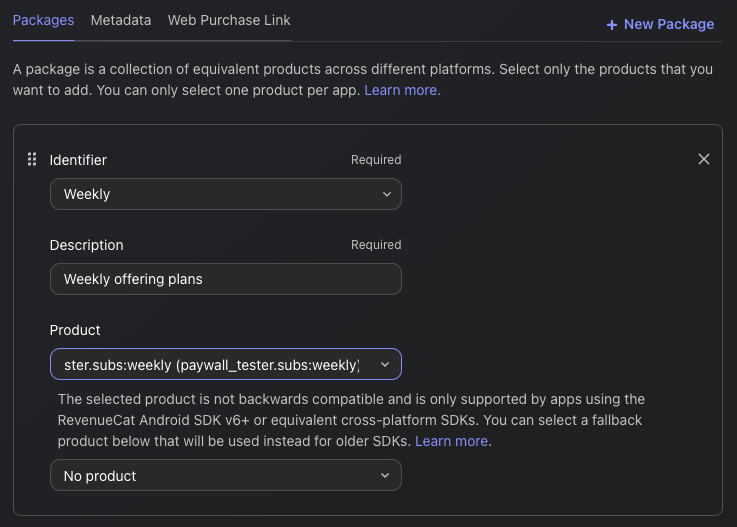
To create a package, navigate to your newly created Offering, then click the Edit button to configure the details, and then you can add packages by clicking the + New Package in the Packages section.
From there:
- Choose an Identifier from the dropdown that best represents the package duration (e.g., monthly, annual).
- If none of the predefined durations fit—such as in the case of consumable purchases—you can select a custom identifier instead.
- Add a description to help clarify the purpose or contents of the package.
- Attach the relevant products that match the chosen duration (e.g., monthly products across iOS and Android).
- Click Save to create the package.
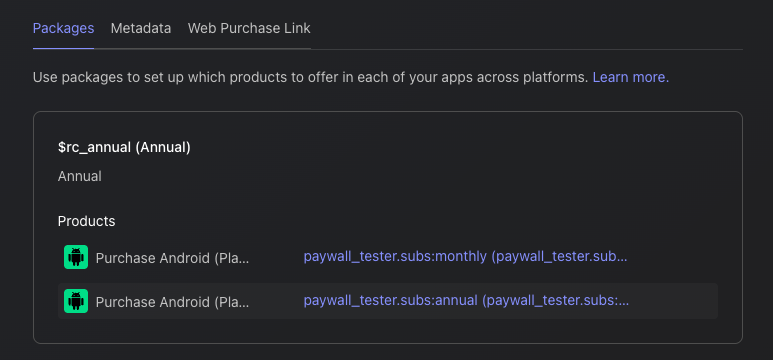
Once you've added all the Packages to your Offering, you'll see the results displayed as shown below:
The relationships between Offerings and Packages
So, an Offering can contain multiple Packages, allowing you to "offer" different options to users. This means you can present various choices—such as monthly, annual, or lifetime plans—all within a single Offering, as illustrated in the diagram below:
Offering (e.g. "pro plan")
                    |
       --------------------------------
       |              |              |
   Package A      Package B      Package C
   ("monthly")    ("annual")    ("lifetime")
       |              |              |
 Product A1      Product B1      Product C1
 (iOS/Android)   (iOS/Android)   (iOS/Android)
Alright, time to create some awesome Paywalls!
페이월 생성하기
0:07:00A paywall is a screen that encourages users to purchase your products. RevenueCat's paywall system is built on a server-driven UI, allowing you to update layouts instantly using the Paywall Editor without needing to release a new app version.

This allows your team to focus on A/B testing, refining offerings, and optimizing messaging to boost subscriptions, all without the delays of app updates. If you want to deep dive into the server-driven UI approach, you can read Server-driven UI SDK on Android: how RevenueCat enables remote paywalls without app updates.
Prerequisites: Offering Setup
Before creating a paywall, you must have at least one Offering configured with packages. The paywall will be linked to an Offering, and the packages within that Offering determine which products are displayed to users.
How Paywalls Connect to Offerings
Understanding the relationship between Paywalls and Offerings is crucial:
- Offering = The container that holds your packages (products)
- Paywall = The visual presentation layer that displays those packages
- One Offering can have one active Paywall at a time
- When you select an Offering for your paywall, it automatically has access to all packages within that Offering
Creating a New Paywall
To start building, go to the Paywalls page for your project and click + New Paywall.

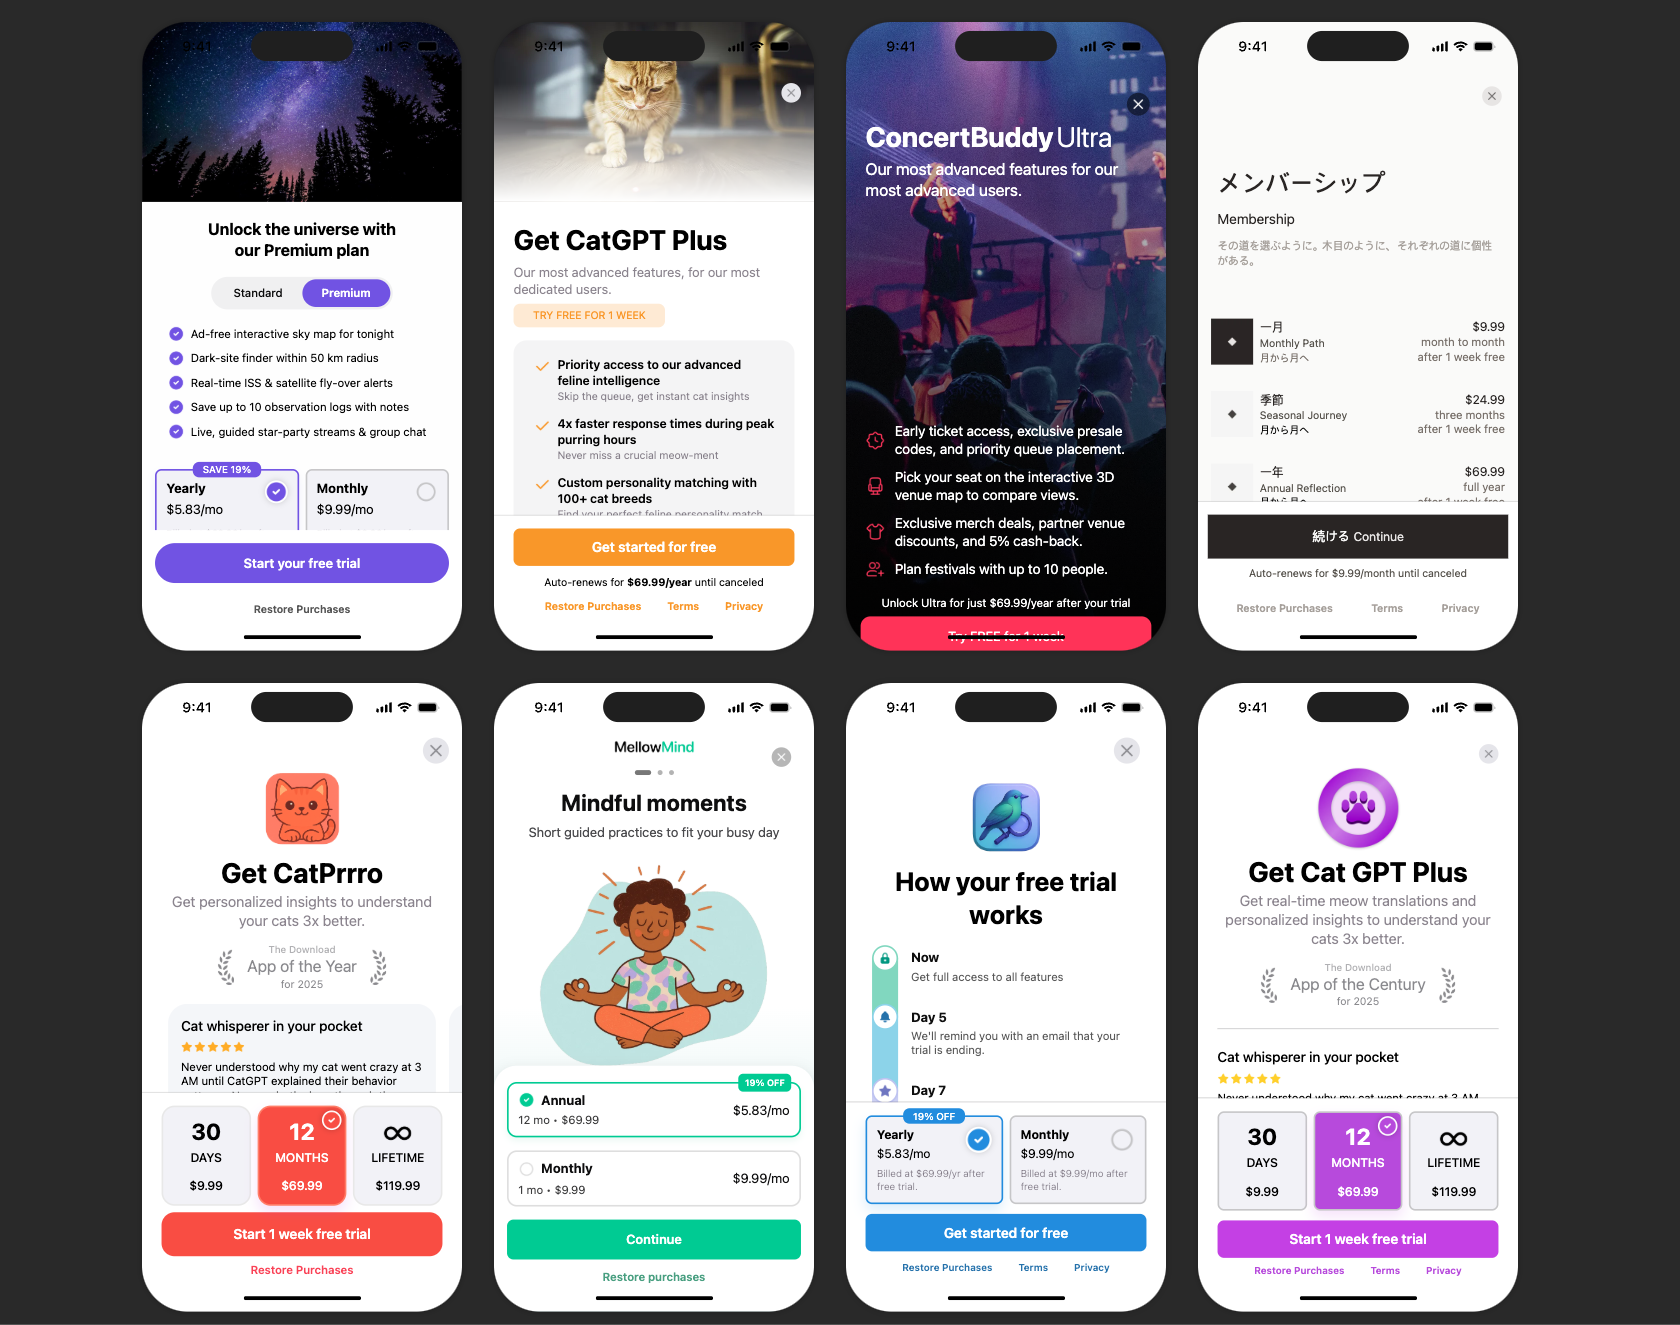
Choose a Starting Point
You have three options to begin:
- Pre-built Templates (Recommended): Start with professionally designed templates and customize them.
- Start from Scratch: Build your paywall from a blank canvas.
- Import from Figma: Import designs directly from Figma.
Using the Paywall Editor
The Paywall Editor consists of three main areas:
- Left Sidebar: Add components, view the layer hierarchy, manage branding and media assets.
- Center Preview: Real-time visualization of your paywall.
- Right Panel: Configure properties for the selected component (sizing, styling, behavior).
Key Configuration Steps
- Set the Paywall Name: Give your paywall a descriptive name (e.g., "Main Subscription Paywall").
- Select an Offering: Choose which Offering this paywall will display. The identifier links the paywall to your Offering.
- Configure Components: Add and arrange text, images, icons, package selectors, and purchase buttons.
- Style Your Design: Customize colors, fonts, spacing, and images to match your app's branding.
- Set Up Purchase Button: Ensure the purchase button is connected to trigger checkout for the selected package.
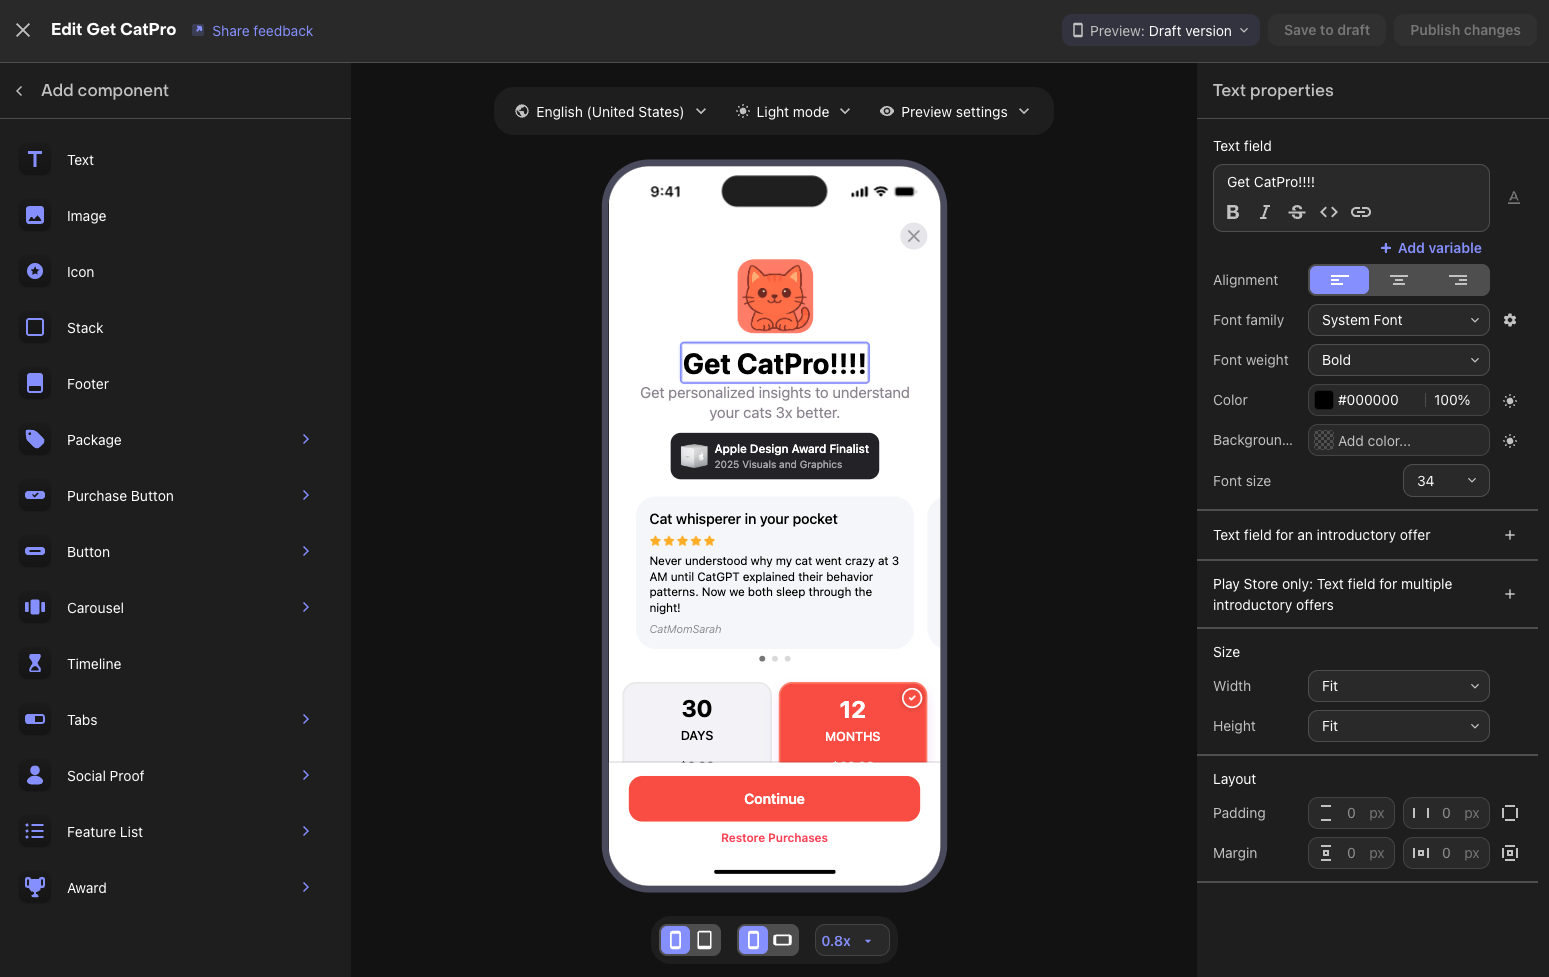
Available Components
RevenueCat provides various building blocks for your paywall:
- Text & Images: Headlines, descriptions, feature lists, and visual assets.
- Package Selector: Displays your subscription options from the linked Offering.
- Purchase Button: Triggers the purchase flow for the selected package.
- Footer: Terms of service, privacy policy, and restore purchases links.
- Stacks & Containers: Layout components to organize other elements.
- Carousels: Swipeable content sections.
Preview Options
Use the editor's preview controls to test your paywall:
- Toggle between Light and Dark mode
- Switch between different device sizes
- Preview different locales if you have localized content
Draft vs Published
Paywalls have two states:
| State | Description | Visible to Users |
|---|---|---|
| Draft | Work in progress, saved but not active | No |
| Published | Live and served to users via SDK | Yes |
Workflow:
- Make changes and click "Save to draft" to save your work without affecting live users
- When ready, click "Publish changes" to make your paywall live
- You can toggle a published paywall back to inactive status anytime
You've completed all the configuration steps for setting up Google Play products and the RevenueCat dashboard! Next, let's look at how to test your in-app purchases.
Testing in-app purchases (Optional)
0:05:00Before shipping your app to production, you'll want to test the complete purchase flow. There are two approaches to testing in-app purchases: RevenueCat Test Store for fast, deterministic testing without any special account setup, and Google Play License Testing for end-to-end testing with Google's infrastructure.
RevenueCat Test Store
Test Store is RevenueCat's built-in testing environment that allows you to test in-app purchase flows without connecting to Google Play. It's automatically provisioned with every RevenueCat project and gives you complete control over purchase outcomes.
Key benefits of using Test Store:
- Deterministic outcomes: Control whether purchases succeed, fail, or get cancelled — no more flaky sandbox behavior.
- No special accounts needed: Skip the hassle of creating and managing license tester accounts.
- Fast feedback: Test purchase flows in seconds rather than minutes.
- Works in CI/CD: Write automated tests for your purchase logic that run reliably in any environment.
To get started with Test Store, navigate to your RevenueCat dashboard, go to Apps & providers, and enable Test Store. You'll receive a Test Store API key prefixed with test_ that you can use in place of your production API key during development and testing.
Google Play License Testing
Google provides license testing that allows you to simulate purchases using Google Play's infrastructure without being charged real money.
To set up license testing:
- Go to the Google Play Console.
- Navigate to Settings → License testing.
- Add the Google account email addresses of your testers.
- Set the license response to RESPOND_NORMALLY for standard testing.
When testing on a real device with a Google account added as a license tester, purchases will show as "Test order" and no real charges will be made. This gives you end-to-end testing with Google's actual billing infrastructure.
With your testing approach configured, you're ready to ship with confidence! Let's wrap up in the conclusion.
마무리
이 Codelab에서는 Google Play 상품을 구성하고, Google Play 계정을 RevenueCat 대시보드에 연결하고, 상품, Offering, Entitlement 및 페이월을 설정하는 방법을 배웠습니다. 이제 모든 것이 구성되었으므로 RevenueCat SDK를 프로젝트에 통합할 준비가 되었습니다!
다음 단계:
- 인앱 결제 및 페이월을 위한 RevenueCat Android SDK 통합 — 완전히 작동하는 수익화 흐름을 향한 다음 단계입니다.
- 인앱 결제 및 페이월을 위한 RevenueCat Kotlin Multiplatform SDK 통합 — KMP/CMP 프로젝트를 위한 완전히 작동하는 수익화 흐름을 향한 다음 단계입니다.
- 인앱 결제 및 페이월을 위한 RevenueCat Flutter SDK 통합 — Flutter 프로젝트를 위한 완전히 작동하는 수익화 흐름을 향한 다음 단계입니다.
- Product Tutorials: RevenueCat을 시작하고 최대한 활용하는 데 도움이 되는 비디오 튜토리얼.