Test Store Overview
0:02:00Welcome to the RevenueCat Test Store setup guide for iOS!
Testing in-app purchases has always been challenging. You need to configure sandbox accounts, create test products, wait for app review, and deal with flaky network conditions. RevenueCat's Test Store eliminates these pain points by providing a deterministic, fast, and reliable testing environment.
What is Test Store?
Test Store is RevenueCat's built-in testing environment that allows you to test in-app purchase flows without connecting to the App Store. It's automatically provisioned with every new RevenueCat project and gives you complete control over purchase outcomes.
What you'll learn
This codelab will guide you through the complete process of setting up and using RevenueCat's Test Store for iOS development. You'll start by enabling Test Store in your RevenueCat dashboard and configuring your iOS application to use Test Store API keys. Then, you'll learn how to test purchase flows with deterministic outcomes, write automated unit tests for your in-app purchase logic, and integrate these tests into your CI/CD pipeline using GitHub Actions.
Benefits of Test Store
Test Store revolutionizes how you test in-app purchases. Unlike traditional testing methods that require you to wait for App Store Connect configuration or app approval, Test Store provides instant testing capabilities. You get complete deterministic control over purchase outcomes: whether a transaction succeeds, fails, or gets cancelled is entirely up to you. This means no more dealing with flaky network connections or unreliable sandbox environments.
The real power comes when you start writing automated tests. With Test Store, you can build reliable unit tests for your purchase logic that run consistently in any environment, including CI/CD systems like GitHub Actions. This enables you to iterate quickly on your purchase flows, testing changes in seconds rather than minutes or hours.
Prerequisites
Before you start, ensure you have:
- A RevenueCat account (free at revenuecat.com)
- An iOS project with RevenueCat SDK integrated (version 5.x or higher)
- Basic knowledge of Swift and iOS development
- Familiarity with SwiftUI (optional, for UI examples)
Enable Test Store in Dashboard
0:03:00The first step is to enable Test Store in your RevenueCat dashboard and obtain your Test Store API key.
Access the Dashboard
Start by logging into your RevenueCat dashboard and navigating to the Apps & providers section in the left sidebar menu. This is where you'll find all your connected apps and available store integrations.
Create Your Test Store
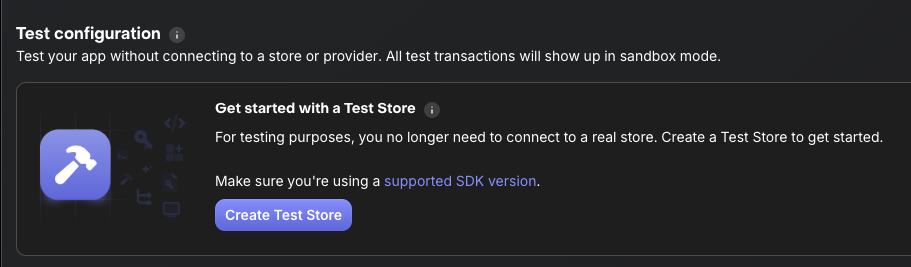
In the Apps & providers section, look for the Test Store option among the available providers. Test Store is automatically provisioned for every RevenueCat project, so you'll simply need to activate it by clicking Create Test Store or Enable Test Store. The setup is instant with no waiting for approvals or configuration sync.
Get Your API Key
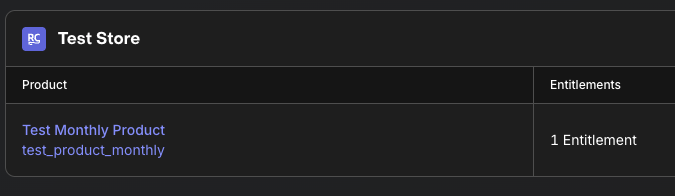
Once Test Store is enabled, click on the Test Store entry in your apps list to view its details. Here you'll find your Test Store API Key, which starts with the prefix test_. This key functions just like a regular RevenueCat API key, but with one crucial difference: it routes all purchase requests to Test Store instead of the App Store, giving you full control over the testing environment.
Understanding API Key Separation: Test Store API keys are completely separate from your production and sandbox keys. This separation is intentional and important for security. Never use Test Store keys in production builds; they should only be used in debug and test environments. You can create multiple Test Store configurations per project if needed for different testing scenarios.
What's Next?
Now that you have your Test Store API key, you're ready to configure your iOS application to use Test Store for testing.
Configure Test Store in iOS App
0:05:00Now let's configure your iOS application to use Test Store. The key is to use your Test Store API key instead of your production API key when running tests.
Step 1: Add Test Store API Key via Xcode Configuration
Create an xcconfig file or use Xcode build settings to manage your API keys per configuration. Create a file named Debug.xcconfig:
// Debug.xcconfig
REVENUECAT_API_KEY = test_YOUR_KEY_HERE
And a Release.xcconfig:
// Release.xcconfig
REVENUECAT_API_KEY = appl_YOUR_PRODUCTION_KEY
Then add REVENUECAT_API_KEY to your Info.plist:
<key>RevenueCatAPIKey</key>
<string>$(REVENUECAT_API_KEY)</string>
Step 2: Initialize SDK in Your App
Update your @main App struct to configure RevenueCat with the appropriate API key:
import RevenueCat
import SwiftUI

@main
struct MyApp: App {
    init() {
        // Read API key from Info.plist (set via xcconfig)
        let apiKey = Bundle.main.infoDictionary?["RevenueCatAPIKey"] as? String
            ?? "test_YOUR_KEY_HERE"

        Purchases.configure(withAPIKey: apiKey)

        // Enable debug logs for test builds
        #if DEBUG
        Purchases.logLevel = .debug
        #endif
    }

    var body: some Scene {
        WindowGroup {
            ContentView()
        }
    }
}
Step 3: Environment-Specific Configuration
For more advanced setups, you can create a configuration helper using #if DEBUG preprocessor directives:
enum RevenueCatConfig {
    static var apiKey: String {
        #if DEBUG
        return "test_YOUR_KEY_HERE"
        #else
        return "appl_YOUR_PRODUCTION_KEY"
        #endif
    }

    static func configure() {
        Purchases.configure(withAPIKey: apiKey)

        #if DEBUG
        Purchases.logLevel = .verbose
        #endif
    }
}
Then use it in your app initialization:
@main
struct MyApp: App {
    init() {
        RevenueCatConfig.configure()
    }

    var body: some Scene {
        WindowGroup {
            ContentView()
        }
    }
}
Verification
To verify Test Store is working:
- Run your app in debug mode in Xcode
- Check the Xcode console for
"Purchases SDK initialized with Test Store" - The SDK will indicate it's connected to Test Store instead of the App Store
Test Purchase Flows Interactively
0:05:00With Test Store enabled, you can now test purchase flows with complete control over outcomes. When Test Store shows its purchase dialog, you decide the result.
Understanding Test Store Purchase Dialog
When you initiate a purchase with Test Store, you'll see a custom Test Store dialog instead of the standard App Store purchase sheet. This dialog displays the product details and price just like a real purchase dialog, but with one key difference: you get to control the outcome. The dialog presents three clear options: Successful Purchase to simulate a completed transaction, Failed Purchase to test payment failures, and Cancel to simulate user cancellation. This deterministic behavior is what makes Test Store so powerful for testing.
Testing Success Flow
Let's test a successful purchase flow:
func purchaseProduct() async {
    do {
        // Fetch products from Test Store
        let offerings = try await Purchases.shared.offerings()

        guard let package = offerings.current?.availablePackages.first else {
            return
        }

        // Initiate purchase
        let (_, customerInfo, _) = try await Purchases.shared.purchase(package: package)

        // Check the result
        let isPremium = customerInfo.entitlements["premium"]?.isActive == true

        if isPremium {
            // Purchase successful!
            showPremiumContent()
        }
    } catch {
        // Handle error
        handlePurchaseError(error)
    }
}
Testing the Happy Path: Run your app and trigger the purchase flow as you normally would. When the Test Store dialog appears, tap "Successful Purchase". Your app should immediately grant premium access, and you can verify that the entitlements are properly updated. This lets you quickly validate that your success flow works correctly without needing a real payment method or sandbox account.
Testing Failure Scenarios
Now test how your app handles failures:
func handlePurchaseError(_ error: Error) {
    guard let purchasesError = error as? RevenueCat.ErrorCode else {
        showError("Unexpected error: \(error.localizedDescription)")
        return
    }

    switch purchasesError {
    case .purchaseCancelledError:
        // User cancelled - don't show error
        print("User cancelled purchase")
    case .purchaseInvalidError:
        // Invalid purchase
        showError("This purchase is not available")
    case .paymentPendingError:
        // Payment pending (e.g., awaiting parental approval)
        showPendingMessage()
    default:
        // Other errors
        showError("Purchase failed: \(error.localizedDescription)")
    }
}
Testing Error Handling: Trigger the purchase flow again, but this time when the Test Store dialog appears, tap "Failed Purchase". Your app should gracefully handle the error, showing an appropriate error message to the user. Confirm that the user doesn't receive premium access and that your app's state remains consistent. This is crucial for ensuring your error handling logic works correctly in production.
Testing Cancellation
struct PaywallView: View {
    @State private var isPurchasing = false
    var onDismiss: () -> Void

    var body: some View {
        Button(action: {
            Task {
                isPurchasing = true
                do {
                    try await purchaseProduct()
                } catch let error as RevenueCat.ErrorCode
                    where error == .purchaseCancelledError {
                    // User cancelled - just dismiss
                    onDismiss()
                } catch {
                    // Handle other errors
                    handlePurchaseError(error)
                }
                isPurchasing = false
            }
        }) {
            Text(isPurchasing ? "Processing..." : "Subscribe")
        }
        .disabled(isPurchasing)
    }
}
Testing User Cancellation: Open your paywall and tap the subscribe button. When the Test Store dialog appears, tap "Cancel" to simulate a user backing out of the purchase. Your paywall should dismiss cleanly without showing any error messages (cancellation is a normal user action, not an error state). Verify that no purchase was recorded and your app's state is unchanged.
Key Takeaways
The beauty of Test Store lies in its deterministic control. You decide exactly what happens with each purchase attempt. This means you can thoroughly test all scenarios (success, failure, and cancellation) in a matter of minutes, without needing real payment methods or dealing with the delays and complexities of sandbox accounts. By the time you're ready to integrate with the App Store, you'll have confidence that your purchase handling logic is rock-solid.
Write Automated Unit Tests
0:08:00One of Test Store's most powerful features is enabling automated unit testing of your in-app purchase logic. Let's write tests that run reliably in CI/CD.
Step 1: Set Up XCTest
XCTest is built into Xcode, so no external dependencies are needed. Simply ensure your project has a test target. If you used Xcode's default project template, one is already included. Your Package.swift or Xcode project should already have RevenueCat as a dependency:
// In your Package.swift or via Xcode SPM
dependencies: [
    .package(url: "https://github.com/RevenueCat/purchases-ios.git", from: "5.58.0")
]
Step 2: Create Purchase Repository Protocol
First, let's create a testable purchase repository using a Swift protocol:
protocol PurchaseRepository {
    func getOfferings() async throws -> Offerings
    func purchase(package: Package) async throws -> CustomerInfo
    func getCustomerInfo() async throws -> CustomerInfo
}

final class PurchaseRepositoryImpl: PurchaseRepository {

    func getOfferings() async throws -> Offerings {
        return try await Purchases.shared.offerings()
    }

    func purchase(package: Package) async throws -> CustomerInfo {
        let (_, customerInfo, _) = try await Purchases.shared.purchase(package: package)
        return customerInfo
    }

    func getCustomerInfo() async throws -> CustomerInfo {
        return try await Purchases.shared.customerInfo()
    }
}
Step 3: Create ViewModel with Business Logic
enum PaywallState {
    case loading
    case success(packages: [Package])
    case purchasing
    case purchaseSuccess
    case purchaseCancelled
    case error(message: String)
}

@MainActor
final class PaywallViewModel: ObservableObject {
    @Published var state: PaywallState = .loading

    private let repository: PurchaseRepository

    init(repository: PurchaseRepository) {
        self.repository = repository
    }

    func loadProducts() async {
        do {
            let offerings = try await repository.getOfferings()
            let packages = offerings.current?.availablePackages ?? []
            state = .success(packages: packages)
        } catch {
            state = .error(message: error.localizedDescription)
        }
    }

    func purchase(package: Package) async {
        state = .purchasing
        do {
            let customerInfo = try await repository.purchase(package: package)
            let isPremium = customerInfo.entitlements["premium"]?.isActive == true

            if isPremium {
                state = .purchaseSuccess
            } else {
                state = .error(message: "Purchase completed but entitlement not active")
            }
        } catch let error as RevenueCat.ErrorCode
            where error == .purchaseCancelledError {
            state = .purchaseCancelled
        } catch {
            state = .error(message: error.localizedDescription)
        }
    }
}
Step 4: Write Unit Tests with XCTest
Now create unit tests using a mock repository:
import XCTest
@testable import MyApp

final class MockPurchaseRepository: PurchaseRepository {
    var mockOfferings: Offerings?
    var mockCustomerInfo: CustomerInfo?
    var mockError: Error?

    func getOfferings() async throws -> Offerings {
        if let error = mockError { throw error }
        return mockOfferings!
    }

    func purchase(package: Package) async throws -> CustomerInfo {
        if let error = mockError { throw error }
        return mockCustomerInfo!
    }

    func getCustomerInfo() async throws -> CustomerInfo {
        if let error = mockError { throw error }
        return mockCustomerInfo!
    }
}

@MainActor
final class PaywallViewModelTests: XCTestCase {

    private var mockRepository: MockPurchaseRepository!
    private var viewModel: PaywallViewModel!

    override func setUp() async throws {
        mockRepository = MockPurchaseRepository()
        viewModel = PaywallViewModel(repository: mockRepository)
    }

    func testPurchaseSuccess() async {
        // Given: Mock successful purchase with active entitlement
        // Set up mockCustomerInfo with active "premium" entitlement

        // When: Purchase is initiated
        // await viewModel.purchase(package: mockPackage)

        // Then: State should be purchaseSuccess
        // XCTAssertEqual(viewModel.state, .purchaseSuccess)
    }

    func testPurchaseCancelled() async {
        // Given: Mock cancelled purchase
        mockRepository.mockError = RevenueCat.ErrorCode.purchaseCancelledError

        // When: Purchase is initiated
        // await viewModel.purchase(package: mockPackage)

        // Then: State should be purchaseCancelled
        // XCTAssertEqual(viewModel.state, .purchaseCancelled)
    }

    func testPurchaseFailed() async {
        // Given: Mock failed purchase
        mockRepository.mockError = RevenueCat.ErrorCode.paymentPendingError

        // When: Purchase is initiated
        // await viewModel.purchase(package: mockPackage)

        // Then: State should be error
        // if case .error(let message) = viewModel.state {
        //     XCTAssertTrue(message.contains("pending"))
        // } else {
        //     XCTFail("Expected error state")
        // }
    }
}
Step 5: Mock-Based Testing Alternative
For even more control, you can use a fully mocked approach:
final class SpyPurchaseRepository: PurchaseRepository {
    var getOfferingsCalled = false
    var purchaseCalled = false
    var lastPurchasedPackage: Package?

    var stubbedOfferings: Offerings!
    var stubbedCustomerInfo: CustomerInfo!
    var stubbedError: Error?

    func getOfferings() async throws -> Offerings {
        getOfferingsCalled = true
        if let error = stubbedError { throw error }
        return stubbedOfferings
    }

    func purchase(package: Package) async throws -> CustomerInfo {
        purchaseCalled = true
        lastPurchasedPackage = package
        if let error = stubbedError { throw error }
        return stubbedCustomerInfo
    }

    func getCustomerInfo() async throws -> CustomerInfo {
        if let error = stubbedError { throw error }
        return stubbedCustomerInfo
    }
}
Why This Approach Works
This testing approach eliminates the traditional pain points of testing in-app purchases. Because Test Store has no network dependencies, your tests run reliably every single time. No more flaky failures due to connection issues. Tests execute in seconds rather than minutes, giving you rapid feedback during development. You can achieve complete test coverage across all scenarios, including edge cases that would be difficult or time-consuming to reproduce with real payment systems.
The architecture we've built (with the protocol pattern separating business logic from the SDK) makes these tests both fast and maintainable. You can run them in any CI/CD environment like GitHub Actions, catching bugs before they ever reach production.
Run Tests in CI/CD
0:04:00Now let's configure your tests to run automatically in GitHub Actions, ensuring your purchase logic stays reliable with every code change.
Step 1: Create GitHub Actions Workflow
Create .github/workflows/ios-tests.yml:
name: iOS Tests

on:
  push:
    branches: [ main, develop ]
  pull_request:
    branches: [ main, develop ]

jobs:
  test:
    runs-on: macos-latest

    steps:
      - name: Checkout code
        uses: actions/checkout@v4

      - name: Select Xcode version
        run: sudo xcode-select -s /Applications/Xcode.app

      - name: Cache SPM packages
        uses: actions/cache@v3
        with:
          path: |
            ~/Library/Developer/Xcode/DerivedData
            .build
          key: ${{ runner.os }}-spm-${{ hashFiles('**/Package.resolved') }}
          restore-keys: |
            ${{ runner.os }}-spm-

      - name: Run unit tests
        env:
          REVENUECAT_TEST_STORE_API_KEY: ${{ secrets.REVENUECAT_TEST_STORE_API_KEY }}
        run: |
          xcodebuild test \
            -scheme MyApp \
            -destination 'platform=iOS Simulator,name=iPhone 15,OS=latest' \
            -resultBundlePath TestResults.xcresult \
            REVENUECAT_API_KEY=$REVENUECAT_TEST_STORE_API_KEY

      - name: Upload test results
        if: always()
        uses: actions/upload-artifact@v3
        with:
          name: test-results
          path: TestResults.xcresult
Step 2: Add Test Store API Key to GitHub Secrets
- Go to your GitHub repository
- Navigate to Settings → Secrets and variables → Actions
- Click New repository secret
- Name:
REVENUECAT_TEST_STORE_API_KEY - Value: Your Test Store API key (e.g.,
test_xxxxx) - Click Add secret
Step 3: Configure Xcode to Use the Secret
Update your xcconfig to read the environment variable when available:
// Debug.xcconfig
// Use environment variable if available (CI), fallback to local key
REVENUECAT_API_KEY = $(REVENUECAT_API_KEY:default=test_YOUR_KEY_HERE)
Step 4: Fastlane Alternative
If you use Fastlane for your iOS CI/CD, you can add a test lane:
lane :test do
  run_tests(
    scheme: "MyApp",
    devices: ["iPhone 15"],
    result_bundle: true,
    xcargs: "REVENUECAT_API_KEY=#{ENV['REVENUECAT_TEST_STORE_API_KEY']}"
  )
end
Verify Your Setup
Commit and push your changes to trigger the workflow. Head over to the GitHub Actions tab in your repository to watch your tests run automatically. You'll see real-time progress as the workflow checks out your code, sets up the macOS environment, and runs your test suite. Within a few minutes, you'll know whether all tests pass in the CI environment.
The Power of Automated Testing
Once this is set up, every pull request gets validated automatically before it can be merged. You'll get immediate feedback if any changes break your purchase logic, without having to manually test every scenario. Test Store ensures that your tests produce consistent results across every run, eliminating the frustration of flaky tests. This creates a quality gate that prevents buggy code from reaching your main branch, while saving countless hours that would otherwise be spent on repetitive manual testing.
Best Practices & Production Setup
0:03:00Now that you've set up Test Store, let's cover best practices and how to transition between Test Store and production environments.
Environment Separation
Always keep Test Store and production keys separate using #if DEBUG:
enum RevenueCatKeys {
    // Test Store - for testing only
    static let testStoreKey = "test_xxxxx"

    // App Store - for production
    static let appStoreKey = "appl_xxxxx"

    static var apiKey: String {
        #if DEBUG
        return testStoreKey
        #else
        return appStoreKey
        #endif
    }
}
Xcode Scheme/Configuration-Based Key Switching
Use Xcode build configurations for more granular control:
// Debug.xcconfig (Test Store)
REVENUECAT_API_KEY = test_xxxxx
USE_TEST_STORE = YES

// Staging.xcconfig (Test Store)
REVENUECAT_API_KEY = test_xxxxx
USE_TEST_STORE = YES

// Release.xcconfig (App Store)
REVENUECAT_API_KEY = appl_xxxxx
USE_TEST_STORE = NO
Building a Comprehensive Testing Strategy
A robust testing strategy for in-app purchases should follow a pyramid approach. Start with unit tests using Test Store to validate your purchase logic in isolation. These run fast and catch most issues early. Build on that foundation with integration tests, also using Test Store, to verify complete purchase flows end-to-end. Once you're confident in your implementation, move to manual testing with Apple Sandbox to verify platform integration. Finally, do a small-scale production test with real payments to ensure everything works in the live environment.
Choosing Between Test Store and Apple Sandbox
During initial development and iteration, Test Store is your best friend. It's perfect for rapid prototyping of purchase flows, writing unit and integration tests, and testing error handling and edge cases. The instant feedback loop makes it ideal for CI/CD automated testing where you need reliable, fast results.
Switch to Apple Sandbox when you need to test platform-specific features that Test Store doesn't simulate. This includes pending transactions (like those awaiting Ask to Buy approval), receipt validation specifics, subscription renewal cycles, and region-specific pricing. Think of Sandbox as your pre-production validation environment. Use it after your core logic is solid and you need to verify App Store integration.
Security Best Practices
Never expose your Test Store API key in production:
// ❌ BAD: Hardcoded keys
let apiKey = "test_xxxxx"

// ✅ GOOD: Compile-time configuration
#if DEBUG
let apiKey = "test_xxxxx"
#else
let apiKey = "appl_xxxxx"
#endif

// ✅ BETTER: Read from xcconfig via Info.plist
let apiKey = Bundle.main.infoDictionary?["RevenueCatAPIKey"] as! String
Logging and Debugging
Enable appropriate logging levels:
#if DEBUG
Purchases.logLevel = .verbose
print("RevenueCat: Using Test Store for testing")
#else
Purchases.logLevel = .info
#endif
Transitioning to Production
Before shipping your app, ensure you've completed a thorough checklist. All your tests should pass with Test Store, and you should have manually verified the integration with Apple Sandbox. Double-check that your Xcode configurations are properly set up to use the right API keys in each environment. Production API keys must be secured and never committed to version control. Verify that Test Store keys are completely removed from release builds; they should only exist in debug configurations. Make sure logging is appropriately configured (verbose in debug, minimal in production), and confirm that your error handling has been tested across all scenarios.
Conclusion
Congratulations! 🎉 You've successfully set up RevenueCat's Test Store for iOS. Throughout this codelab, you've learned how to enable Test Store in your RevenueCat dashboard, configure Test Store API keys in your iOS application, test purchase flows with deterministic outcomes, write automated unit tests for your purchase logic, run those tests in CI/CD environments like GitHub Actions, and follow best practices for environment separation.
Key Takeaways
Test Store fundamentally changes how you approach in-app purchase testing. Gone are the days of wrestling with sandbox accounts and dealing with flaky network-dependent tests. With deterministic control over purchase outcomes, you can write reliable tests that give you true confidence in your implementation. The CI/CD integration means your purchase logic is continuously validated with every code change, enabling you to iterate on purchase flows in seconds instead of hours. Most importantly, you'll catch purchase-related bugs before they ever reach production, protecting both your revenue and user experience.
Next Steps
Now that you have Test Store set up, it's time to build on this foundation. Start by writing comprehensive tests covering all your purchase scenarios. Don't just test the happy path. Integrate these tests into your CI/CD pipeline so they run automatically on every pull request. Thoroughly test your error handling with different failure modes to ensure your app degrades gracefully. When you're ready, transition to Apple Sandbox for platform-specific testing to verify things like subscription renewals. Finally, ship with confidence, knowing that your purchase logic has been thoroughly validated at every step.
Additional Resources
RevenueCat Test Store Blog Post RevenueCat iOS SDK Documentation Testing Guide GitHub: purchases-iosHappy testing! 🚀