RevenueCat Google Play Entegrasyonu Genel Bakış
0:03:00RevenueCat'in Google Play entegrasyon Codelab'ine hos geldiniz!
Bu Codelab'de asagidakileri ogreneceksiniz:
Google Play'de urunleri dogru sekilde yapilandirma yontemi. RevenueCat panelini kurma ve Google Play urunlerine baglama yontemi. Product, Offering, Package, Entitlement kavramlarini anlama. Paywall Editor kullanarak odeme duvari (Paywall) olusturma yontemi.
Bu Codelab'i tamamladiginizda, Android uygulamanizda uygulama ici satin alma ve odeme duvarini sorunsuz bir sekilde uygulamadan once gereken tum Google Play ve RevenueCat panel kurulumlarini tamamlamis olacaksiniz.
Neden RevenueCat?
Dunyanin en iyi uygulamalari, iOS, Android ve web'de uygulama ici satin alma, abonelik ve Odeme Duvarlarini yonetmek ve musteri verilerini yoneterek gelirlerini artirmak icin RevenueCat'i kullaniyor. Yillik 8 milyar dolardan fazla uygulama ici satin almayi isleme alan RevenueCat, OpenAI (ChatGPT), Notion, Buffer, Goodnotes gibi onde gelen sirketler tarafindan guvenilmektedir.
Neden bircok gelistirici RevenueCat'i seciyor?
RevenueCat, platformlar arasi uygulama ici satin almalari basitlestirirken analiz icin birlesik bir veri kaynagi saglar. Bu sayede yasam boyu deger (LTV), gelir egilimlerini ve kullanici davranisini daha iyi anlayabilir, daha akilli gelir elde etme ve daha hizli buyumeyi mumkun kilabilirsiniz. Temel avantajlar sunlardir:
Birlesik Kullanici Tanima: Satin almalari kullanici kimliklerine guvenilir bir sekilde baglayarak uygulama duzeyi ve magaza duzeyi hesaplar arasindaki kopuklugu cozer. Basitlestirilmis Abonelik Yonetimi: Platforma ozgu sinirlari soyutlayarak dogrudan kontrolun sinirli oldugu durumlarda bile (ornegin iOS) tutarli abonelik davranisi saglar. Platformlar Arasi Analiz: Apple ve Google konsollarinin gecikmeli verilerinden daha net ve uygulanabilir, standartlastirilmis gercek zamanli icgoruler elde edebilirsiniz. Kesin Fiyat Icgoruleri: Yerel ceverceveler yetersiz kaldigi durumlarda bile tum bolge ve magazalarda kullanicilarin odedigi kesin tutari anlayabilirsiniz.
RevenueCat kullandiginizda uygulama gelir elde etme daha basit, daha akilli ve olceklenebilir hale gelir.
Google Play Urun Kurulumu
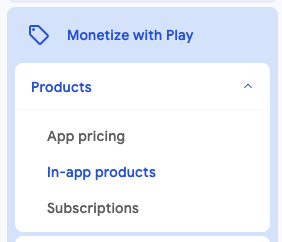
0:05:00Oncelikle, Google Play Console'a giris yapin ve uygulamanizi secin. Ardindan, kenar cubugunda Monetize with Play > Products bolumune giderek asagidaki gorselde gosterildigi gibi In-app products veya Subscriptions'a tiklayin.
Varsayilan olarak Google Play'de olusturabilecegininiz iki urun turu vardir: In-app products ve Subscriptions.
Asagidaki gorselde goruldugu gibi henuz APK yuklemediyseniz, urunleri ayarlamadan once APK yuklemeniz gerekir. Kenar cubugundaki Release bolumune giderek APK yukleyebilirsiniz.
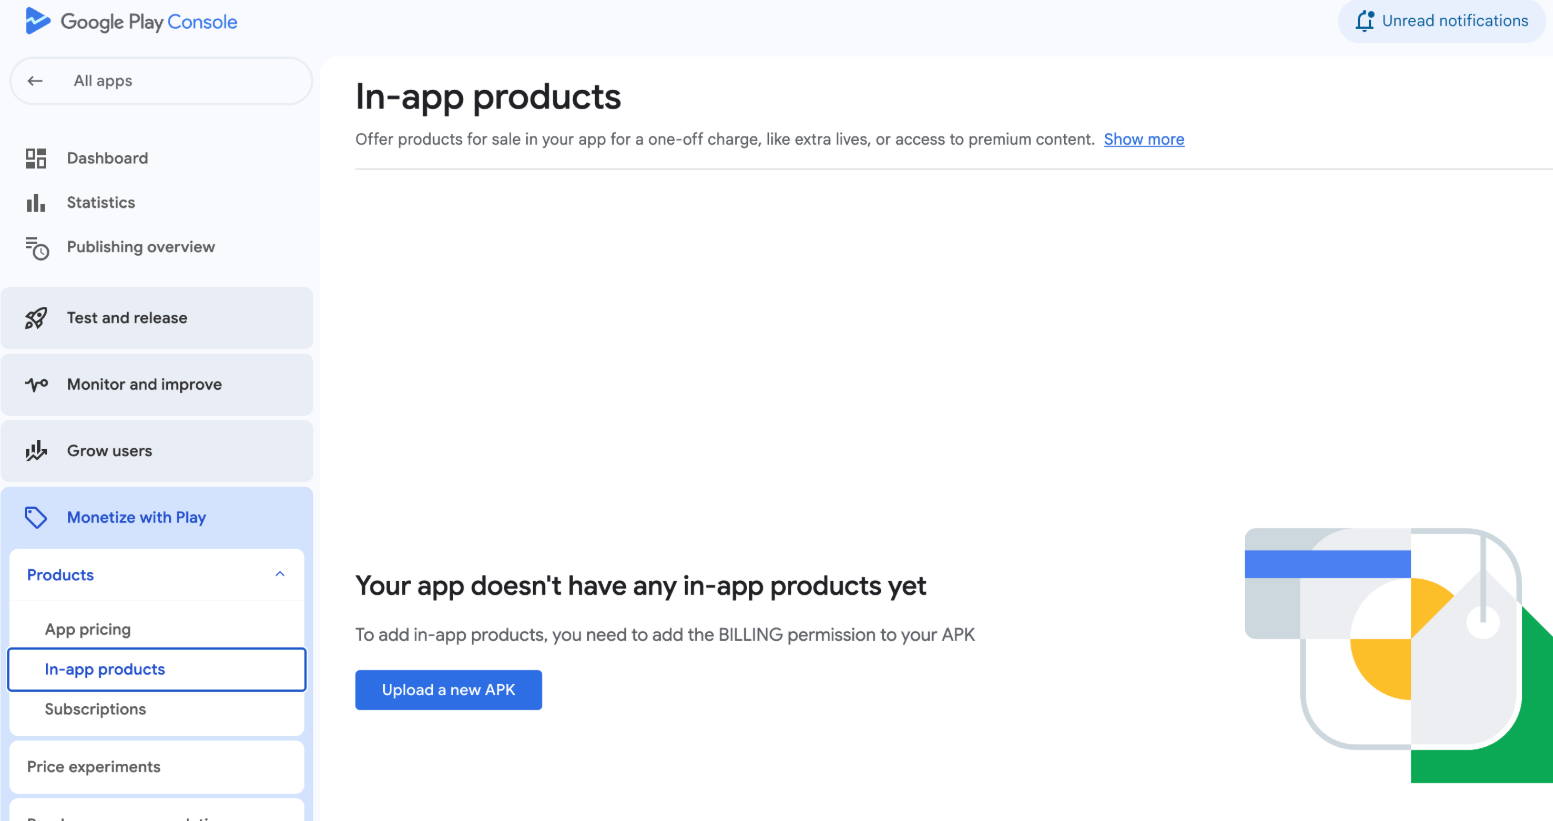
Uygulama Ici Urunler
Tek seferlik satin almalarla ozellikleri veya icerikleri kalici olarak acin. Ornekler arasinda reklam kaldirma, premium ozelliklerin kilidini acma veya oyun ici para satin alma yer alir.
Kenar cubugunda In-app products'a tikladiginizda yukaridaki ekran gorunur ve kullanicilarin satin alabilecegi yeni uygulama ici urunler olusturabilirsiniz.
Abonelikler
Aylik, yillik veya ozel sureler boyunca duzeni ucretlerle icerige veya ozelliklere erisim saglayin. Akis icerigi, premium uygulama erisimi veya duzenli olarak guncellenen ozellikler gibi hizmetler icin idealdir.
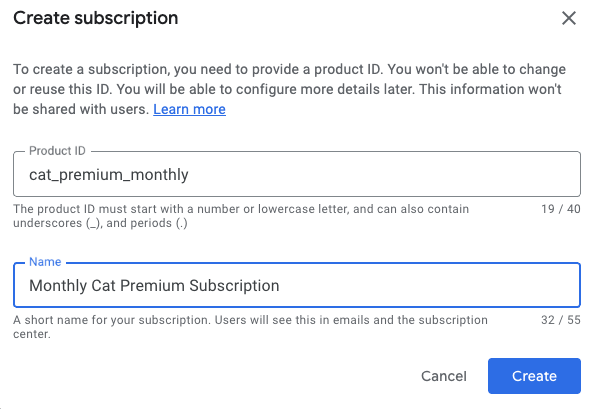
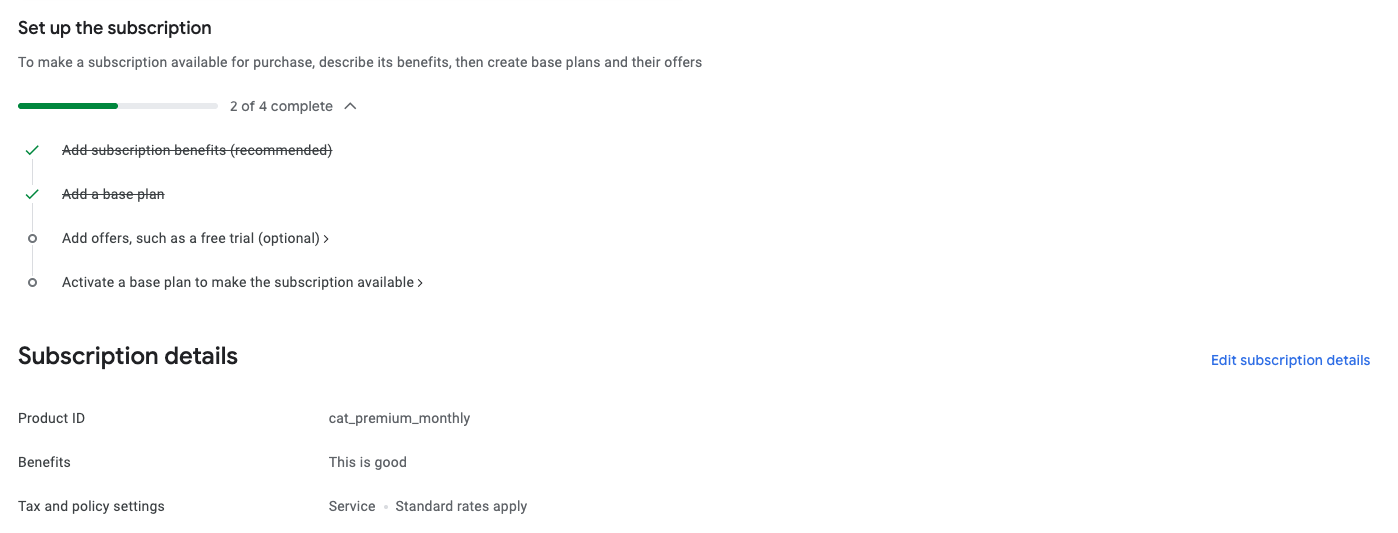
Bir abonelik urunu olustururken abonelik avantajlari ekleyin, varsayilan plani yapilandirin ve teklifler (ucretsiz deneme veya promosyon fiyatlandirmasi gibi) ayarlayin, ardindan urunu etkinlestirerek kullanicilara sunun.
Google Play'de Urun Kurulumunu tamamladiginizda her sey hazir! Uygulama ici urunler veya abonelikler olusturma, guvenilir urun kimlikleri yazma, varsayilan planlar ve teklifler ayarlama veya tuketilemez ogeler ekleme hakkinda daha fazla bilgi icin ayrintili talimatlar ve en iyi uygulamalari kontrol etmek uzere Google Play Urun Kurulumu kilavuzuna bakin.
Google Play'i RevenueCat'e Baglama
0:15:00Ardindan, urunleri, gelir elde etmeyi, istatistikleri ve daha fazlasini yonetmek icin bir RevenueCat hesabi olusturmaniz gerekir. Tek ihtiyaciniz olan bir e-posta adresi.
RevenueCat'de hesap olusturduktan sonra, Google Play Store hizmet kimlik bilgileri kilavuzunda saglanan talimatlari izleyerek kimlik bilgileri setini yapilandirin.
Bu kurulum sayesinde RevenueCat, Google Play urunleriyle entegre olur ve magaza urunlerini RevenueCat paneline sorunsuzca aktarabilir, satin alma etkinliklerini takip edebilir, LTV raporlarini analiz edebilir, kullanici satin alma bildirimleri alabilir ve gercek zamanli veri icgoruleriyle buyume stratejileri gelistirebilirsiniz.
Baslamak icin asagidaki adimlari izleyin:
1. Google Developer ve Reporting API'yi Etkinlestirme
Google Cloud projenizde hem Google Play Developer API'yi hem de Developer Reporting API'yi etkinlestirmek icin asagidaki adimlari izleyin:
- Google Cloud Console'u acin.
- Acilir menuden mevcut bir proje secin veya yeni bir proje olusturun.
- Google Play Android Developer API ve Google Play Developer Reporting API sayfalarini ziyaret edin.
- Her sayfada Enable butonuna tiklayin (zaten etkinse Manage olarak gorunur).
API'ler etkinlestirildikten sonra projenizin API paneline gidin. Henuz kimlik bilgileri yapilandirmadiysan kimlik bilgileri olusturmaniz istenecektir. Kimlik bilgilerinin Google Play Android Developer API ile birlikte kullanilmak uzere oldugunu belirtmeniz gerekir. Bu adimin proje sahibi veya Google Play Console'da uygun API erisim izinleri verilen bir ekip uyesi tarafindan tamamlanmasi gerekir.
2. Hizmet Hesabi Olusturma
Google Cloud Console'un Service Accounts bolumune gidin ve dogru projede calistiginizdan emin olun.
Burada RevenueCat'in Google hizmetleriyle arayuz olustururken kullanabilecegi bir hizmet hesabi olusturmaniz gerekir. Create Service Account'a tiklayin, anlamli bir isim verin ve ardindan devam etmek icin Create and continue'yu secin.
Roller atamaniz istendiginde asagidakileri eklemeniz gerekir:
Pub/Sub Admin - Google'in gercek zamanli sunucu bildirimlerini islemesi icin gereklidir. Monitoring Viewer - Kuyruk metrikleri ve performans hakkinda gorunurluk saglar.
> Not: Roller arama cubugunda goruntulenmezse, listedeki Pub/Sub ve Monitoring kategorilerinde manuel olarak bulabilirsiniz.
Simdi ozel anahtar dosyasi olusturma zamani.
Google Cloud Console'un Service Accounts panelinde, az once olusturdugunuz hizmet hesabini bulun. "Actions" sutununun altindaki uc nokta simgesine tiklayin ve Manage Keys'i secin.
Orada Add Key'e tiklayin, ardindan Create new key'i secin. Iletisim kutusu gorundigunde, devam etmeden once JSON formatini secmeniz gerekir. Dosyayi indirin. Bu JSON anahtari daha sonra kurulum surecinde gerekli olacaktir.
3. RevenueCat'e Finansal Erisim Izni Verme
Google Play Console'un Users and Permissions bolumune gidin. Orada Invite user'a tiklayarak onceki adimda (2. adim) olusturdugunuz hizmet hesabi e-postasini ekleyin.
Ardindan App permissions'da RevenueCat'in erisecegi belirli uygulamalari secmeniz gerekir. Sonra Account permissions alanina kaydin. Burada her seyin sorunsuz calismasini saglamak icin gerekli erisim izinlerini verin.
Asagidaki izinlerin secili oldugundan emin olun:
Uygulama bilgilerini goruntuleme ve toplu raporlari indirme erisimi Finansal veriler, siparis gecmisi ve iptal geri bildirimine erisim- Abonelikleri ve musteri siparislerini yonetme
Her sey dogru gorunuyorsa, asagi kaydin ve Send invite'a tiklayin. Gonderdikten sonra Users and Permissions Genel Bakis'a donun. Hizmet hesabi, kabul edildikten sonra burada aktif olarak listelenmis olmalidir.
4. Kimlik Bilgileri JSON'unu RevenueCat'e Kaydetme
Bitirmek icin RevenueCat paneline gidin ve Proje Kurulumu'nu acin. Onceden kaydettiginiz JSON kimlik bilgileri dosyasini (2. adimda) bulun ve kurulum alanina surukleyip birakin veya dosya seciciyi kullanarak manuel olarak secin.
Yukledikten sonra degisiklikleri uygulamak icin Save'e tiklamayi unutmayin. RevenueCat kimlik bilgilerini dogrulamaya baslayacak ve yaklasik 36 saat icinde entegrasyon araciligiyla Google Play satin almalarini isleyebileceksiniz.
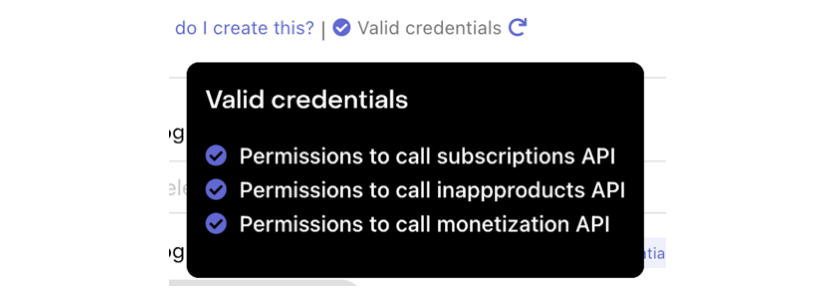
Asagidaki gibi "Validate Credentials" butonuna tiklayarak kimlik bilgilerinizi dogrulayabilirsiniz:

Dogrulama sonuclarini gosteren bir ozet goruntulenecek ve Google kimlik bilgilerinizin mevcut durumu hakkinda icgoruler saglayacaktir. Her sey dogru ayarlanmissa, yuklediginiz JSON dosyasinin altinda gerekli tum izinlerin kontrol listesiyle birlikte "Valid credentials" mesaji gorunecektir.
5. Imzali APK veya Android App Bundle Yukleme
Onceki adimlari tamamladiktan sonra her seyin dogru baglandigindan emin olmak icin birkac son kontrol yapmaniz gerekir:
- Imzali APK veya App Bundle'in Google Play Console'a basariyla yuklendiginden emin olun.
- Surum icin gerekli tum inceleme ve onay adimlarinin tamamlandigindan emin olun.
- Uygulamanin Closed veya Open test izinde mevcut oldugunu ve en az bir test hesabi eklediginizi dogrulayin.
- Abonelik urunlerinin Play Console'da Active olarak goruntulendigini tekrar kontrol edin.
- Son olarak, RevenueCat'te kullandiginiz package name'in Google Play'e kaydedilen ile harf harf tam olarak eslestigini dogrulayin.
Bu son dogrulamalar kurulum sorunlarini onlemek ve RevenueCat'in Google Play verileriyle sorunsuz sekilde senkronize olmasini saglamak icin cok onemlidir.
Uff, Tebrikler! Zor kismi basariyla tamamladiniz!
Product, Offering, Package, Entitlement
0:6:00Bu noktada karmasik kurulumun cogu tamamlandi. Artik gelir elde etme stratejinizi yapilandirmadan once anlamaniz gereken RevenueCat'in dort temel kavramina - Product, Offering, Package, Entitlement - asina olma zamani.
Her biri, platformlar arasinda uygulama ici satin almalarin nasil tanimlanacagi, goruntulenecegi ve yonetilegeci konusunda benzersiz bir role sahiptir.
Product
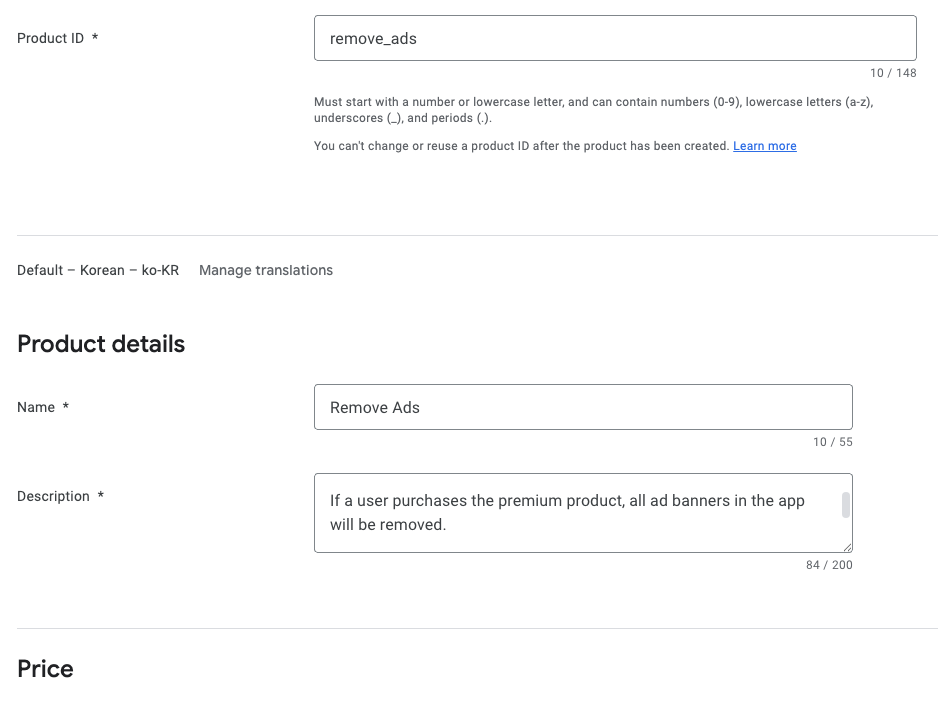
Product, Google Play, Apple App Store veya web gibi magaza platformlarinda dogrudan olusturulan ve yonetilen bireysel uygulama ici satin alma ogeleridir. Bunlar gelir elde etmenin temel birimidir. Aylik abonelik, omur boyu erisim veya tek seferlik satin alma gibi dusunun. Her urunun magazada tanimladiginiz benzersiz bir tanimlayicisi, fiyati ve suresi vardir.
> Ornek: Google Play'de yapilandirilan com.app.pro_monthly gibi aylik bir abonelik urunu.
Offering
Offering, uygulamanizda odeme duvari (Paywall) deneyimi icin birlikte sunulmak uzere gruplandilrmis urun koleksiyonlaridir. Offering'ler RevenueCat panelinde yapilandirilir ve uygulama guncellemesi olmadan A/B testleri, fiyatlandirma deneyleri ve bolgeye veya kullanici segmentine ozel odeme duvarlarini yonetme esnekligi saglar.
> Ornek: default adli bir Offering, kullanicilara gosterilen aylik, yillik ve omur boyu secenekleri gibi birden fazla paket icerebilir.
Package
Package, farkli platformlardaki (ornegin iOS, Android, Web) esdeger urunler icin bir sarmalayici gorevi gorur. Bu, her magazanin belirli urun kimligine baglanirken tek bir fiyatlandirma secenegini (ornegin aylik abonelik) platformlar arasinda tutarli bir sekilde sunmanizi saglar.
Her paketin Offering icinde benzersiz bir tanimlayicisi vardir (ornegin monthly, annual) ve RevenueCat'in kullanicinin platformuna gore dogru urunu islemesine yardimci olur.
> Ornek: monthly paketi, iOS'un com.app.pro_monthly_ios ve Android'in com.app.pro_monthly_android urunlerine eslenebilir.
Entitlement
Entitlement, basarili bir satin alma isleminden sonra kullanicinin neye erisebilecegini tanimlar. Kilidi acilmis ozellikleri veya icerigi temsil eder ve temel urun veya paket tanimlayicilarini soyutlar. Entitlement kullanarak, urun kimliklerini uygulamaniza sabit kodlamadan kullanici erisim mantigi (ornegin "premium erisim yetkilendirmesi") yonetebilirsiniz.
Ayrica RevenueCat'in cihazlar ve platformlar arasinda satin almalari nasil izledigi ve geri yuklediginin merkezindedir.
> Ornek: premium adli bir Entitlement, aylik veya yillik abonelik gibi o erisim seviyesiyle iliskili herhangi bir urunu satin alan kullanicilara verilebilir.
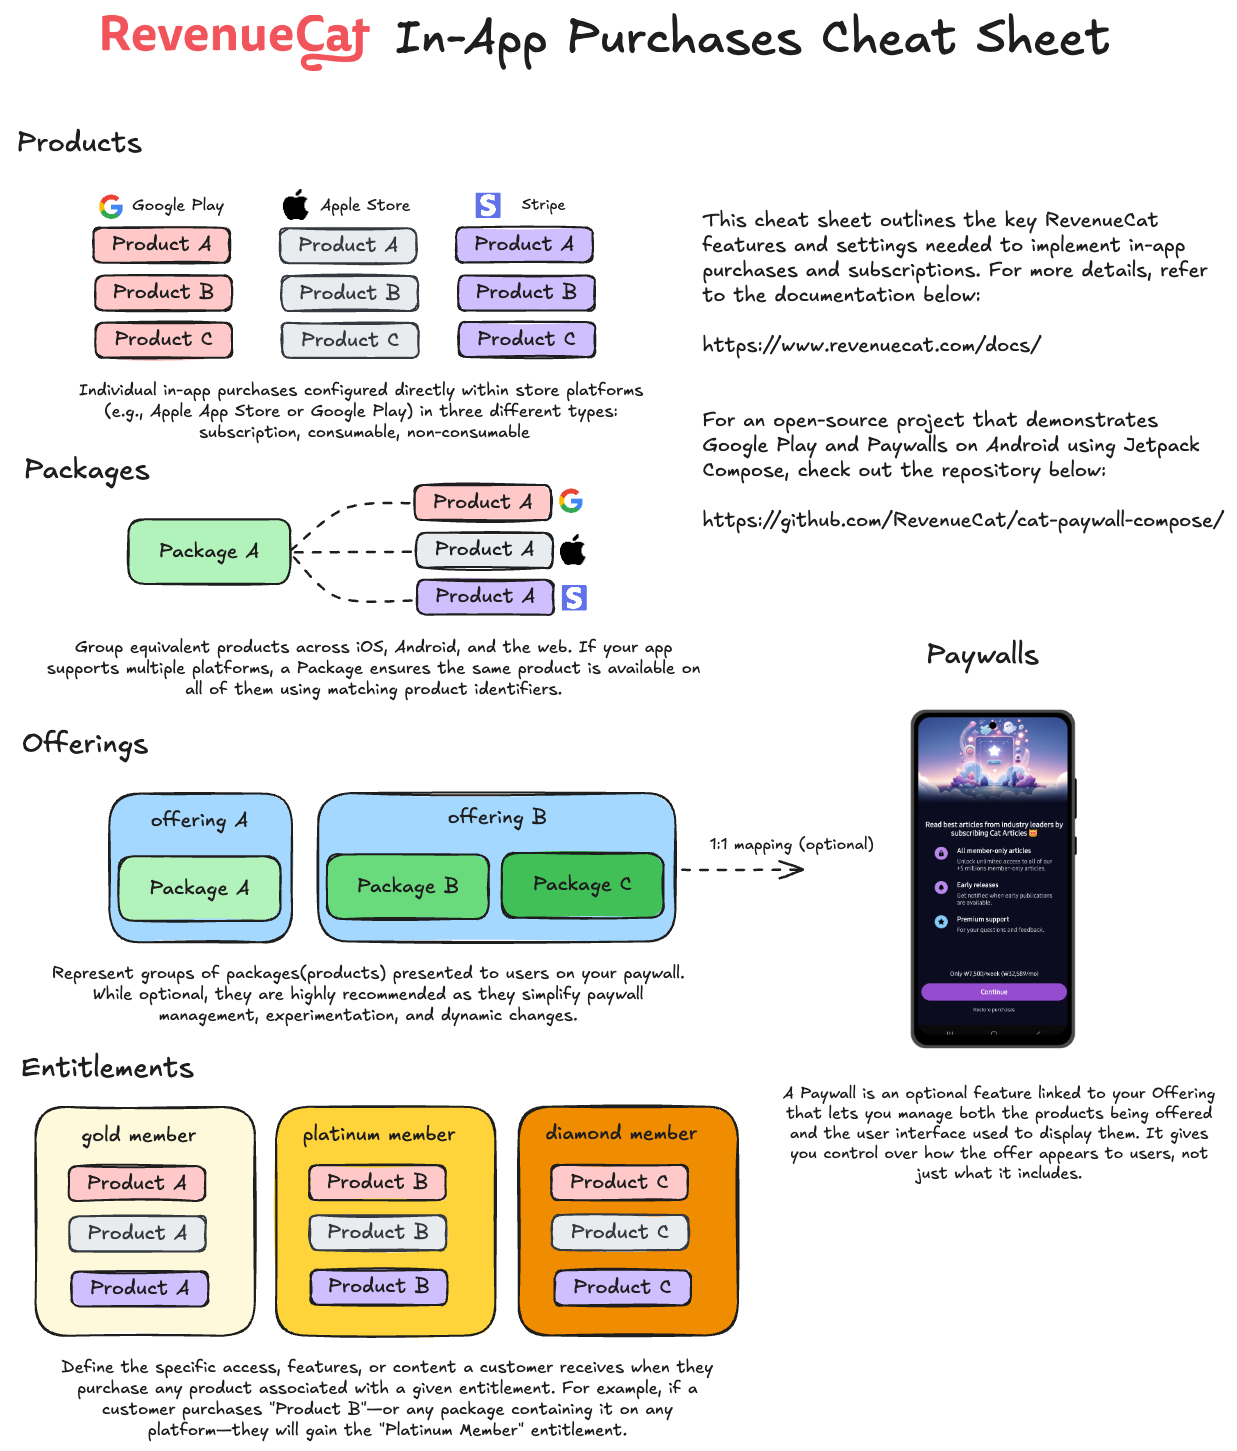
Hizli Basvuru Tablosu
Bu dort ogeinin birlikte nasil calistigini anladiginizda, platformlar arasi abonelikleri yonetmek, fiyatlandirma stratejilerini denemek ve sorunsuz uygulama ici satin alma deneyimleri sunmak cok daha kolay hale gelir.
Daha kolay anlamak icin asagidaki RevenueCat Uygulama Ici Satin Alma Hizli Basvuru Tablosundaki gorsel diyagrama bakin:
mağaza ürün alma
0:03:00Why Import Products?
In the previous step, you created products directly in Google Play Console. However, RevenueCat needs to know about those products so it can manage purchases, validate receipts, and track subscriptions on your behalf. Importing products into RevenueCat bridges the gap between your store configuration and RevenueCat's platform.
Once imported, RevenueCat can:
- Validate purchases: Verify that transactions are legitimate by communicating with Google Play.
- Track subscription status: Monitor renewals, expirations, and cancellations automatically.
- Provide unified analytics: Give you a single dashboard view of revenue, subscribers, and product performance.
- Power Entitlements and Offerings: Link products to entitlements and group them into offerings for your paywalls.
How to Import
Go to the RevenueCat dashboard, navigate to your project, and open the Products tab under Product Catalog.
Click the + New button in the top right corner, then select Import Products from the dropdown menu. RevenueCat will automatically fetch and display a list of available in-app products from your connected Google Play store account.
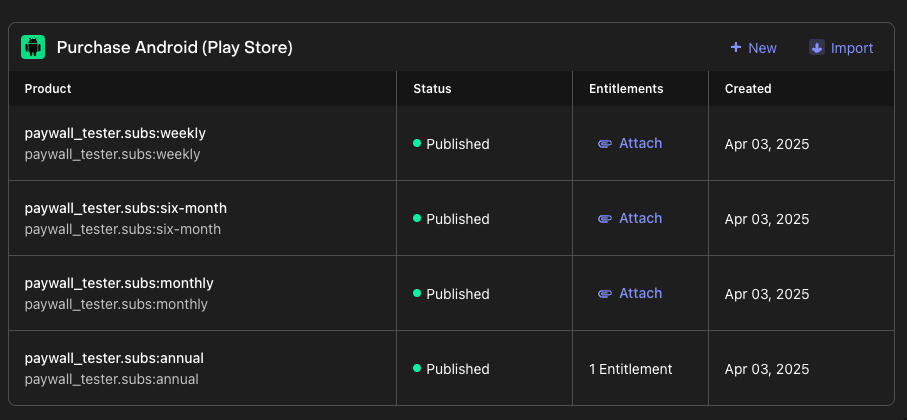
Once your products have been imported, you'll see that the in-app purchase items have been successfully added to your RevenueCat project. These imported products are now ready to be attached to Entitlements and grouped into Offerings in the next steps.
Entitlement Olusturma
0:05:00Artik urunleri iceri aktardiginiza veya olusturduguna gore, Entitlement kurulumu zamani. Ogrendiginiz gibi, Entitlement basarili bir satin alma isleminden sonra kullanicinin neye erisebilecegini tanimlar. "Satin alma", kullanicinin bir hizmete erismek icin gerceklestirdigi tek seferlik satin almalar veya abonelikler gibi tum uygulama ici islem turlerini temsil edebilir.
Genellikle ozellik erisim katmanlarina dayali olarak bir veya daha fazla Entitlement olusturmak isteyeceksiniz (ornegin "has_premium_access"). Bu Entitlement'lar araciligiyla uygulamaniz icindeki kisitli ozelliklere veya iceriklere erisimi kontrol edebilirsiniz.
Yeni bir Entitlement olusturmak icin:
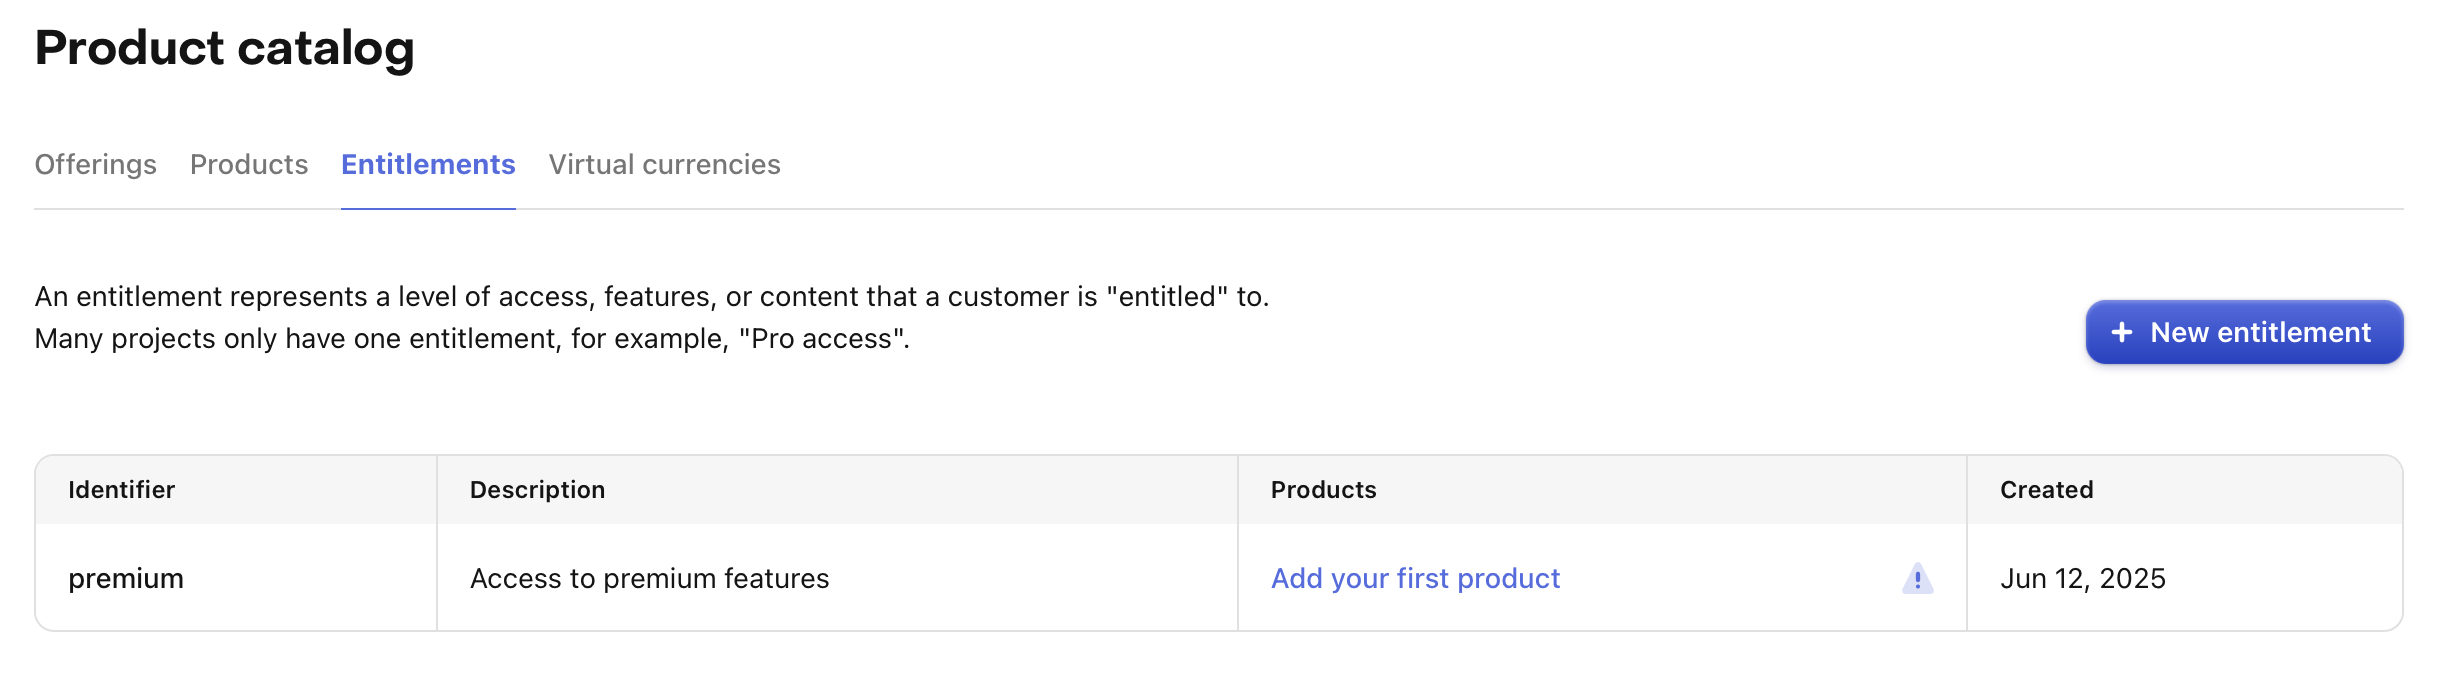
- Proje panelinizin sol menusunde Product Catalog'a gidin.
- Entitlements sekmesine tiklayin.
- + New Entitlement'i secin.
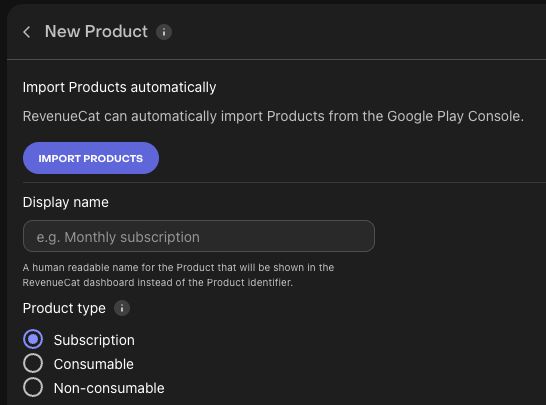
Entitlement icin bir benzersiz tanimlayici girmeniz istenecektir (ornegin "pro"). Bu tanimlayici, daha sonra uygulamanizda kullanicinin erisim seviyesini kontrol etmek icin referans alacaginiz seydir.
Cogu uygulama tek bir Entitlement kullanir, ancak gerektiginde birden fazla olusturabilirsiniz. Ornegin, bir navigasyon uygulamasi tam erisim icin bir abonelik ("pro") sunabilir ve ayrica belirli harita bolgelerinin kilidini acmak icin tek seferlik satin almalar da satabilir. Bu durumda, bir "pro" Entitlement'in yani sira her bolge icin ek Entitlement'lar (ornegin "map_north_america", "map_europe") olacaktir.
Entitlement'a Urun Baglama
Simdi Entitlement'a urunleri baglama zamani. Bu, uygulama ici satin almalari, kilidi actiklari erisime baglar. Bu kurulum sayesinde, bir kullanici urunu satin aldiginda, ilgili Entitlement verilir ve uygulamanizin belirli ozelliklerine veya iceriklerine erisilebilir.
Ornegin, kullanicinin belirli bir Entitlement'a sahip olup olmadigini kontrol eden basit bir if ifadesi kullanarak kisitli ozellikleri kolayca uygulayabilirsiniz.
Entitlement'a urun baglamak icin:
- RevenueCat panelinde Entitlements sekmesini acin.
- Yapilandirmak istediginiz Entitlement'a tiklayin.
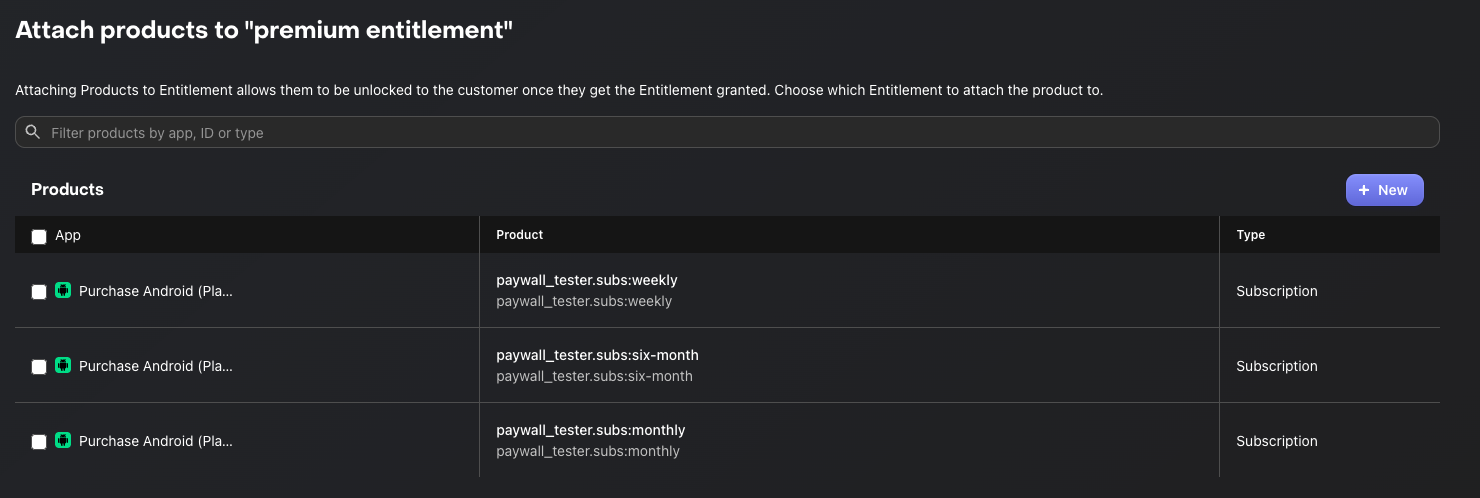
- Attach butonuna tiklayin.
- Urunleri zaten eklediyseniz, listede gorunecekler. Sadece baglamak istediginiz urunu secmeniz yeterli.
Bir Entitlement'a bagli urunu satin aldiginizda, Entitlement o urunun suresi boyunca aktif olur.
Abonelik urunleri icin Entitlement, abonelik suresi boyunca aktif kalir. Tuketilemez veya tuketir satin almalar (Entitlement'a bagliysa), Entitlement genellikle icerigi kalici olarak acar.
Bu mekanizmayi kullanarak, uygulamanizda karmasik mantik islemeden satin alma turune gore ozellik erisimini yonetebilirsiniz.
Uygulamanizda Paywall uygulamayi planlamiyorsaniz, Son bolumune atlayabilirsiniz. Aksi takdirde, Offering nasil olusturulacagini ogrenmek icin sonraki adima devam edin.
Offering Olusturma
0:07:00If you want to introduce Paywalls in your app, the first step is to create Offerings. An Offering represents a set of products that are presented to users on your paywall.
Creating an Offering
To create a new Offering, navigate to Product Catalog → Offerings in your RevenueCat dashboard, then click the + New button.
You'll be prompted to fill in the following fields:
- Identifier: A unique key used to reference this offering in your code (e.g.,
default). This cannot be changed later, so choose a meaningful name. - Display Name: A human-readable name for this offering that helps you identify it in the dashboard (e.g., "Default Offering").

Once you've filled in the details, click Create to save the new Offering. Your newly created Offering will now appear in the Offerings list.
Note that RevenueCat automatically creates a "Default" Offering for your project. You can use this default offering or create additional ones to support different paywall configurations, A/B tests, or regional pricing strategies.
Adding Packages
A Package serves as a wrapper for equivalent products across different platforms (e.g., iOS, Android, Web). This provides a single source of truth for your products across platforms.
For example, if a user purchases a product on Android, they can still access the same entitlement on their iOS device, as long as they're logged into the same account.
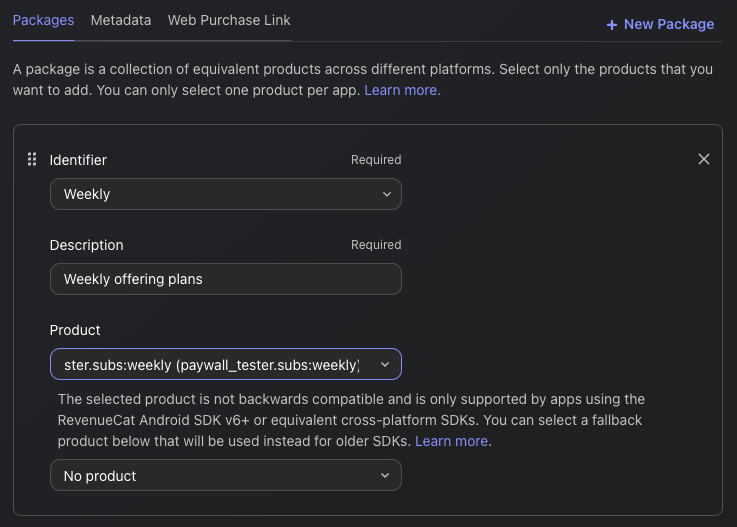
To create a package, navigate to your newly created Offering, then click the Edit button to configure the details, and then you can add packages by clicking the + New Package in the Packages section.
From there:
- Choose an Identifier from the dropdown that best represents the package duration (e.g., monthly, annual).
- If none of the predefined durations fit—such as in the case of consumable purchases—you can select a custom identifier instead.
- Add a description to help clarify the purpose or contents of the package.
- Attach the relevant products that match the chosen duration (e.g., monthly products across iOS and Android).
- Click Save to create the package.
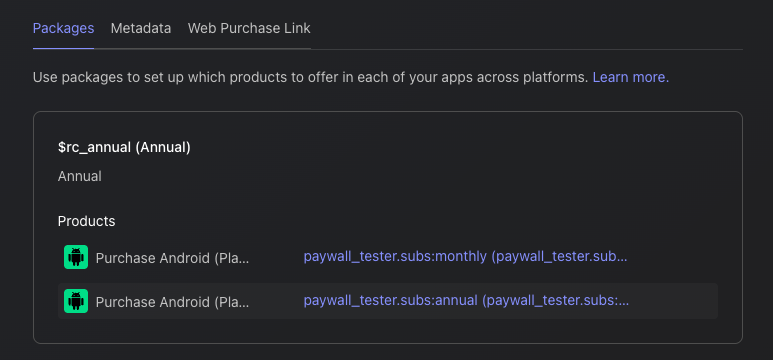
Once you've added all the Packages to your Offering, you'll see the results displayed as shown below:
The relationships between Offerings and Packages
So, an Offering can contain multiple Packages, allowing you to "offer" different options to users. This means you can present various choices—such as monthly, annual, or lifetime plans—all within a single Offering, as illustrated in the diagram below:
Offering (e.g. "pro plan")
                    |
       --------------------------------
       |              |              |
   Package A      Package B      Package C
   ("monthly")    ("annual")    ("lifetime")
       |              |              |
 Product A1      Product B1      Product C1
 (iOS/Android)   (iOS/Android)   (iOS/Android)
Alright, time to create some awesome Paywalls!
Odeme Duvari Olusturma
0:07:00A paywall is a screen that encourages users to purchase your products. RevenueCat's paywall system is built on a server-driven UI, allowing you to update layouts instantly using the Paywall Editor without needing to release a new app version.

This allows your team to focus on A/B testing, refining offerings, and optimizing messaging to boost subscriptions, all without the delays of app updates. If you want to deep dive into the server-driven UI approach, you can read Server-driven UI SDK on Android: how RevenueCat enables remote paywalls without app updates.
Prerequisites: Offering Setup
Before creating a paywall, you must have at least one Offering configured with packages. The paywall will be linked to an Offering, and the packages within that Offering determine which products are displayed to users.
How Paywalls Connect to Offerings
Understanding the relationship between Paywalls and Offerings is crucial:
- Offering = The container that holds your packages (products)
- Paywall = The visual presentation layer that displays those packages
- One Offering can have one active Paywall at a time
- When you select an Offering for your paywall, it automatically has access to all packages within that Offering
Creating a New Paywall
To start building, go to the Paywalls page for your project and click + New Paywall.

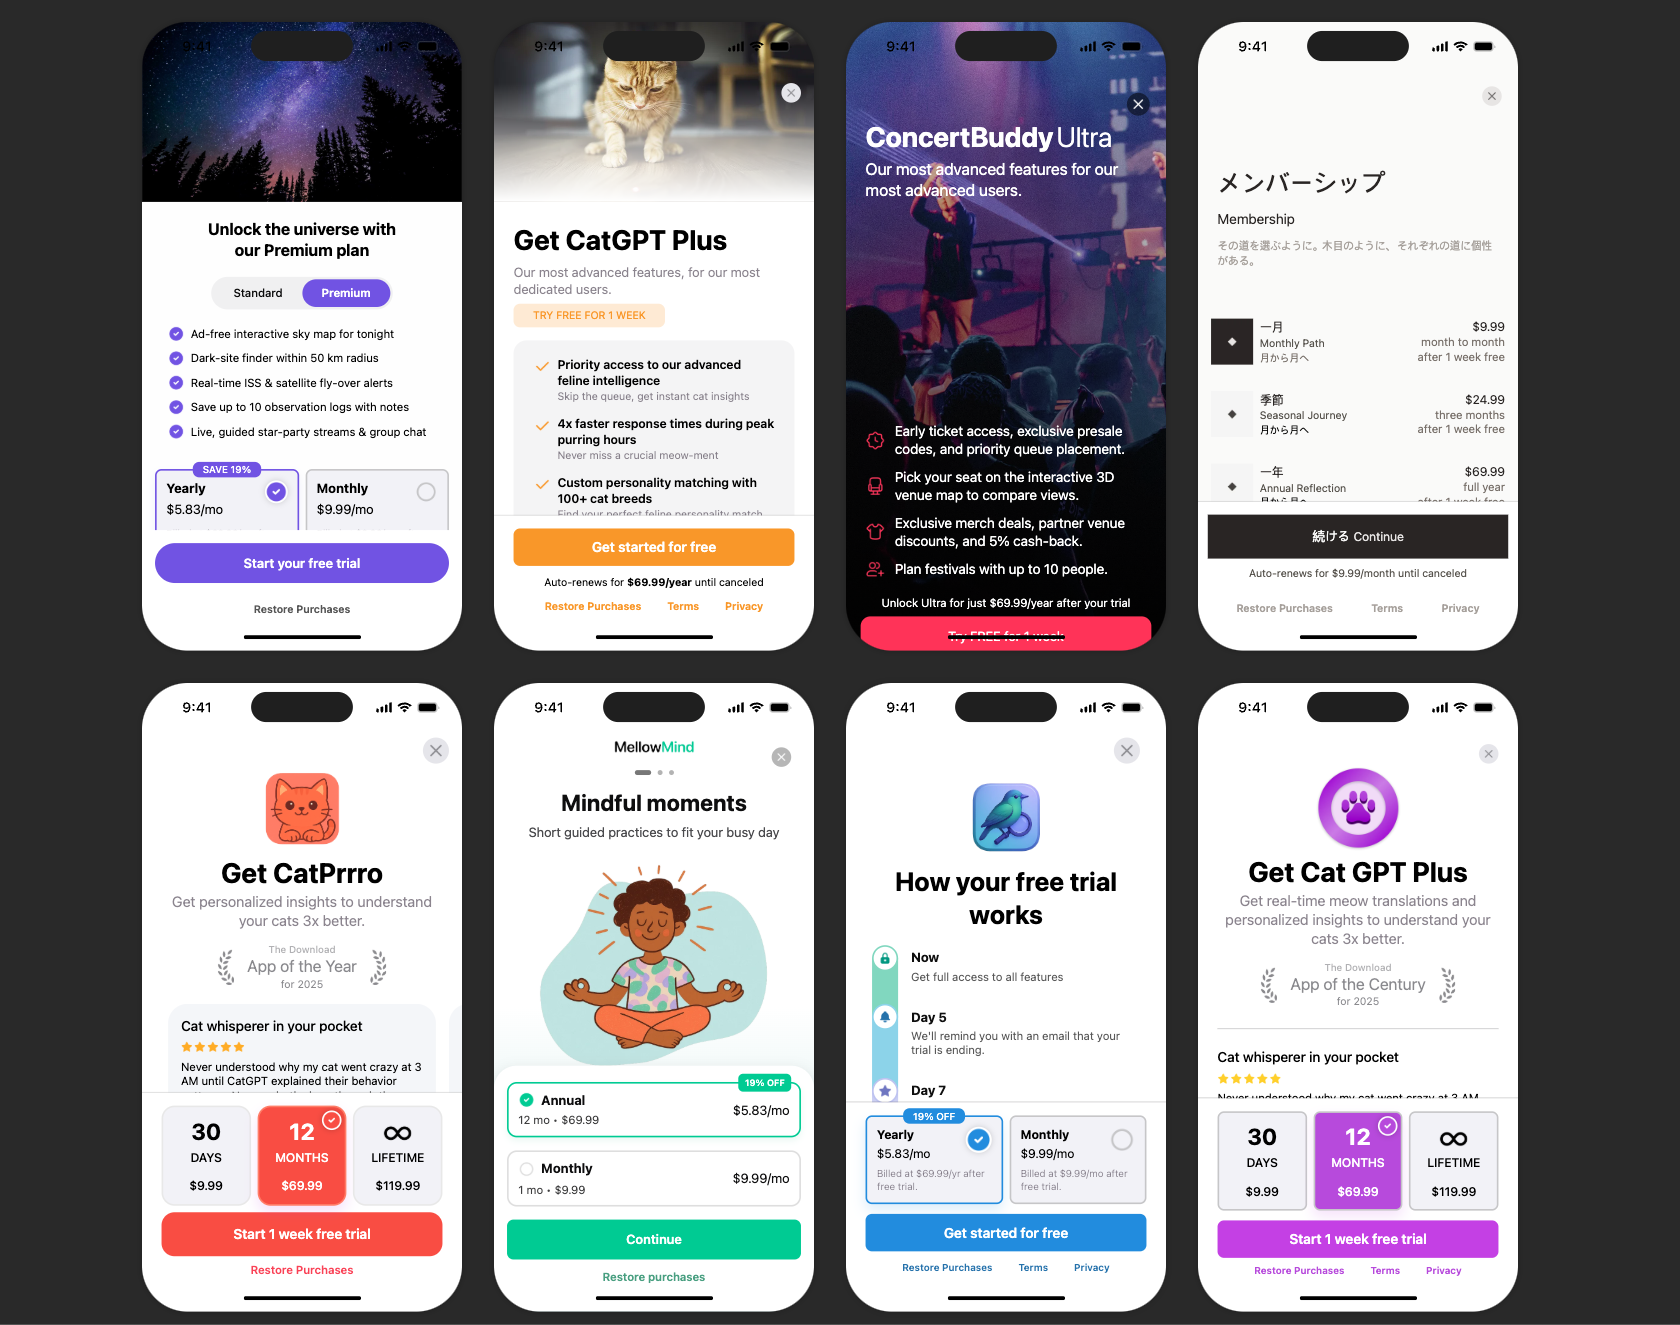
Choose a Starting Point
You have three options to begin:
- Pre-built Templates (Recommended): Start with professionally designed templates and customize them.
- Start from Scratch: Build your paywall from a blank canvas.
- Import from Figma: Import designs directly from Figma.
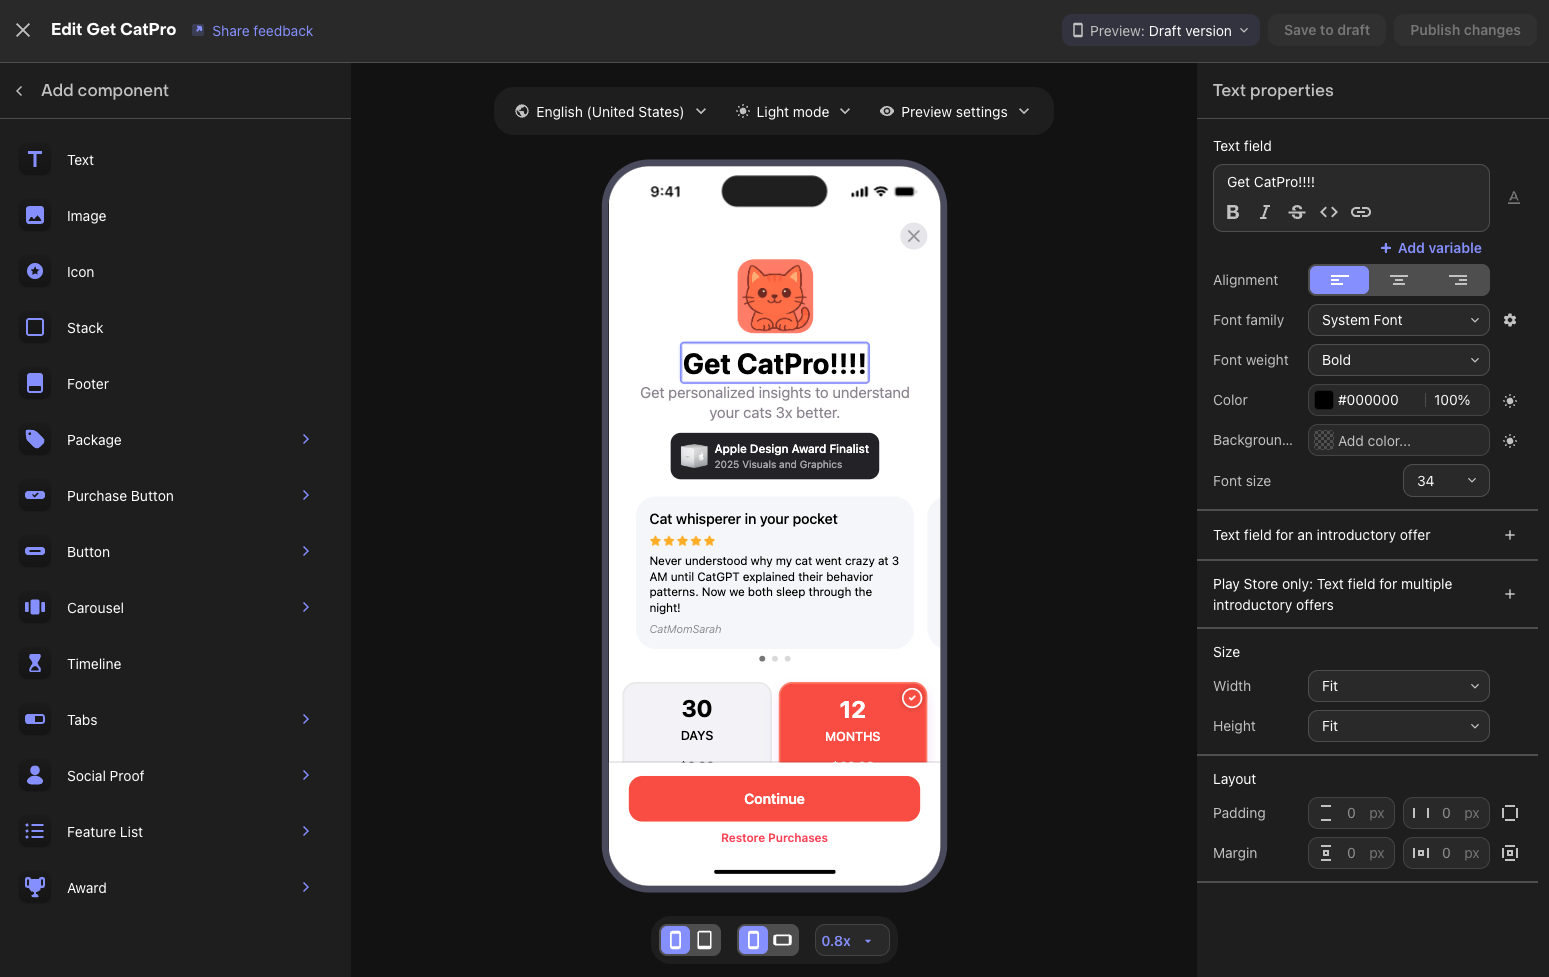
Using the Paywall Editor
The Paywall Editor consists of three main areas:
- Left Sidebar: Add components, view the layer hierarchy, manage branding and media assets.
- Center Preview: Real-time visualization of your paywall.
- Right Panel: Configure properties for the selected component (sizing, styling, behavior).
Key Configuration Steps
- Set the Paywall Name: Give your paywall a descriptive name (e.g., "Main Subscription Paywall").
- Select an Offering: Choose which Offering this paywall will display. The identifier links the paywall to your Offering.
- Configure Components: Add and arrange text, images, icons, package selectors, and purchase buttons.
- Style Your Design: Customize colors, fonts, spacing, and images to match your app's branding.
- Set Up Purchase Button: Ensure the purchase button is connected to trigger checkout for the selected package.
Available Components
RevenueCat provides various building blocks for your paywall:
- Text & Images: Headlines, descriptions, feature lists, and visual assets.
- Package Selector: Displays your subscription options from the linked Offering.
- Purchase Button: Triggers the purchase flow for the selected package.
- Footer: Terms of service, privacy policy, and restore purchases links.
- Stacks & Containers: Layout components to organize other elements.
- Carousels: Swipeable content sections.
Preview Options
Use the editor's preview controls to test your paywall:
- Toggle between Light and Dark mode
- Switch between different device sizes
- Preview different locales if you have localized content
Draft vs Published
Paywalls have two states:
| State | Description | Visible to Users |
|---|---|---|
| Draft | Work in progress, saved but not active | No |
| Published | Live and served to users via SDK | Yes |
Workflow:
- Make changes and click "Save to draft" to save your work without affecting live users
- When ready, click "Publish changes" to make your paywall live
- You can toggle a published paywall back to inactive status anytime
You've completed all the configuration steps for setting up Google Play products and the RevenueCat dashboard! Next, let's look at how to test your in-app purchases.
Testing in-app purchases (Optional)
0:05:00Before shipping your app to production, you'll want to test the complete purchase flow. There are two approaches to testing in-app purchases: RevenueCat Test Store for fast, deterministic testing without any special account setup, and Google Play License Testing for end-to-end testing with Google's infrastructure.
RevenueCat Test Store
Test Store is RevenueCat's built-in testing environment that allows you to test in-app purchase flows without connecting to Google Play. It's automatically provisioned with every RevenueCat project and gives you complete control over purchase outcomes.
Key benefits of using Test Store:
- Deterministic outcomes: Control whether purchases succeed, fail, or get cancelled — no more flaky sandbox behavior.
- No special accounts needed: Skip the hassle of creating and managing license tester accounts.
- Fast feedback: Test purchase flows in seconds rather than minutes.
- Works in CI/CD: Write automated tests for your purchase logic that run reliably in any environment.
To get started with Test Store, navigate to your RevenueCat dashboard, go to Apps & providers, and enable Test Store. You'll receive a Test Store API key prefixed with test_ that you can use in place of your production API key during development and testing.
Google Play License Testing
Google provides license testing that allows you to simulate purchases using Google Play's infrastructure without being charged real money.
To set up license testing:
- Go to the Google Play Console.
- Navigate to Settings → License testing.
- Add the Google account email addresses of your testers.
- Set the license response to RESPOND_NORMALLY for standard testing.
When testing on a real device with a Google account added as a license tester, purchases will show as "Test order" and no real charges will be made. This gives you end-to-end testing with Google's actual billing infrastructure.
With your testing approach configured, you're ready to ship with confidence! Let's wrap up in the conclusion.
Son
Bu Codelab'de Google Play urunlerini yapilandirmayi, Google Play hesabinizi RevenueCat paneline baglamayi ve urunler, Offering'ler, Entitlement'lar ve Odeme Duvarlarini ayarlamayi ogrendiniz. Artik her sey yapilandirildigina gore, RevenueCat SDK'yi projenize entegre etmeye hazirsiniz!
Sonraki adimlar:
- Uygulama Ici Satin Alma ve Odeme Duvarlari icin RevenueCat Android SDK Entegrasyonu - Tam calisan bir gelir elde etme akisina dogru sonraki adim.
- Uygulama Ici Satin Alma ve Odeme Duvarlari icin RevenueCat Kotlin Multiplatform SDK Entegrasyonu - KMP/CMP projeleriniz icin tam calisan bir gelir elde etme akisina dogru sonraki adim.
- Uygulama Ici Satin Alma ve Odeme Duvarlari icin RevenueCat Flutter SDK Entegrasyonu - Flutter projeleriniz icin tam calisan bir gelir elde etme akisina dogru sonraki adim.
- Urun Egitimler: RevenueCat'i kullanmaya baslamaniza ve en iyi sekilde yararlanmaniza yardimci olacak Video Egitimler.