Connect App Store to RevenueCat
12 minNext, set up your RevenueCat account. All you need is an email address.
Connecting the App Store to RevenueCat requires configuring credentials that allow RevenueCat to securely communicate with Apple's servers. There are two key credentials you should configure:
| Credential | Required? | Purpose |
|---|---|---|
| In-App Purchase Key | ✅ Required | Transaction validation for StoreKit 2. Without this, purchases will fail to record. |
| App Store Connect API Key | ⚪ Optional | Auto-import products & prices from App Store Connect. Convenient but not required. |
1. Generate an In-App Purchase Key (Required)
The In-App Purchase Key enables server-to-server communication with Apple's App Store Server API for validating transactions, managing subscriptions, and accessing purchase information. This is mandatory for apps using StoreKit 2.
Step 1: Create the Key in App Store Connect
- Log in to App Store Connect.
- Click Users and Access in the top navigation.
- Select the Integrations tab.
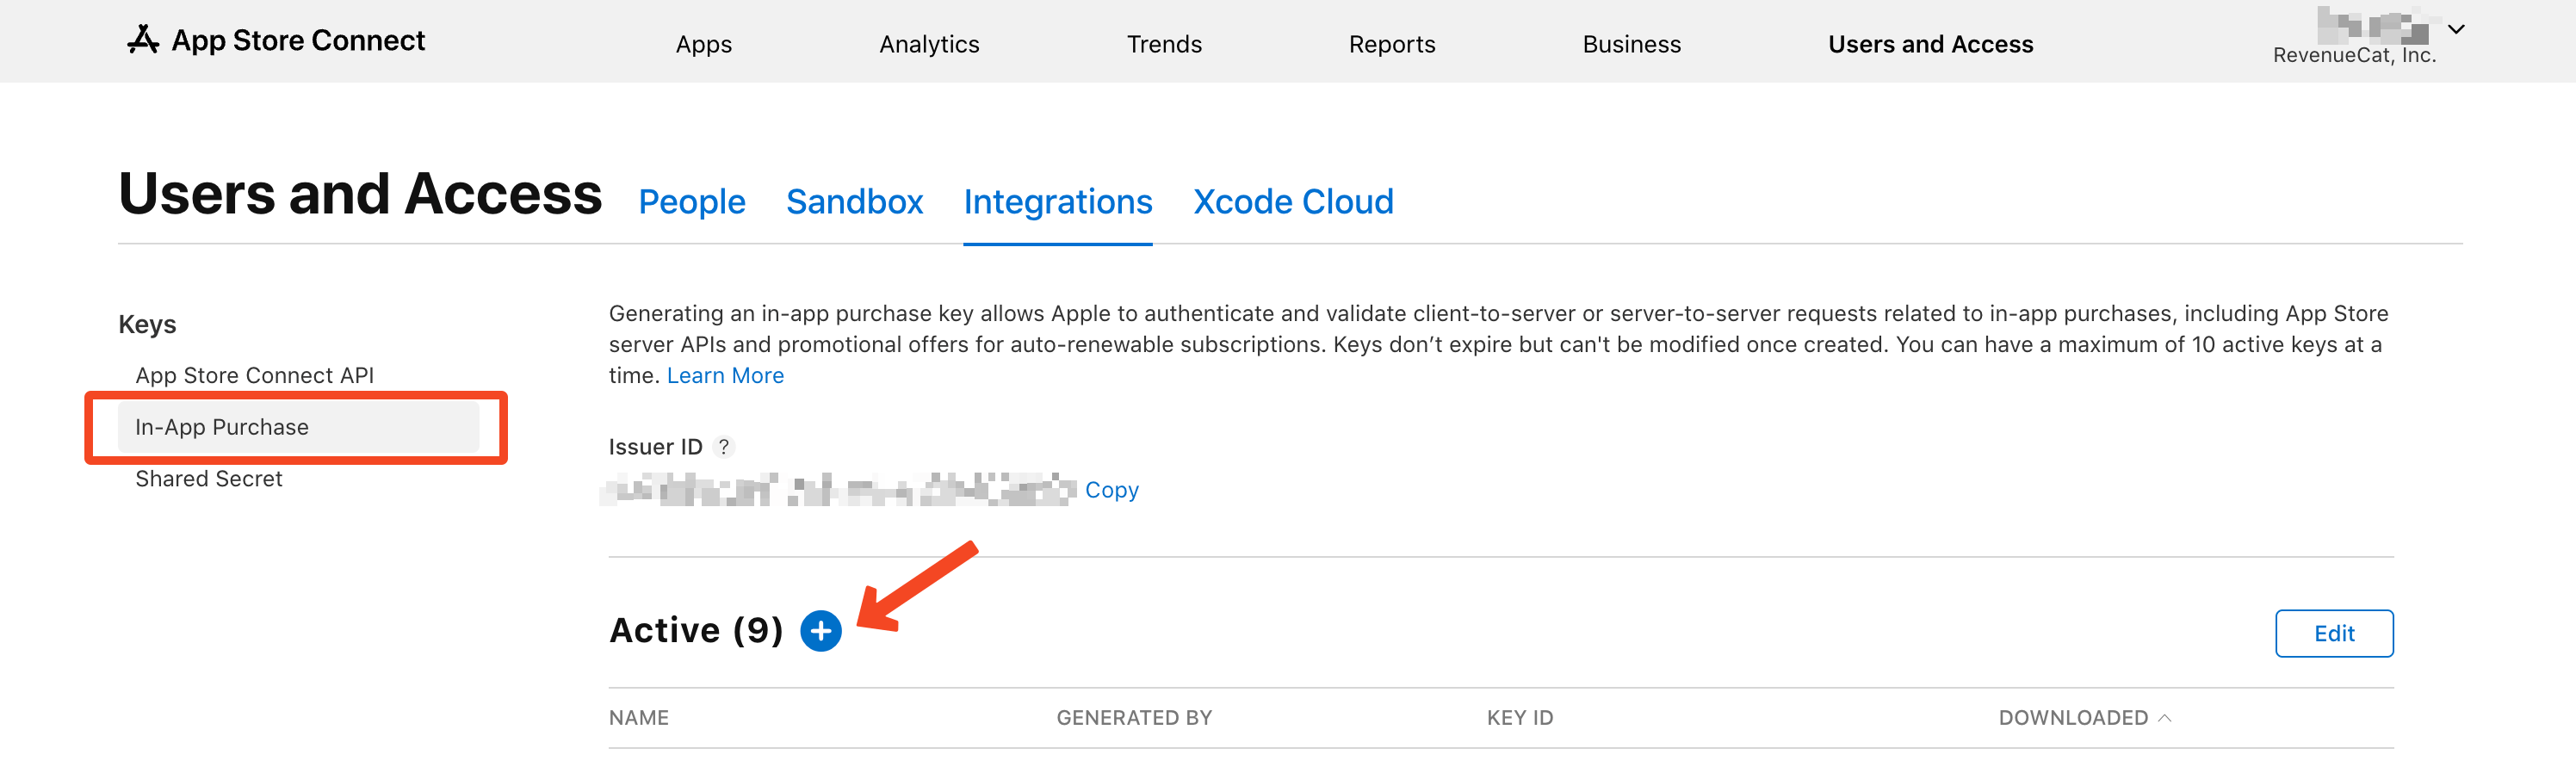
- In the left sidebar, click In-App Purchase under the "Keys" section.
- Click the Generate In-App Purchase Key button (or click the + icon next to "Active" if you already have keys).
- Enter a descriptive name for your key (e.g., "RevenueCat Production").
- Click Generate.
Step 2: Download and Save the Key
.p8 key file once. After you navigate away from this page, the download option disappears forever. Store this file securely. You cannot retrieve it later!
- Click Download In-App Purchase Key to download the
.p8file. - The file will be named
SubscriptionKey_XXXXXXXXXX.p8whereXXXXXXXXXXis your Key ID. - Note down the Key ID displayed next to your key. You'll need this for RevenueCat.
- Store the downloaded file in a secure location (password manager, secure vault, etc.).
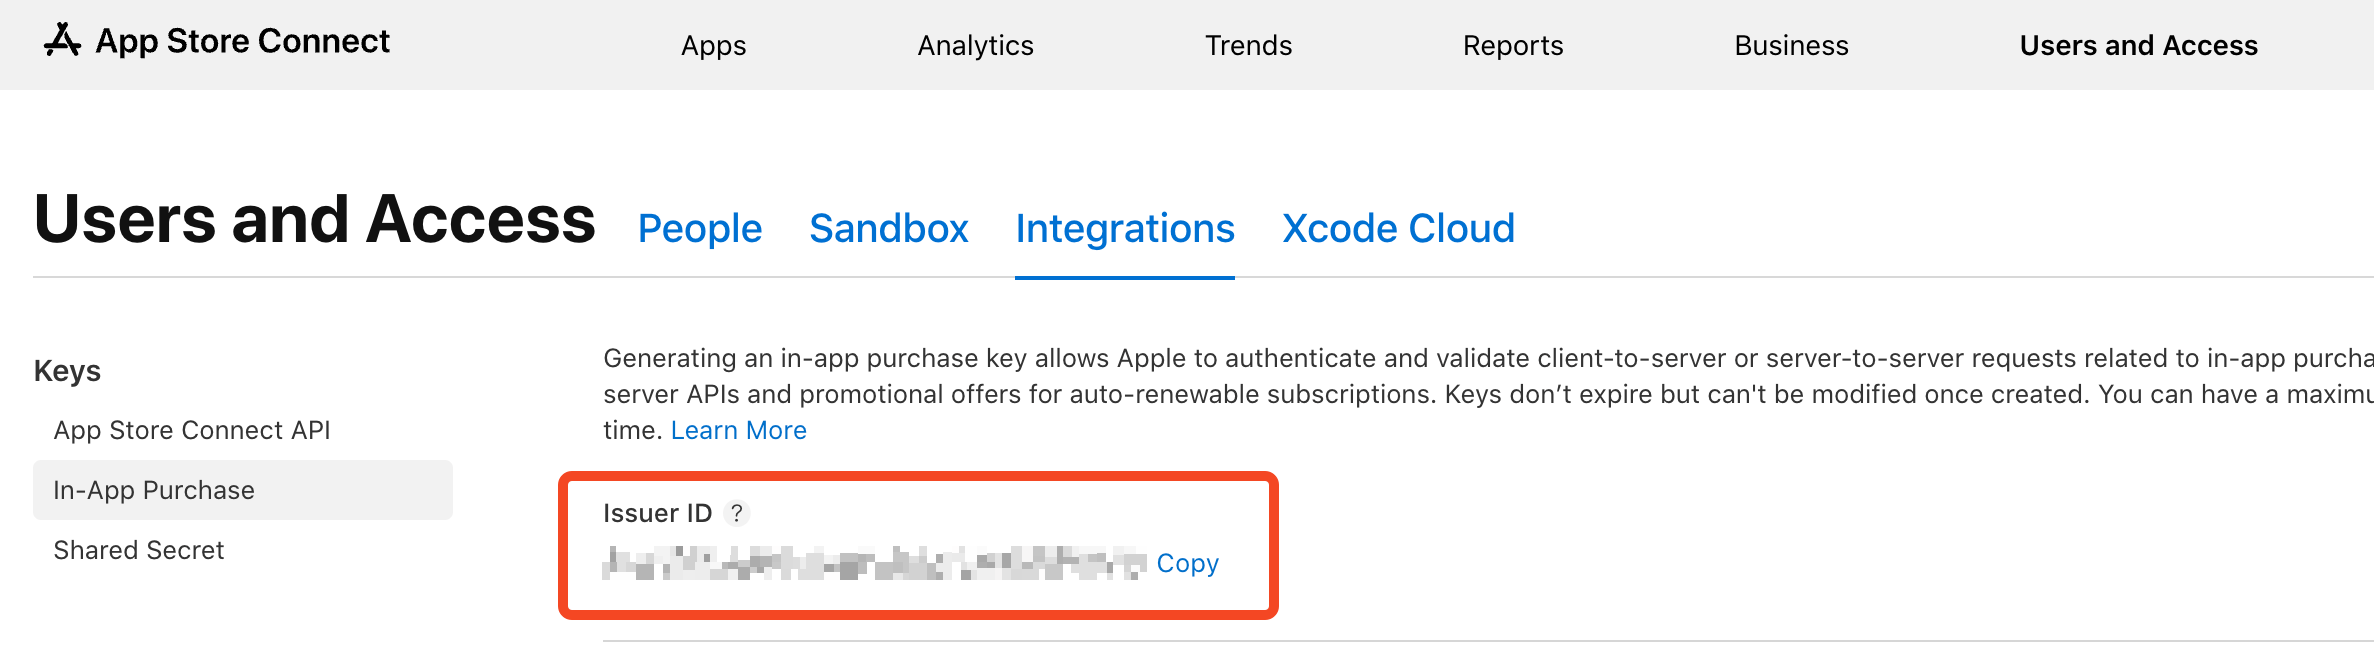
Step 3: Find Your Issuer ID
- On the same In-App Purchase keys page, look for the Issuer ID displayed at the top of the page.
- Copy this ID. It's shared across all keys in your account.
2. Generate an App Store Connect API Key (Optional)
The App Store Connect API Key allows RevenueCat to automatically import products and prices from App Store Connect. While optional, it's highly recommended as it streamlines product management.
Step 1: Create the Key in App Store Connect
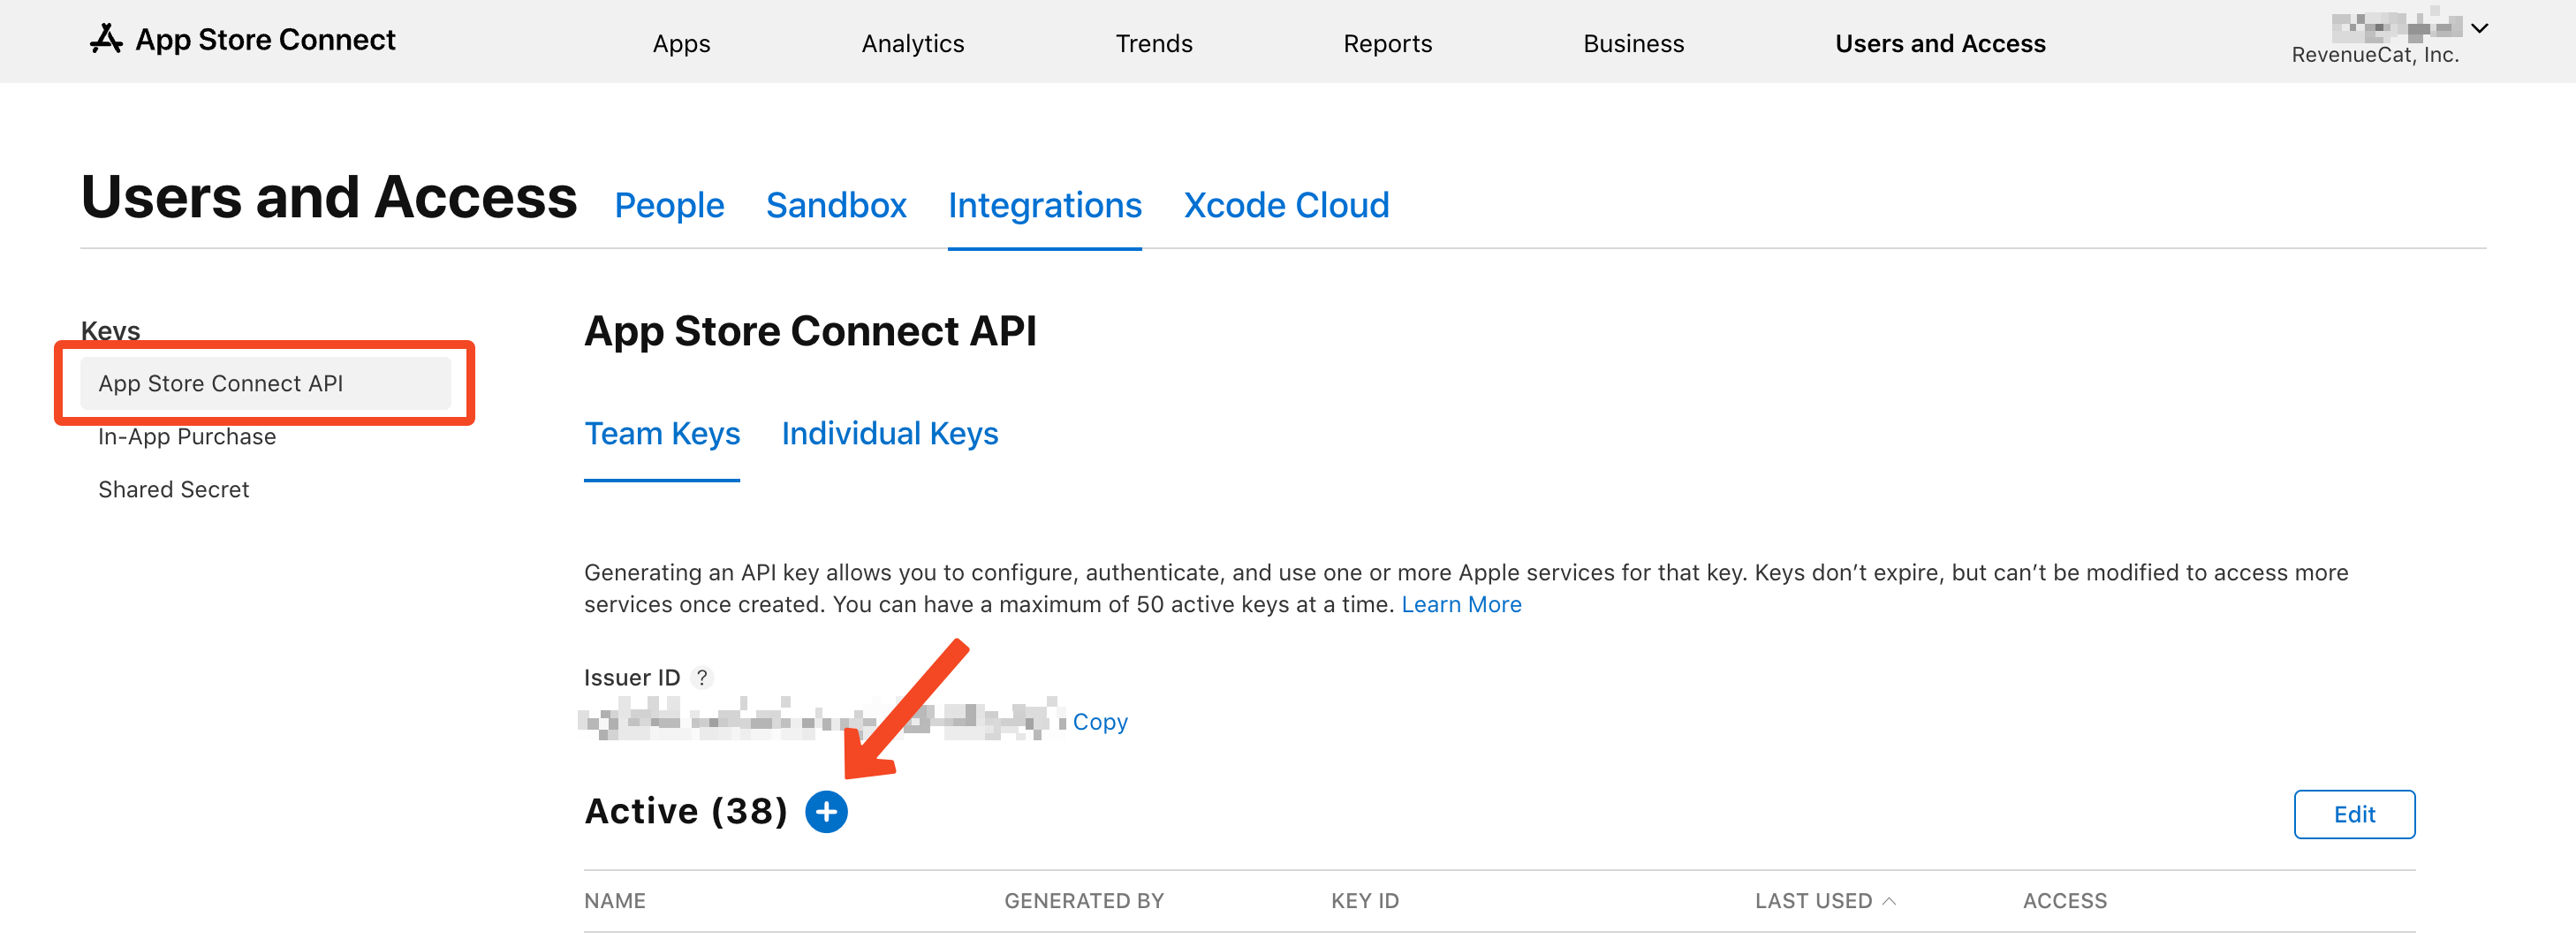
- In App Store Connect, go to Users and Access → Integrations.
- Click App Store Connect API in the left sidebar.
- Click Generate API Key (or the + icon).
- Enter a name (e.g., "RevenueCat Integration").
- Select App Manager as the minimum access level.
- Click Generate and download the
.p8file immediately.
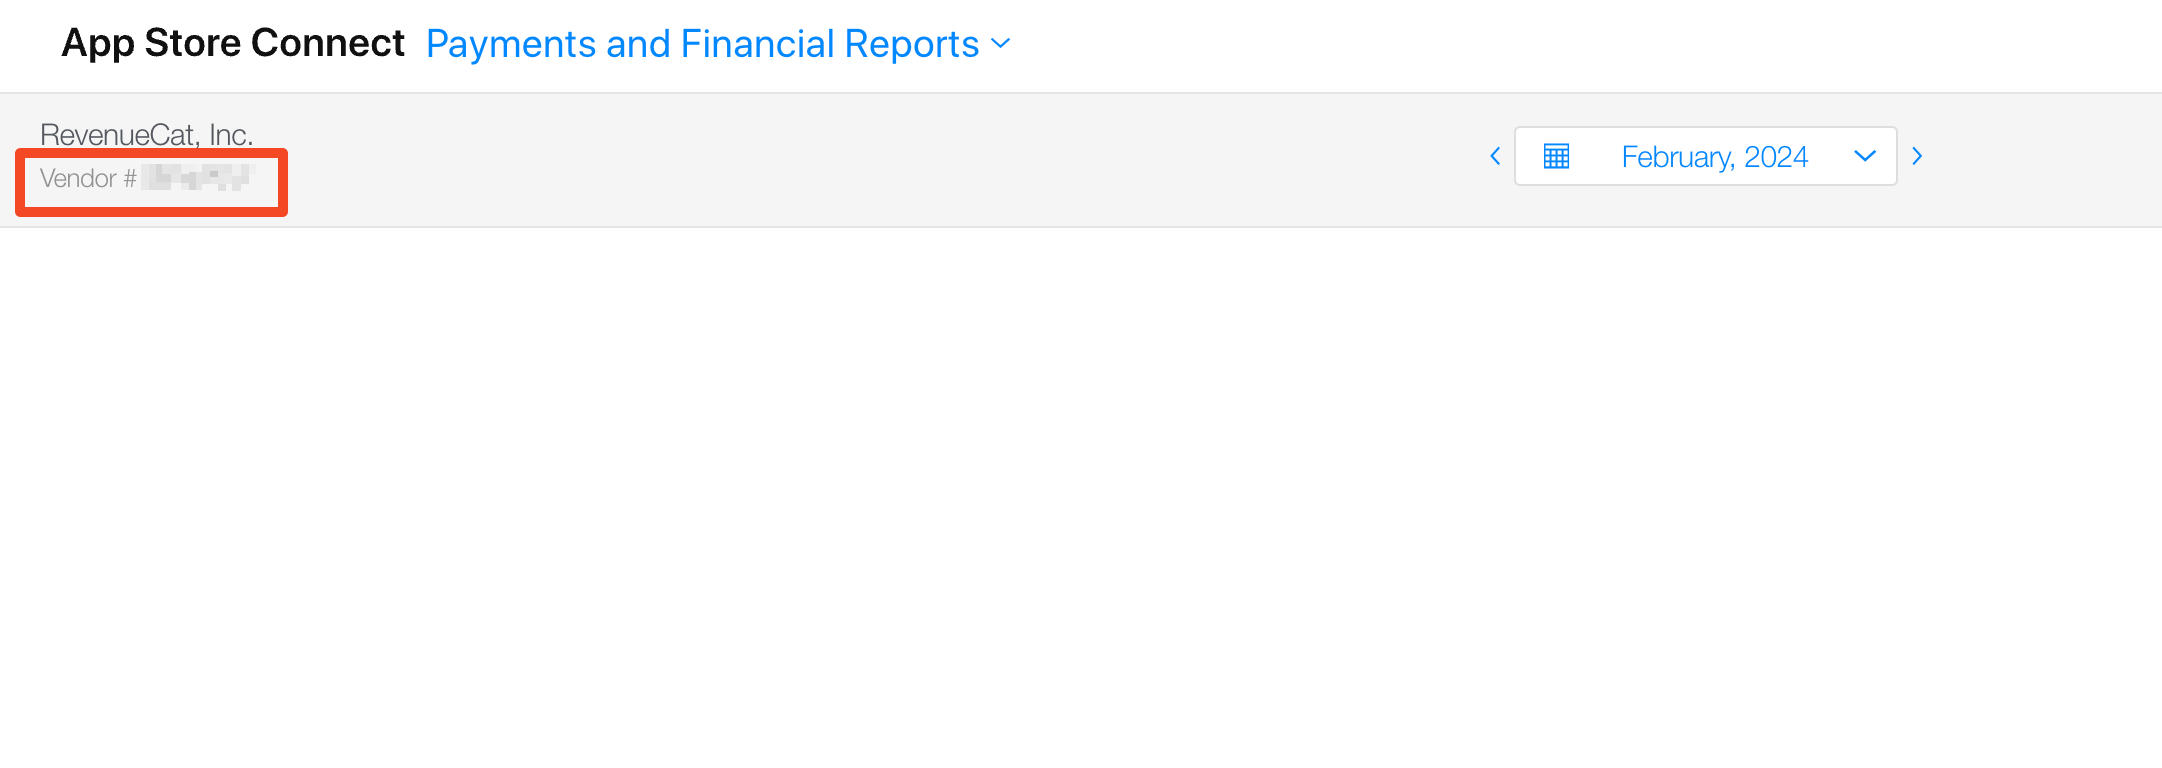
Step 2: Find Your Vendor Number
- Navigate to Payments and Financial Reports.
- Find your Vendor Number in the top left corner.
•
SubscriptionKey_XXXXXXXXXX.p8 = In-App Purchase Key (required)•
AuthKey_XXXXXXXXXX.p8 = App Store Connect API Key (optional)
3. App-Specific Shared Secret (StoreKit 1 - Legacy)
If your app supports iOS 14 or earlier with StoreKit 1, you'll need to configure the App-Specific Shared Secret instead of the In-App Purchase Key.
4. App Store Server Notifications (Optional)
App Store Server Notifications allow Apple to send real-time updates to RevenueCat about subscription events (renewals, cancellations, refunds, etc.).
If you'd like to set up server notifications, see the official documentation: Apple Server Notifications
5. Add Your Credentials to RevenueCat
Now let's configure everything in the RevenueCat dashboard.
Create or Select Your App Configuration
- Log in to the RevenueCat dashboard.
- Navigate to your project and click Apps & providers in the left sidebar.
- If you haven't added an iOS app yet, click + Add app config in the top right corner.
- Select App Store as the platform.
- Enter your app's Bundle ID (must match exactly what's in App Store Connect, including capitalization).
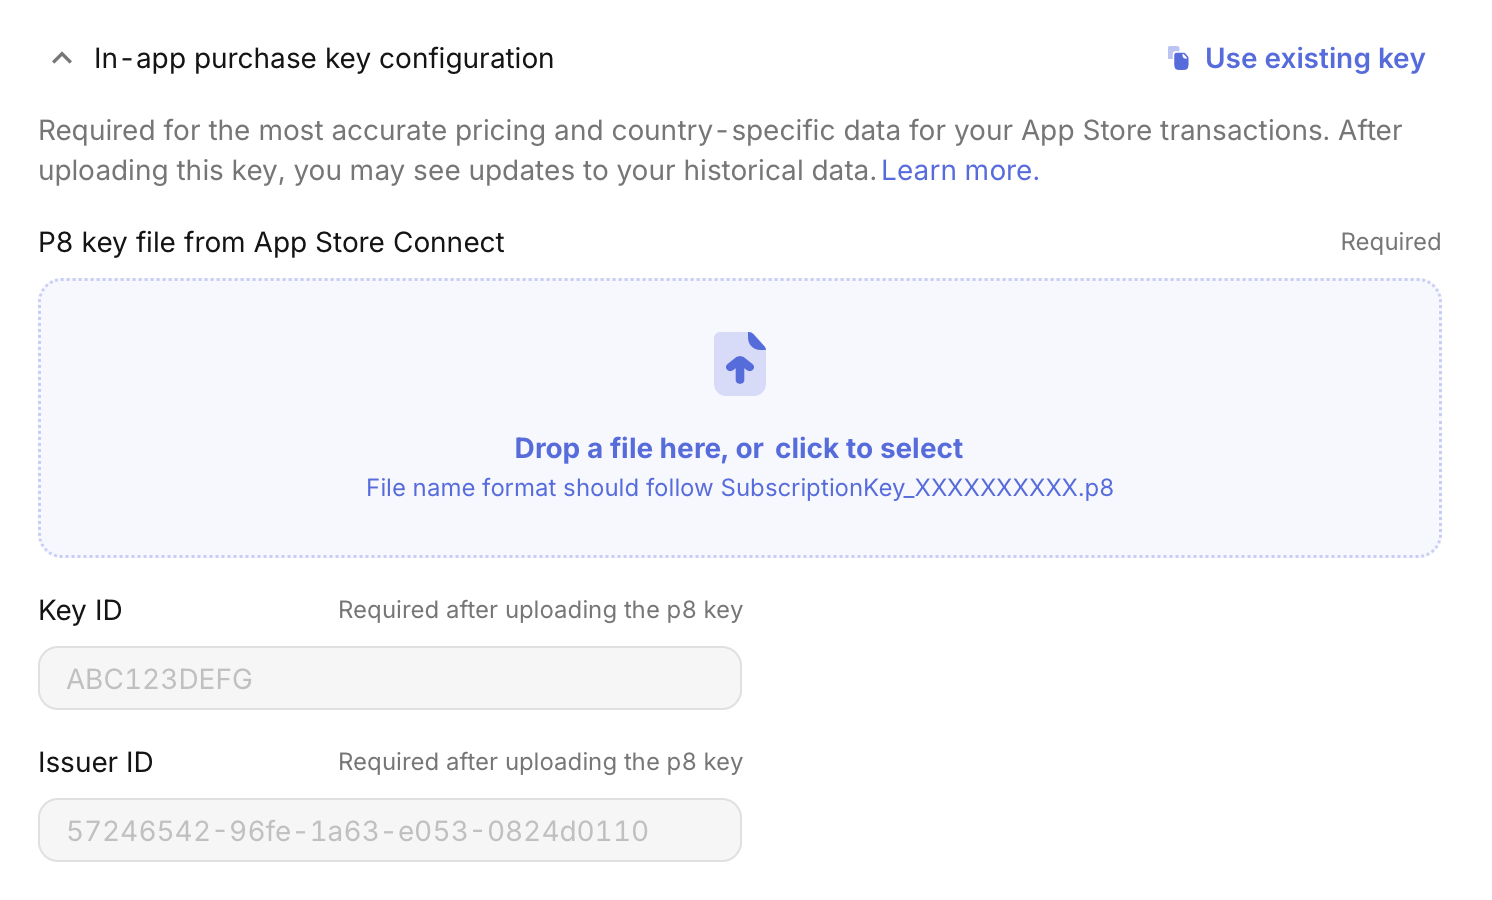
Configure In-App Purchase Key (Required)
In your app's configuration page, find the In-app purchase key configuration section:
- Upload your
.p8key file (SubscriptionKey_XXXXXXXXXX.p8). - Enter the Issuer ID (found at the top of the In-App Purchase keys page in App Store Connect).
- Click Save Changes.
RevenueCat will automatically validate your credentials. If successful, you'll see a "Valid credentials" confirmation.
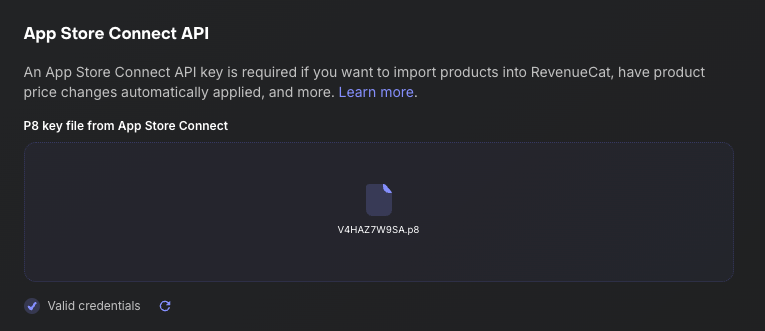
Configure App Store Connect API Key (Optional)
If you also want to enable automatic product importing, find the App Store Connect API section:
- Upload your
.p8key file (AuthKey_XXXXXXXXXX.p8). - Enter the Issuer ID.
- Enter the Vendor Number (found in Payments and Financial Reports).
- Click Save Changes.
6. Verify Your Configuration
After saving your credentials, RevenueCat automatically validates them. You should see a "Valid credentials" message confirming everything is set up correctly.
Checklist
- ✅ Bundle ID matches exactly between RevenueCat and App Store Connect (including capitalization)
- ✅ In-App Purchase Key uploaded with correct Issuer ID (required for StoreKit 2)
- ✅ App Store Connect API Key uploaded with Issuer ID and Vendor Number (optional, for product importing)
- ✅ Key Status shows as "Active" in App Store Connect (not "Revoked")
- ✅ Server Notifications configured (optional, but recommended)
- ✅ Products created in App Store Connect (from Step 1)
- ✅ Paid Applications Agreement is signed and active
Common Issues
| Problem | Possible Cause | Solution |
|---|---|---|
| Purchases not recording | Missing In-App Purchase Key | Go to RevenueCat Dashboard → Apps & providers → Select your iOS app → Upload your SubscriptionKey_*.p8 file in the "In-app purchase key configuration" section. This is required for StoreKit 2 (SDK v5.0+). |
| Products not importing | Missing App Store Connect API Key | Either configure the optional App Store Connect API Key (with Vendor Number) in RevenueCat to enable auto-import, or manually add products via RevenueCat Dashboard → Product Catalog → Products → + New. |
| Products not importing | Bundle ID mismatch | Compare Bundle ID in RevenueCat (Apps & providers → your app) with App Store Connect (My Apps → your app → App Information → Bundle ID). They must match exactly, including capitalization (e.g., com.YourApp ≠ com.yourapp). |
| Products not importing | Agreements not signed | In App Store Connect, go to Business → Agreements, Tax, and Banking. Ensure "Paid Applications" agreement shows "Active" status. Complete all required tax and banking information if pending. |
| Invalid credentials error | Wrong Issuer ID | In App Store Connect, go to Users and Access → Integrations → In-App Purchase (or App Store Connect API). The Issuer ID is displayed at the top of the page above the keys table. Copy it exactly. |
| Invalid credentials error | Key is revoked | In App Store Connect → Users and Access → Integrations, check if your key shows "Revoked" status. If revoked, generate a new key, download the new .p8 file, and upload it to RevenueCat. |
| Invalid credentials error | Wrong key type uploaded | Ensure you're uploading the correct key: SubscriptionKey_*.p8 for In-App Purchase Key section, AuthKey_*.p8 for App Store Connect API section. Don't mix them up. |
| Save button grayed out | Missing required fields | For In-App Purchase Key: ensure both the .p8 file and Issuer ID are provided. For App Store Connect API Key: ensure .p8 file, Issuer ID, and Vendor Number are all filled in. |
| Notifications not received | Server Notifications not configured | Server Notifications are optional but recommended. See Apple Server Notifications docs for setup instructions. |
| Can't find Vendor Number | Looking in wrong location | Vendor Number is NOT in Integrations. Go to App Store Connect → Payments and Financial Reports (or Sales and Trends → Reports). Your Vendor Number appears in the top-left corner of the page. |
| Can't find Issuer ID | No keys generated yet | The Issuer ID only appears after you create at least one API key. Generate any App Store Connect API key first (Users and Access → Integrations → App Store Connect API → Generate), then the Issuer ID will appear. |
Phew, Congrats! You made it through the tricky part 🎉