Create Paywalls
10 minA paywall is a screen that encourages users to purchase your products. RevenueCat's paywall system is built on a server-driven UI, allowing you to update layouts instantly using the Paywall Editor without needing to release a new app version.
This allows your team to focus on A/B testing, refining offerings, and optimizing messaging to boost subscriptions, all without the delays of app updates.
Prerequisites: Offering Setup
Before creating a paywall, you must have at least one Offering configured with packages. The paywall will be linked to an Offering, and the packages within that Offering determine which products are displayed to users.
How Paywalls Connect to Offerings
Understanding the relationship between Paywalls and Offerings is crucial:
- Offering = The container that holds your packages (products)
- Paywall = The visual presentation layer that displays those packages
- One Offering can have one active Paywall at a time
- When you select an Offering for your paywall, it automatically has access to all packages within that Offering
Creating a New Paywall
To start building, go to the Paywalls page for your project and click + New Paywall.

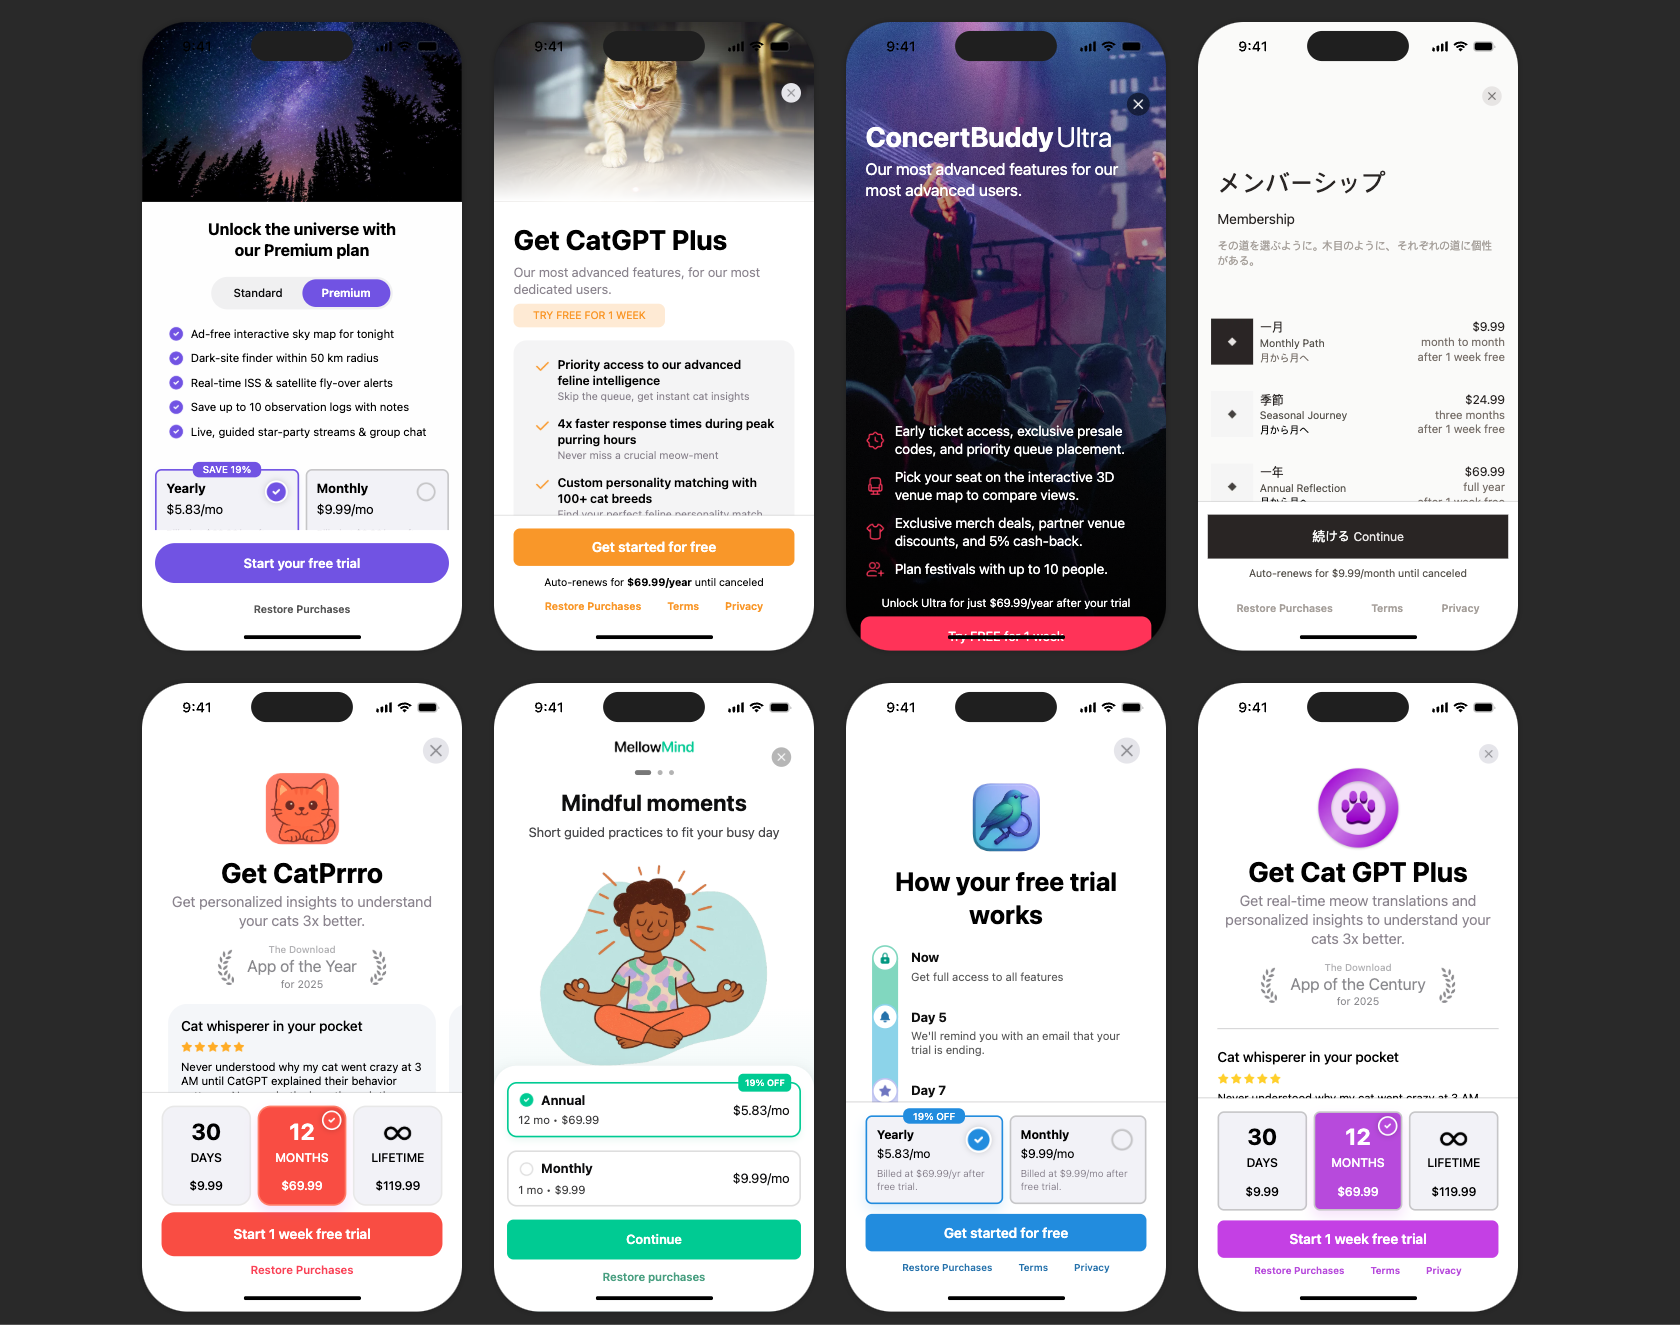
Choose a Starting Point
You have three options to begin:
- Pre-built Templates (Recommended): Start with professionally designed templates and customize them.
- Start from Scratch: Build your paywall from a blank canvas.
- Import from Figma: Import designs directly from Figma.
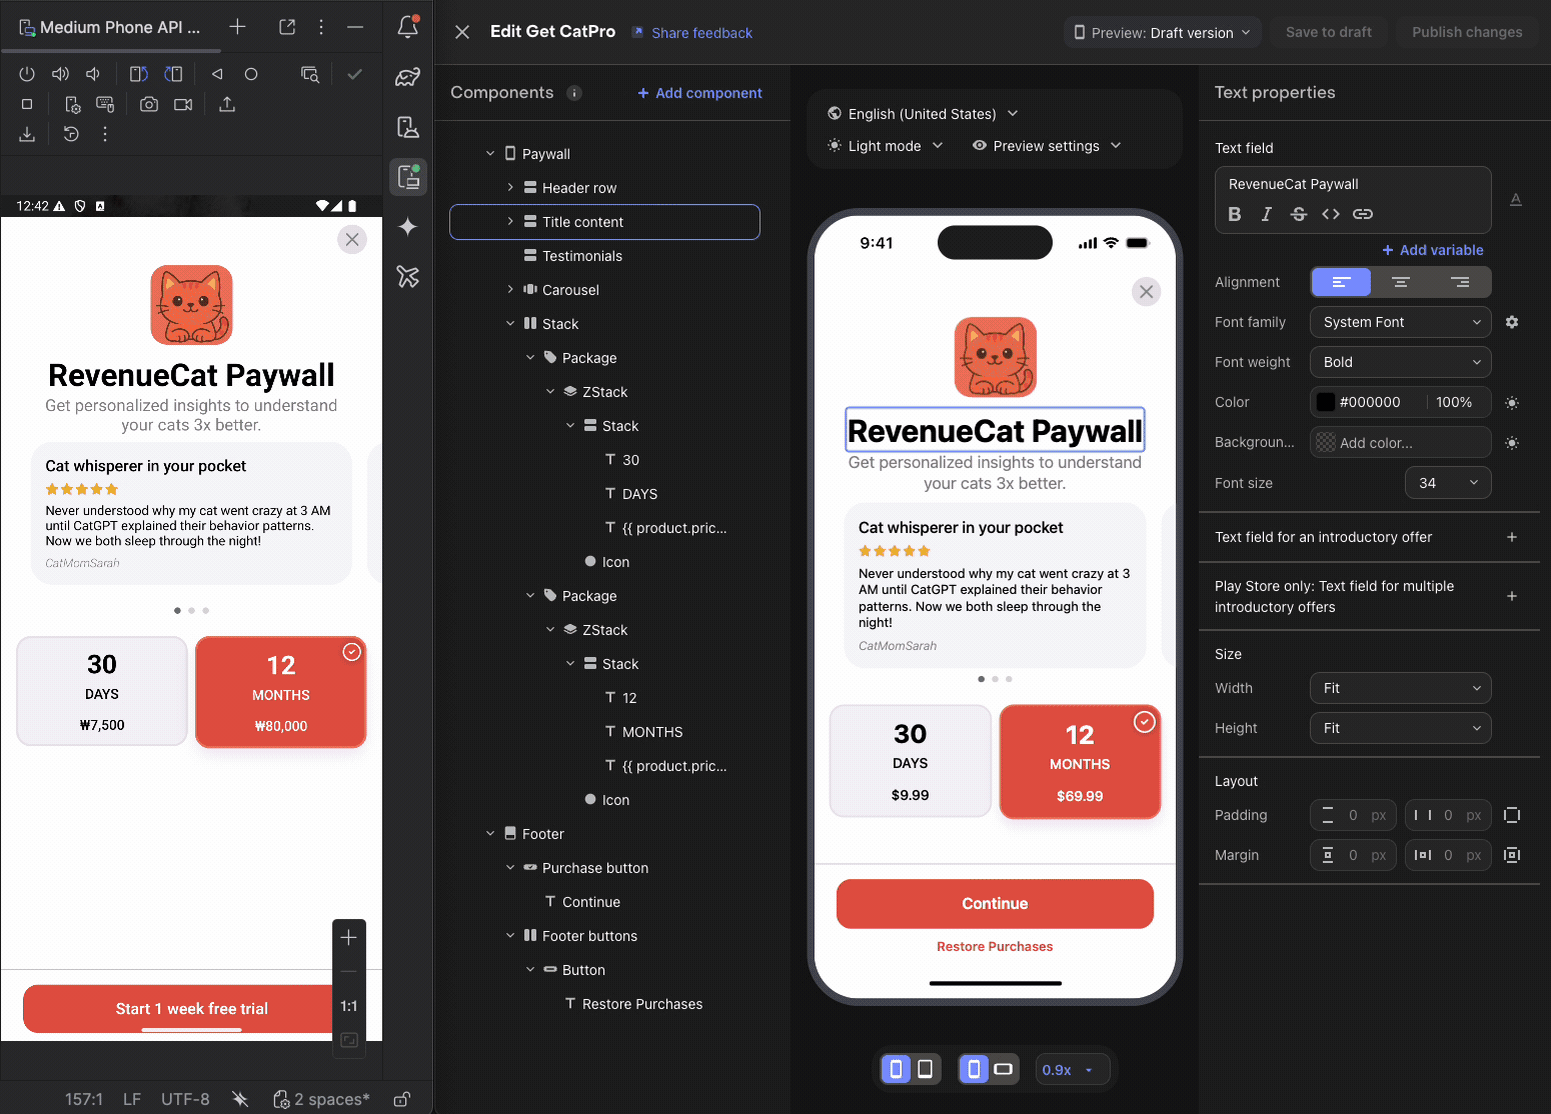
Using the Paywall Editor
The Paywall Editor consists of three main areas:
- Left Sidebar: Add components, view the layer hierarchy, manage branding and media assets.
- Center Preview: Real-time visualization of your paywall.
- Right Panel: Configure properties for the selected component (sizing, styling, behavior).
Key Configuration Steps
- Set the Paywall Name: Give your paywall a descriptive name (e.g., "Main Subscription Paywall").
- Select an Offering: Choose which Offering this paywall will display. The identifier links the paywall to your Offering.
- Configure Components: Add and arrange text, images, icons, package selectors, and purchase buttons.
- Style Your Design: Customize colors, fonts, spacing, and images to match your app's branding.
- Set Up Purchase Button: Ensure the purchase button is connected to trigger checkout for the selected package.
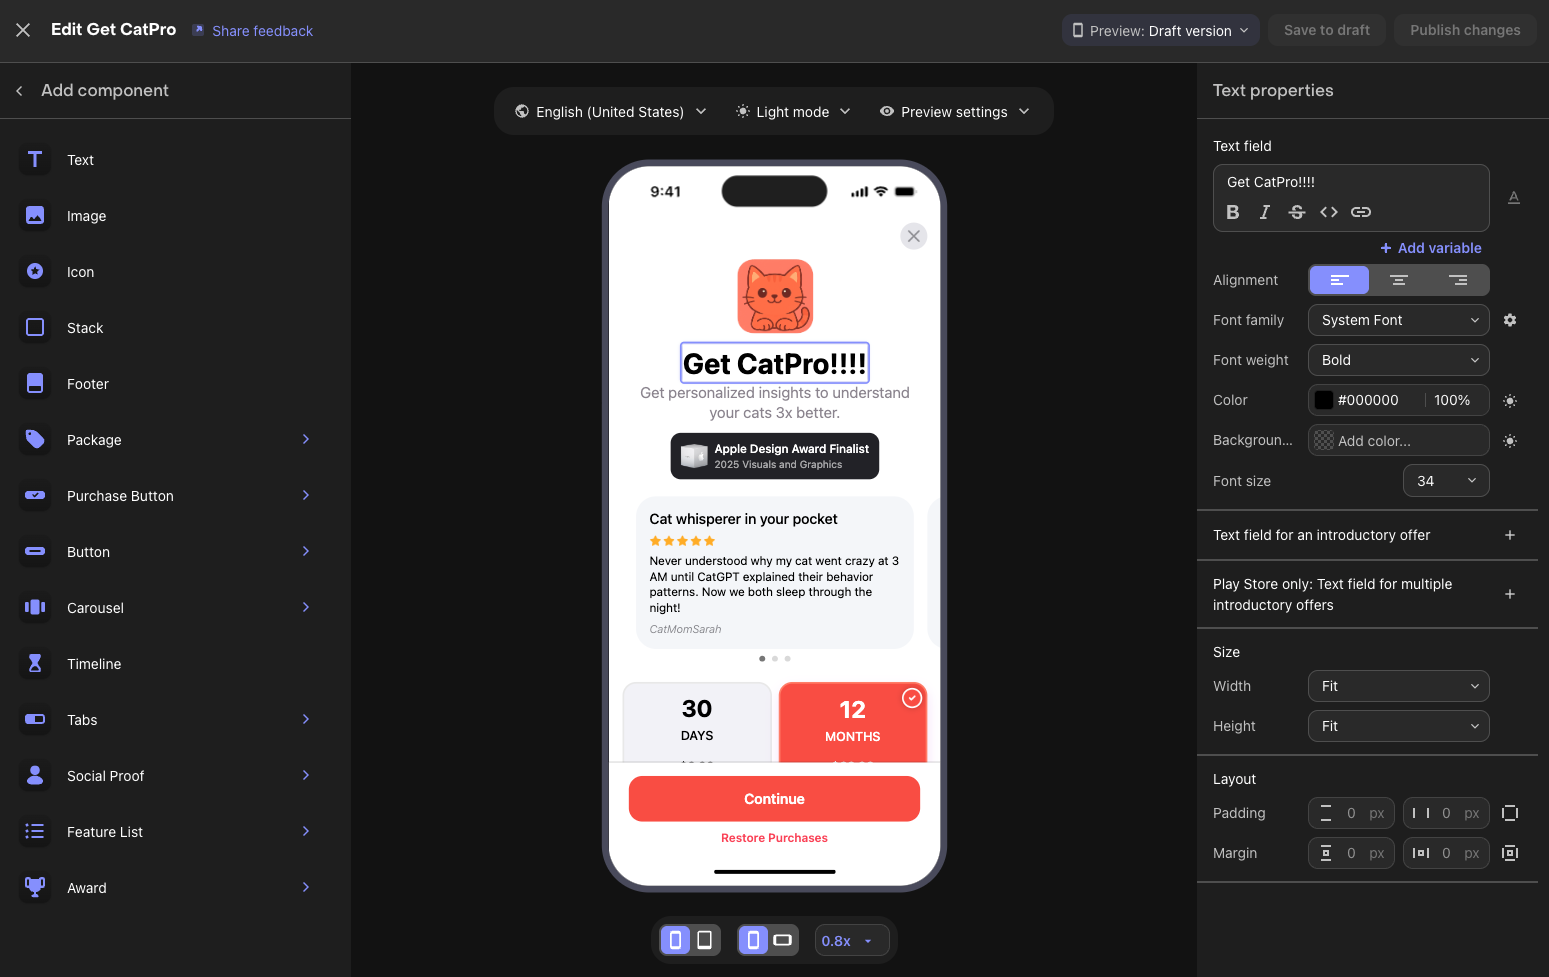
Available Components
RevenueCat provides various building blocks for your paywall:
- Text & Images: Headlines, descriptions, feature lists, and visual assets.
- Package Selector: Displays your subscription options from the linked Offering.
- Purchase Button: Triggers the purchase flow for the selected package.
- Footer: Terms of service, privacy policy, and restore purchases links.
- Stacks & Containers: Layout components to organize other elements.
- Carousels: Swipeable content sections.
Preview Options
Use the editor's preview controls to test your paywall:
- Toggle between Light and Dark mode
- Switch between different device sizes (iPhone, iPad)
- Preview different locales if you have localized content
Draft vs Published
Paywalls have two states:
| State | Description | Visible to Users |
|---|---|---|
| Draft | Work in progress, saved but not active | No |
| Published | Live and served to users via SDK | Yes |
Workflow:
- Make changes and click "Save to draft" to save your work without affecting live users
- When ready, click "Publish changes" to make your paywall live
- You can toggle a published paywall back to inactive status anytime
You've completed all the configuration steps for setting up App Store products and the RevenueCat dashboard! Next, let's set up sandbox testing to verify everything works correctly.